

Como hacer y restaurar copias de seguridad en Softaculous
Actualizado hace 3 meses
Softaculous, una herramienta incluida en cPanel, es bien reconocida por la facilidad con que nos permite instalar apps en nuestro plan de hosting. Sin embargo, no todo el mundo conoce el resto de sus bondades: por ejemplo, su funcionalidad de crear copias de seguridad de nuestro sitio. Un backup implica respaldar tanto los archivos de una web como su base de datos, y Softaculous se desempeña en ambos frentes de maravillas.
En este tutorial cubriremos la creación (y descarga) de una copia de seguridad, y la consecuente restauración de nuestra web en caso de que lo necesitemos.
Creando nuestra primera copia de backup
Primero debemos ingresar al cPanel de nuestro sitio:
cpanel.nuestrositio.com
Tras haber colocado nuestras credenciales, buscamos el ícono de Softaculous en la sección de Software.
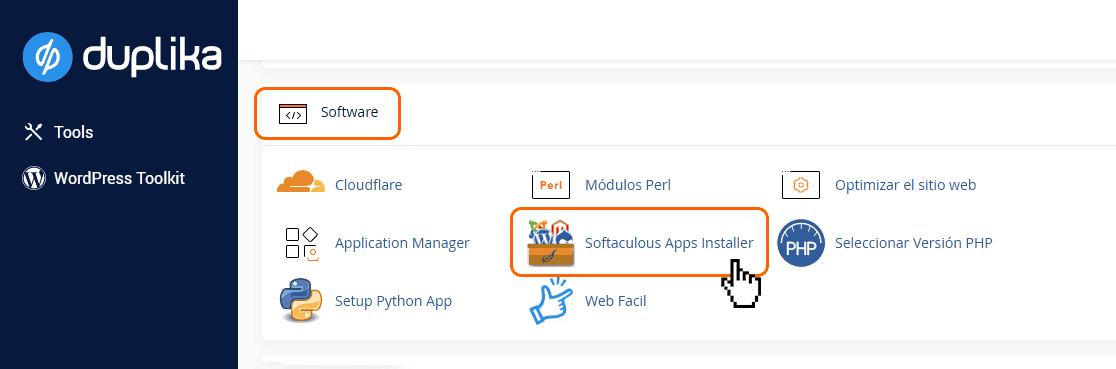
Nota: incluimos cPanel en todos nuestros planes de hosting.
A continuación, haremos clic sobre el siguiente botón:

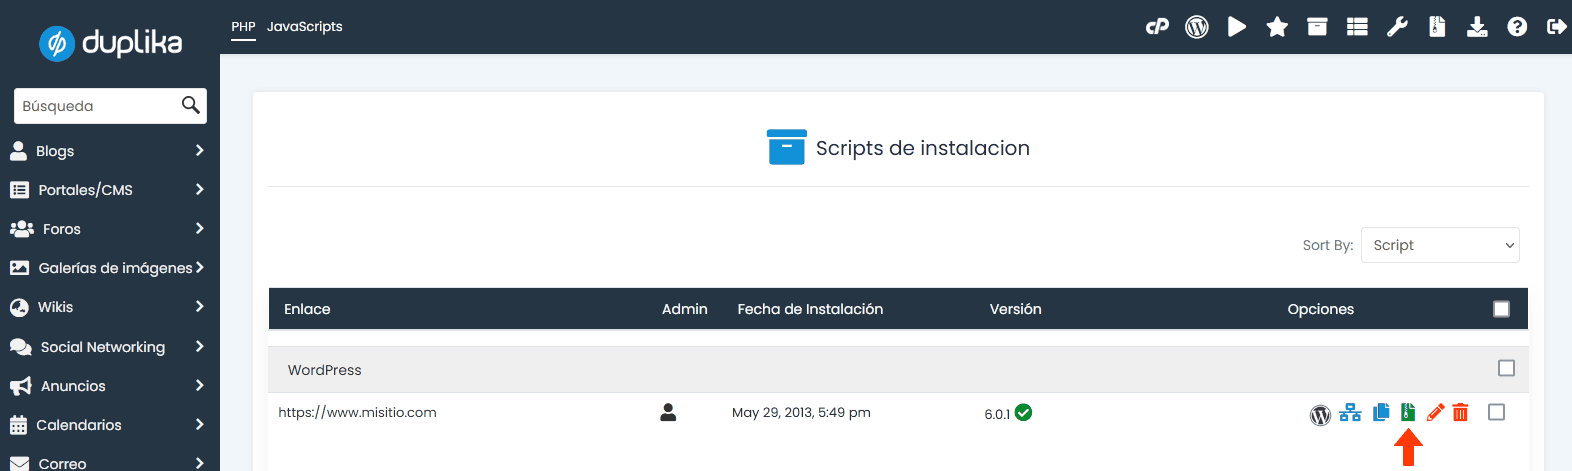
Y luego buscaremos y haremos clic sobre el ícono que parece un pequeño archivo tipo ZIP color verde:
En la pantalla siguiente podemos tomar algunas decisiones, pero esencialmente nos preocuparemos de que las siguientes opciones estén tildadas. Opcionalmente, podemos escribir una nota que reseñe el motivo, fecha, alusión a la copia de respaldo, y cambiar el directorio del backup por defecto.
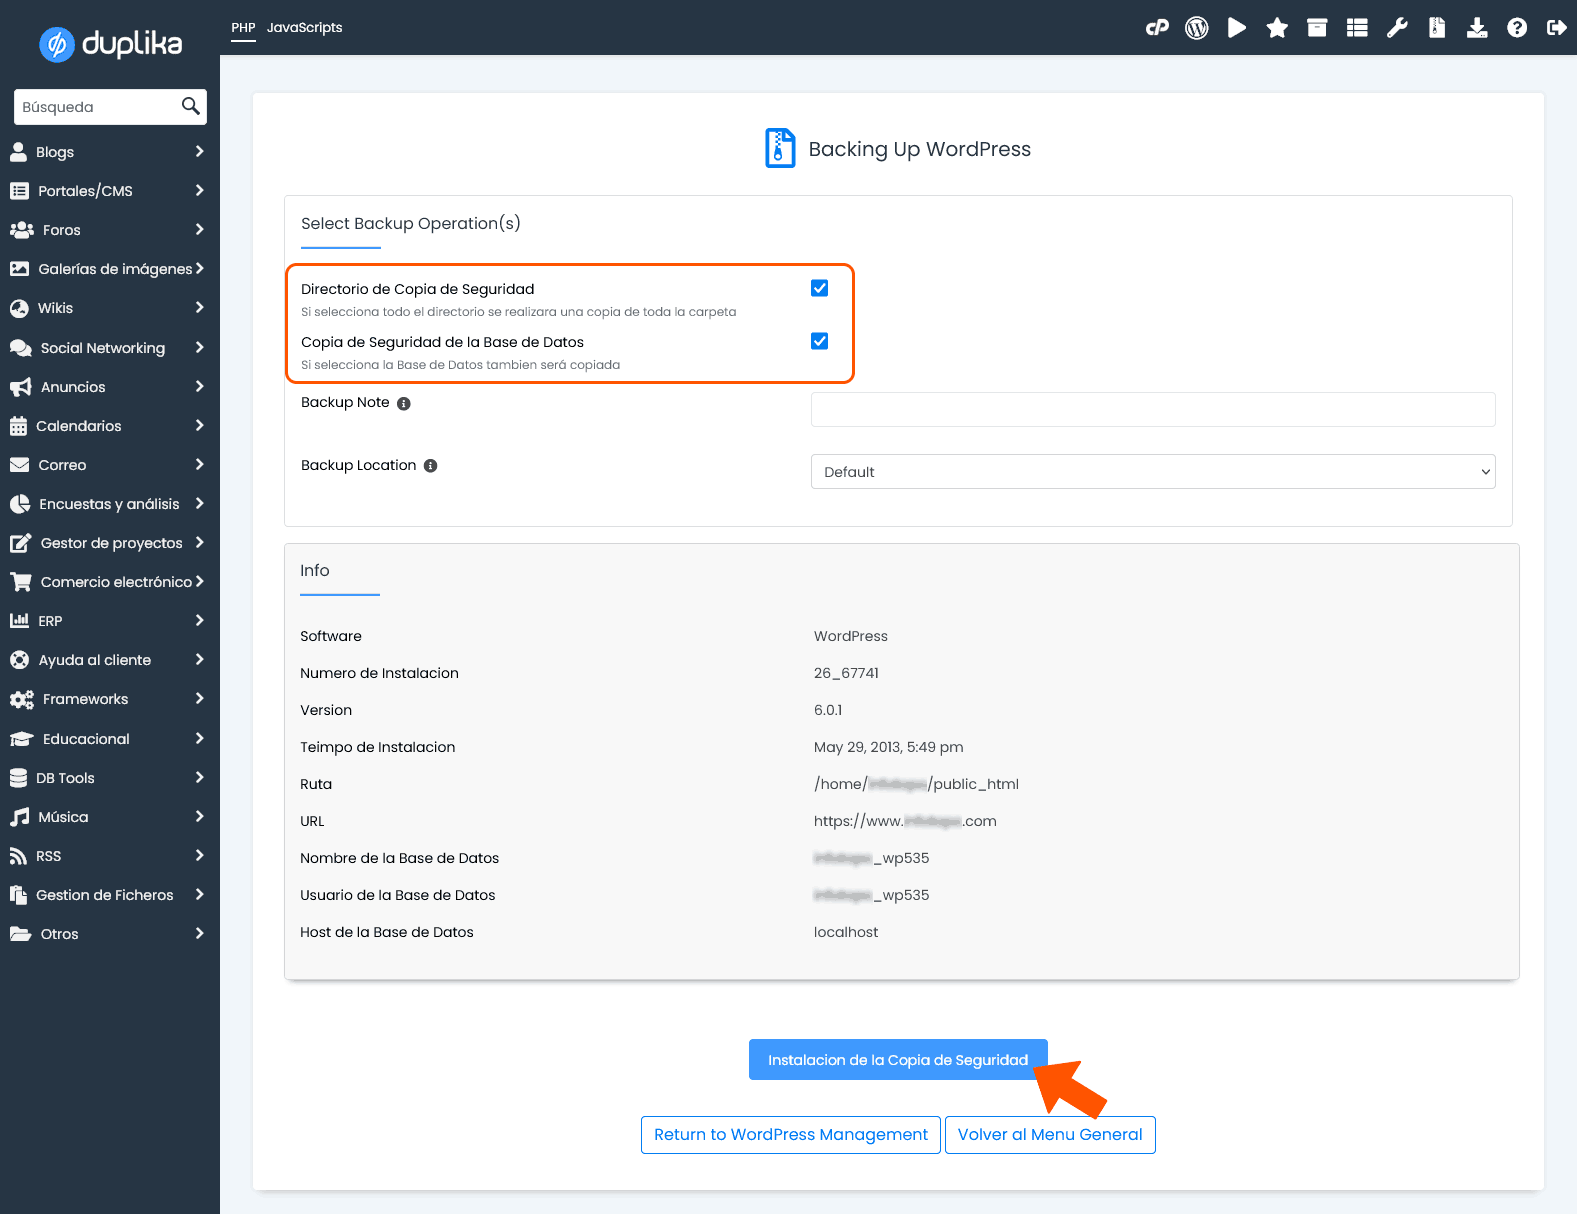
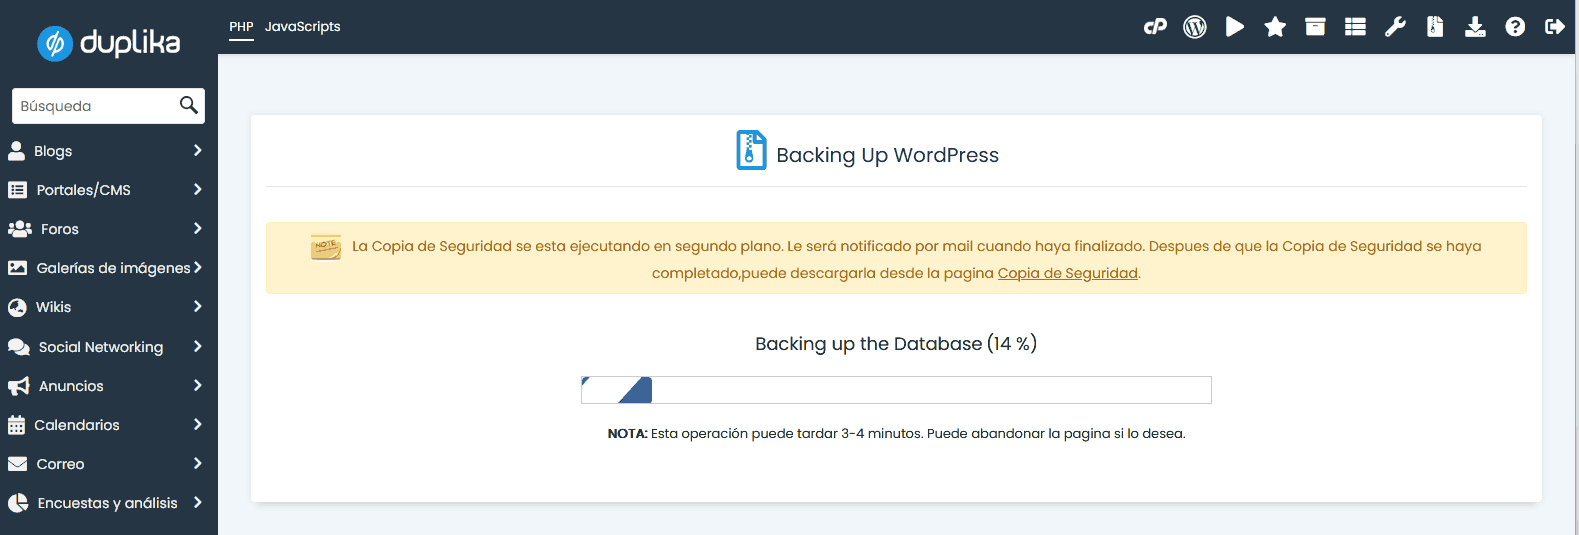
Al presionar el botón azul, veremos una barra de progreso que nos señala dinámicamente el tiempo faltante para la operación.
Al terminar, veremos el mensaje: la copia de seguridad se ha creado satisfactoriamente. Puede descargarla de la página Copia de Seguridad.
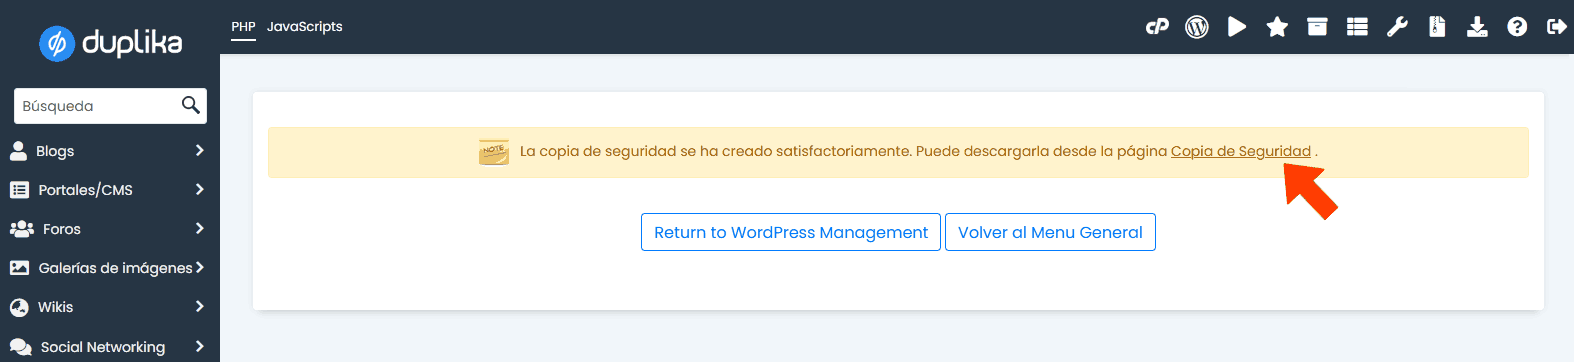
Al hacer clic en el enlace provisto, seremos dirigidos a una página desde donde descargar el archivo de la copia de seguridad creada. La pantalla que visualizaremos será similar a la siguiente captura.
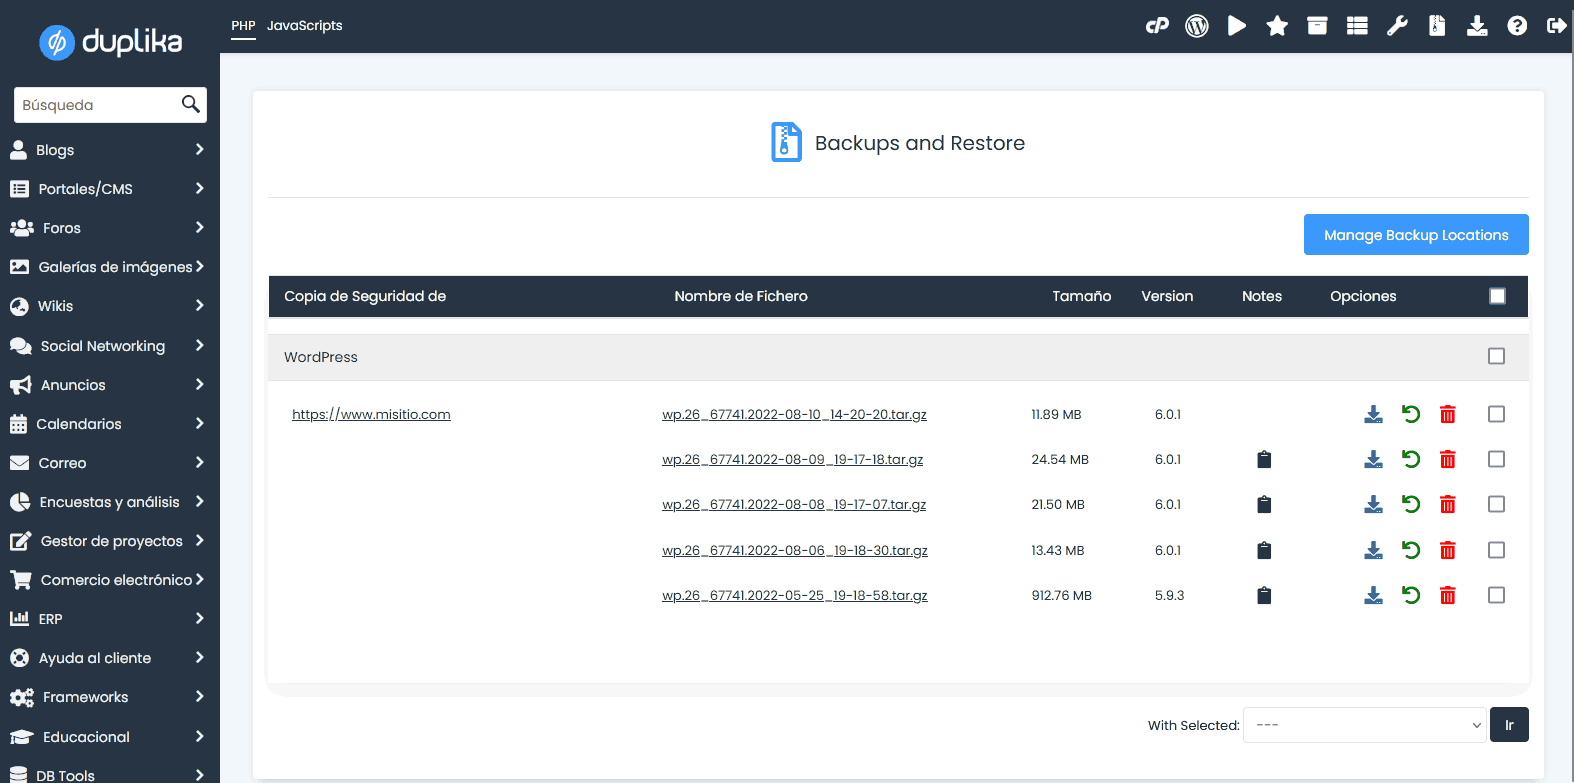
Alternativamente, podemos encontrar las copias de seguridad utilizando un cliente FTP (ej.: filezilla) o bien el administrador de archivos cPanel. Nótese que las copias guardadas, por defecto, se ubicarán dentro de la raíz de nuestra cuenta en una carpeta llamada softaculous_backups.
En cualquier momento, ingresando a cPanel, ícono Softaculous (en sección Software, tal cual lo hemos señalado previamente), veremos el link de nuestras descargas. En la captura inferior podemos ver el botón en cuestión, señalado con un recuadro anaranjado.

Recuperando nuestro backup
Debemos realizar pasos ya transitados: ingresar de nuevo a nuestro cPanel y cliquear en el ícono de Softaculous, sección Software, tal cual describimos al comienzo de esta guía. Entonces, ingresaremos al botón "Backups", señalado con una flecha en la captura inferior.

En esta página veremos una lista con todas las copias de seguridad que hemos creado históricamente. Junto a la copia de seguridad que necesitamos restaurar, basta hacer clic en el icono Restaurar. La captura inferior lo muestra con claridad:
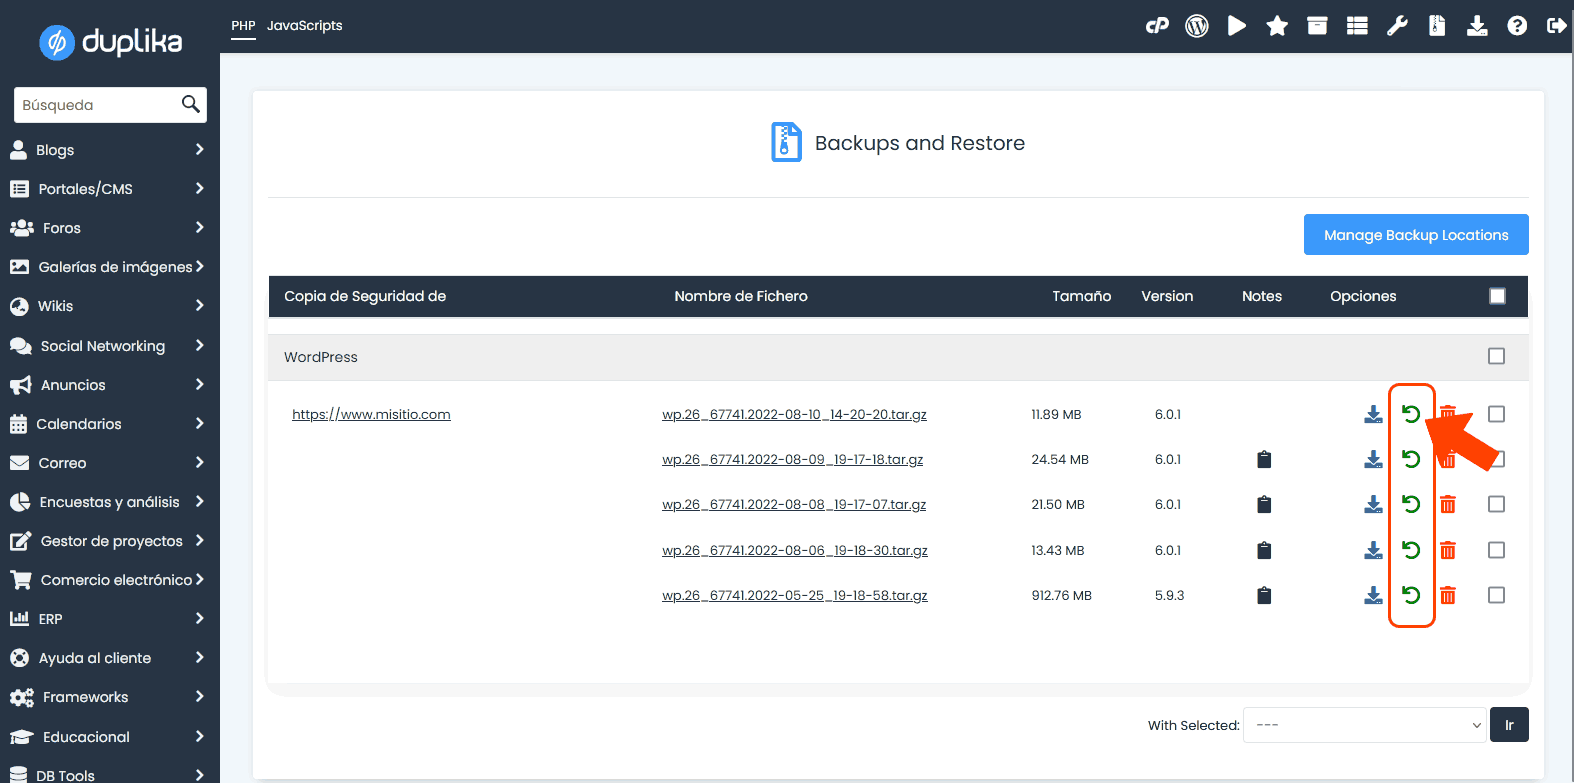
Nótese también que se nos permite borrar las copias de respaldo que no nos interesen más, algo importante para preservar espacio libre en nuestro plan de hosting.
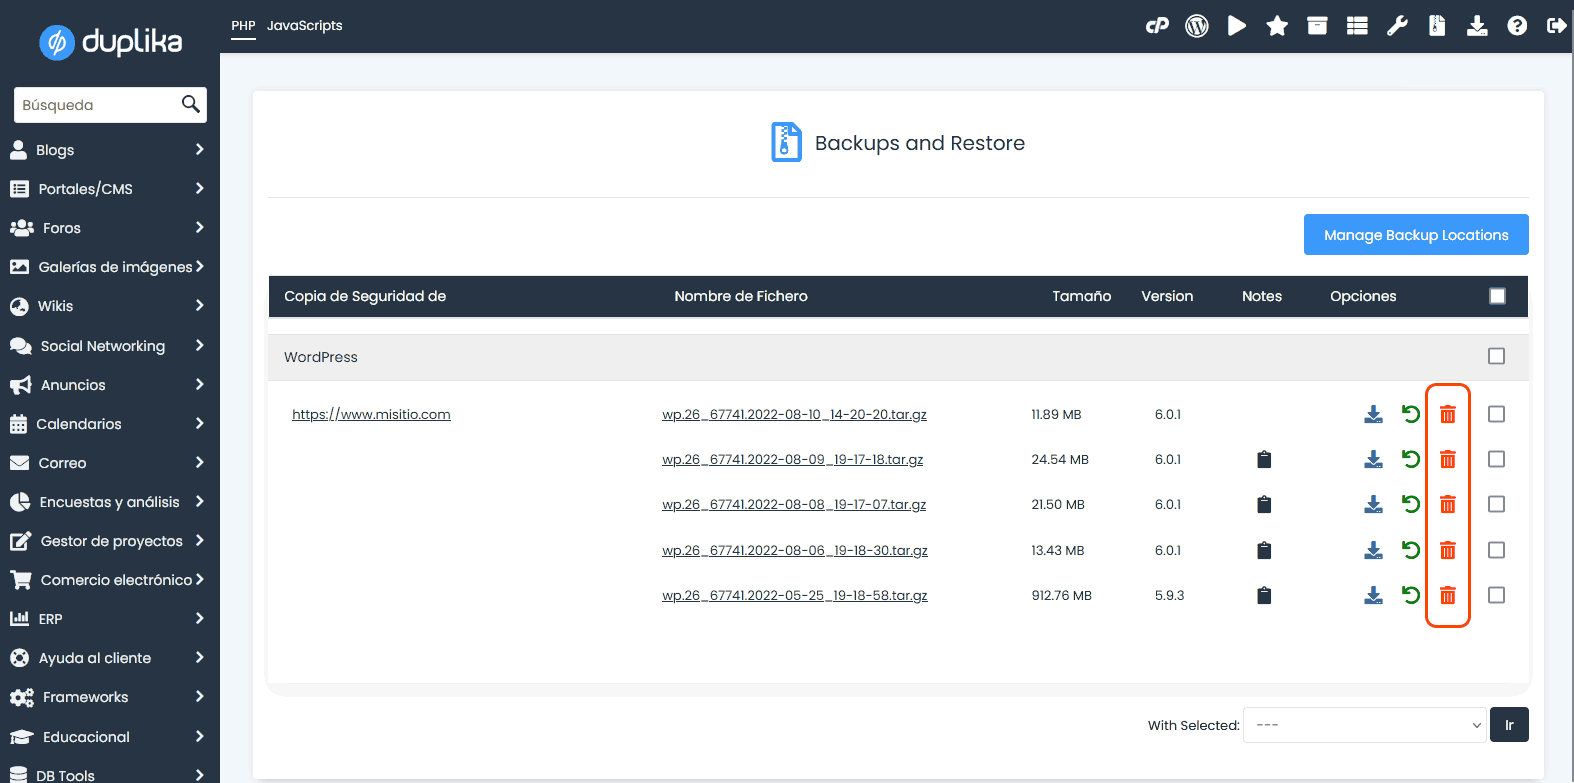
Volviendo al proceso de recuperación de backups, tras hacer clic en el botón de Restaurar veremos la siguiente pantalla de confirmación. Basta hacer clic en el botón de "Restaurar instalación" para que nuestro sitio se reemplace por la copia de respaldo.
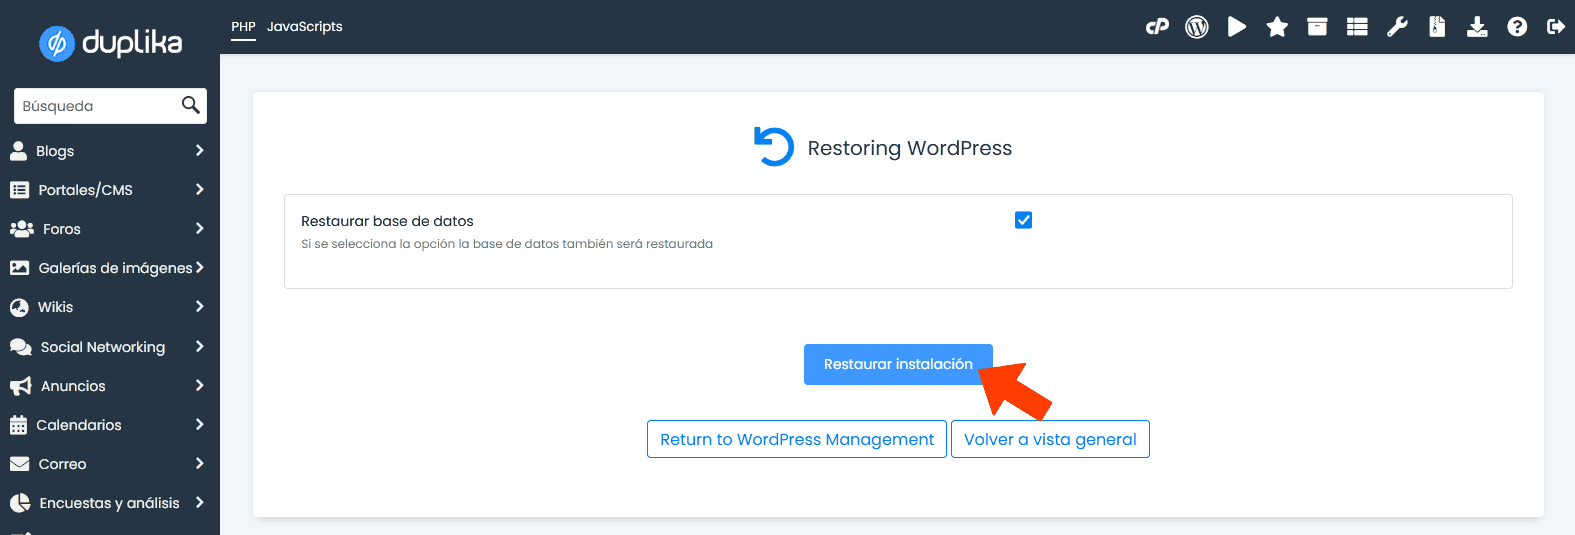
Al igual que con el proceso de crear el backup, veremos una barra de progreso, y al cabo el mensaje "Tu copia de respaldo se ha restaurado exitosamente". Tras esto, podemos ingresar a nuestro sitio y refrescar la página para comprobar los cambios (en su defecto, presionar CTRL+F5 para forzar a nuestro navegador a traer una versión fresca).
¡Eso es todo! Esperamos que la guía les haya resultado muy fácil y, como siempre, éxitos y gracias por la lectura.