

¿Cómo subir archivos a WordPress por FTP?
Actualizado hace 2 meses
En esta nota te vamos a explicar paso a paso cómo subir archivos masivamente a tu sitio de WordPress.
Es cierto que WordPress cuenta con un método de subida de archivos desde su sección de "Medios", o insertando imágenes directamente desde una entrada o página. Sin embargo, este proceso es lento, suele tener algún que otro error esporádico, y, por lo demás, no es la mejor opción para subir archivos "a granel" (bulk), o, mejor entendido, "en cantidades grandes".
¿Por qué es mejor subir vía FTP en lugar de usar la galería de Medios estándar?
Subir archivos a granel vía FTP facilita dos cosas: la subida masiva de archivos, y la subida de archivos pesados.
Basta pensar que la subida vía la galería de medios en WordPress siempre estuvo limitada a un peso máximo de archivo. El tamaño máximo de subida no lo fija WordPress sino la configuración de PHP y del proveedor de hosting; puedes comprobarlo en la pantalla de subida de medios, donde se muestra el límite permitido. Muchas instalaciones veteranas, además, no admiten archivos mayores a los dos megas.
Si necesitas subir una centena o más de archivos, o bien archivos muy pesados, el método recomendado, entonces, es a través de FTP.
Un cliente FTP: Filezilla
FTP es un método de transferencia de archivos, que te permite acceder al disco rígido de tu servidor, el mismo donde se encuentran los archivos de tu sitio.
Por si te interesa, las siglas FTP devienen de File Transfer Protocol, es decir protocolo de transferencia de archivos. Requieres dos cosas para poder sacarle provecho a dicho protocolo: primero, un "cliente", que es otra manera de decir "software para conectarme con el servidor" (te recomendamos el gratuito Filezilla), y, segundo, las credenciales de acceso (o sea, tu nombre de usuario y tu contraseña; si no las tienes/recuerdas, mándanos un ticket).
Configurando tu sitio en Filezilla
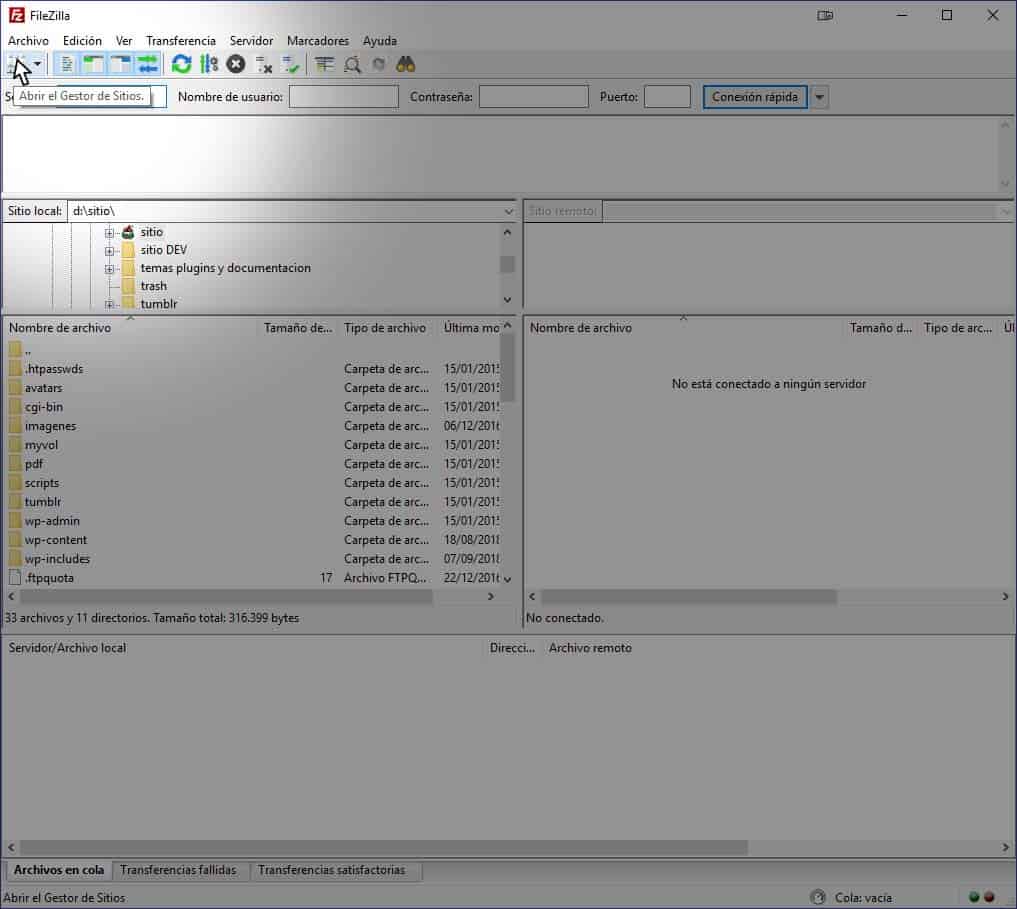
La siguiente captura te muestra el software o cliente para conectarte a tu servidor (para esta guía usamos Filezilla, pero puedes, claro está, usar el programa que quieras). Lo primero a realizar es cliquear el primer botón de herramientas como se ve en la imagen.
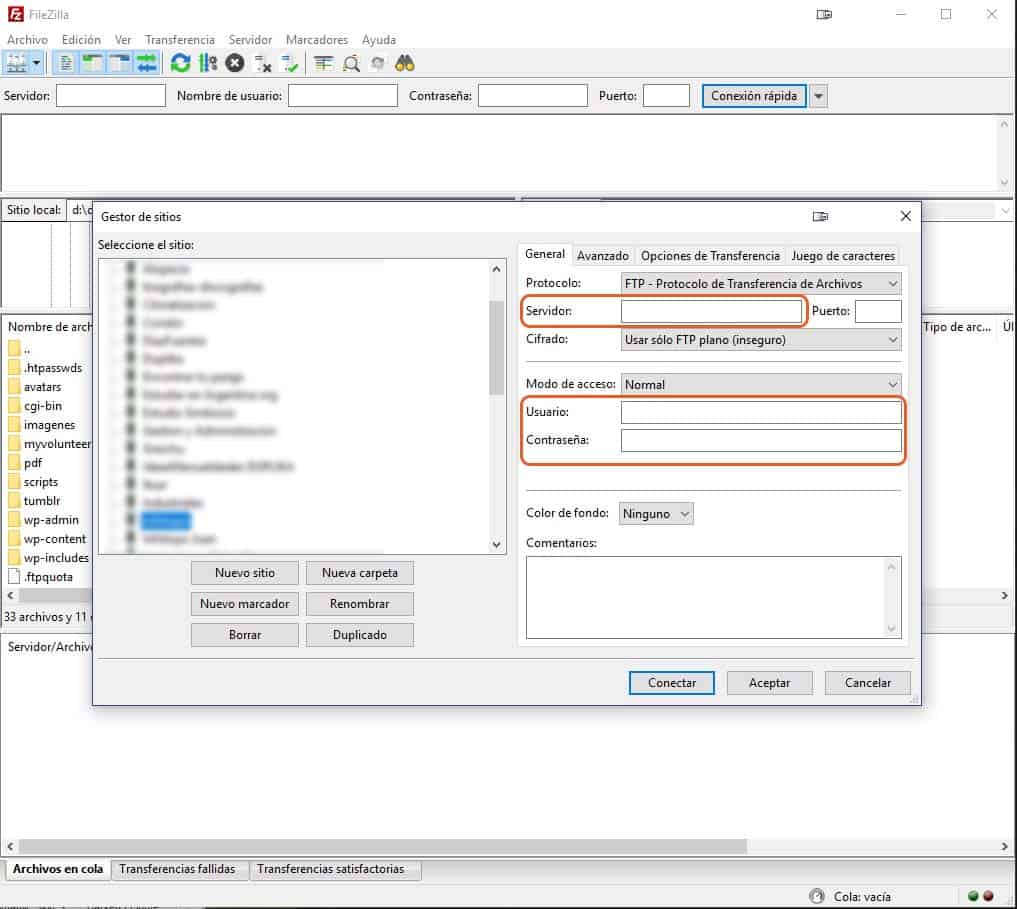
Una ventana de configuración de nuevo sitio se abrirá, y en los campos señalados en la captura inferior te muestro los datos a completar: el servidor (ej.: ftp.tuSitio.com) y las credenciales de acceso, es decir tu nombre de usuario y tu contraseña.
Una vez dentro del sitio, puedes navegar las carpetas remotas como si estuviesen dentro de tu PC. En WordPress, los archivos se almacenan en tusitio.com/wp-content/uploads/año/mes. Ejemplo: tusitio.com/wp-content/uploads/2019/01
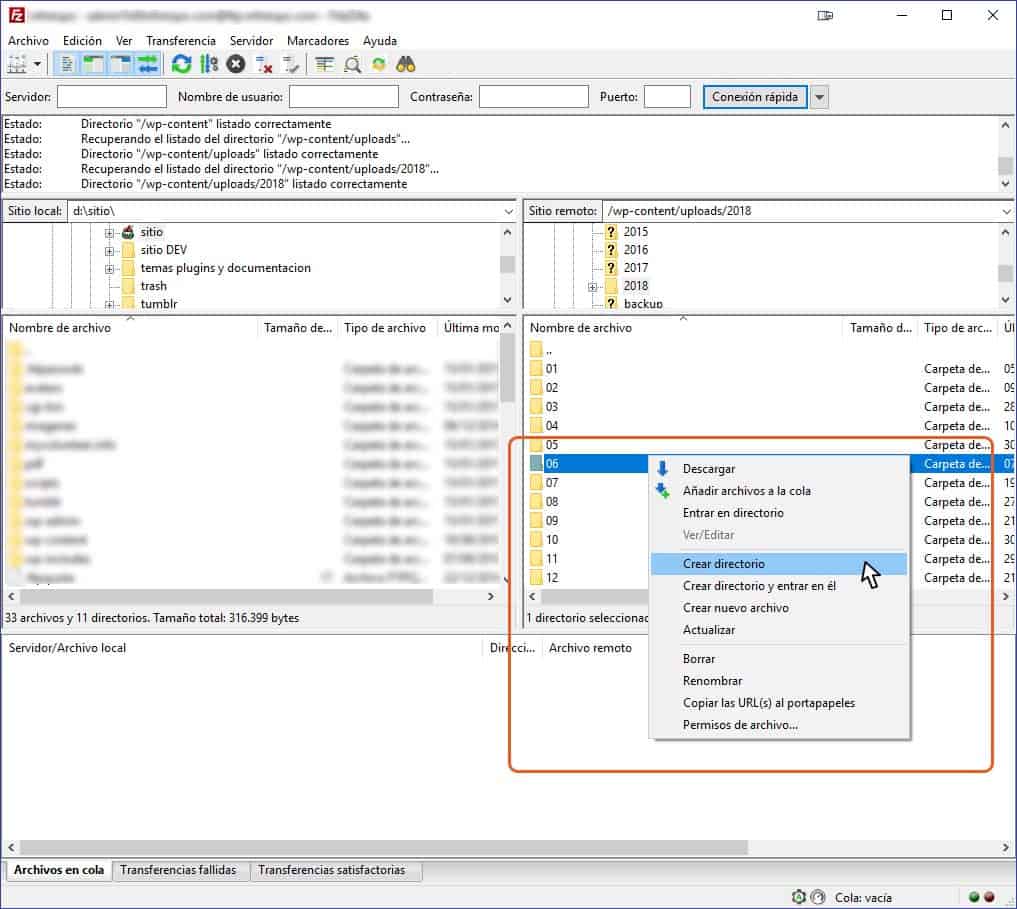
Puedes subir los archivos donde te plazca, convenientemente en el año y mes corriente. Si la carpeta no está creada, puedes crearla realizando clic derecho y seleccionando la opción de "crear directorio" como te muestro abajo. Si no has subido ningún archivo vía WordPress este mes o este año, es probable que esas carpetas no aparezcan.
Para subir los archivos, entras a la carpeta remota donde deseas alojarlos, y arrastras los archivos desde una ventana de tu explorador allí dentro. Filezilla se encargará del resto.
Vale destacar que la ventana izquierda del Filezilla, que he borroneado para no confundirte, es un navegador local de archivos (piénsalo como un explorador de archivos de Windows). Allí también podrás navegar para trasladarte a la carpeta donde se encuentran los archivos a subir, y arrastrarlos todos a la ventana derecha. Es lo mismo para Filezilla: puedes arrastrarlos de una ventana del explorador de Windows como desde dentro del Filezilla. Da igual.
Yo sé usar FTP; sin embargo, los archivos que subí no se ven en mi WordPress
Este es el problema principal que queremos abordar: por defecto, WordPress nunca reconocerá como propios los archivos subidos por FTP. Sencillamente, no aparecerán en tu galería de medios.
No has hecho nada malo; WordPress funciona así, llevando un registro de los archivos subidos en su base de datos para poder mostrarlos en la galería de Medios. Como hemos usado un FTP, no conoce esos archivos... AÚN.
Vamos a realizar las presentaciones pertinentes, y para eso haremos uso de un plugin gratuito llamado "Add From Server".
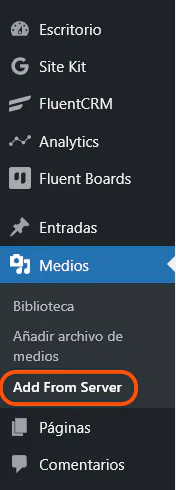
Una vez que has instalado y activado el plugin "Add From Server", ve a tu galería de medios y busca la opción "Añadir desde el servidor" como se muestra en la captura inferior.
Se abrirá un explorador de archivos de tu servidor, sólo que esta vez dentro de WordPress mismo. Verás algo como esto:
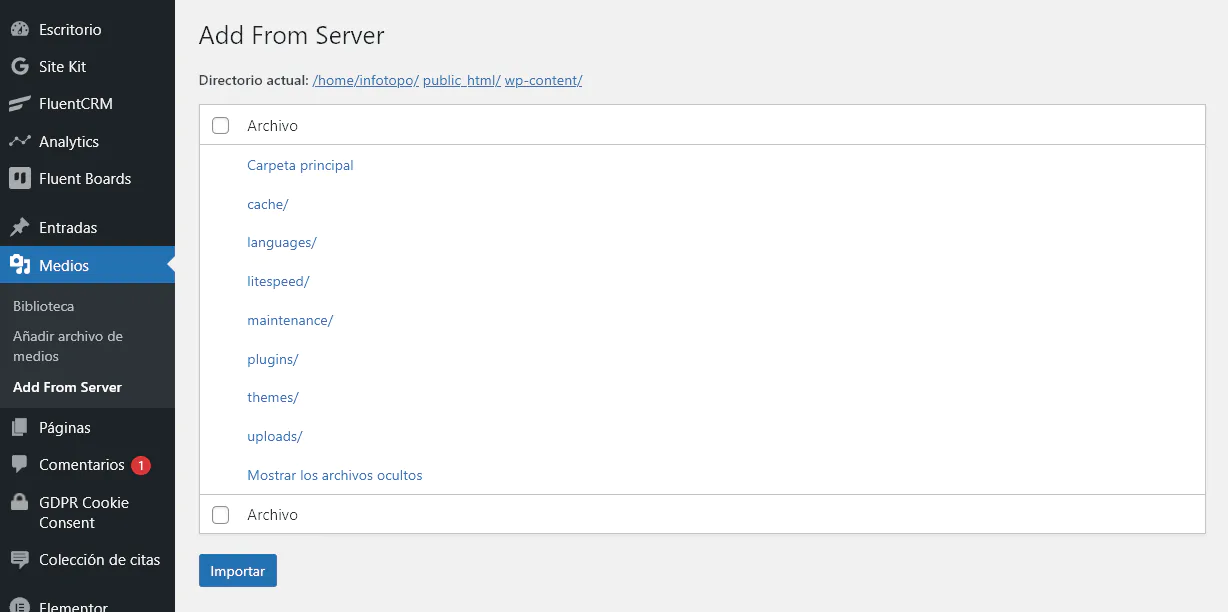
Ten en cuenta que Add From Server no está diseñado para importar medios por lotes, así que es mejor usarlo para archivos individuales o grandes; para importaciones masivas te recomendamos WP-CLI (ver los métodos alternativos).
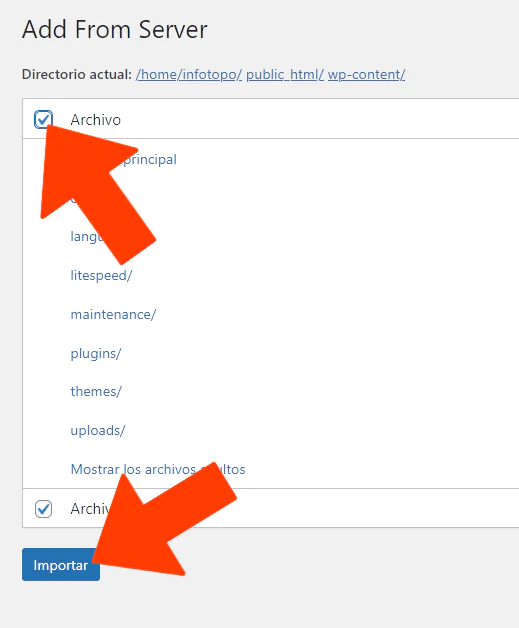
El plugin mostrará una lista de los archivos que se irán incorporando a la galería junto a un mensaje de éxito. Si algo sale mal, toma nota del archivo en cuestión para volver a intentarlo.
Cuando regreses a tu galería de medios, verás incorporadas todas las imágenes subidas por FTP.
Métodos alternativos
Existen maneras opcionales de subir archivos a granel a tu WordPress y registrarlos en la galería, y a continuación te los comento.
Otra posibilidad es echar manos al Import Images from your Server, un plugin pago que permite realizar estas tareas con una interfaz algo más amistosa.
Si eres un cerebrito y lo tuyo son las líneas de comando, puedes importar archivos a tu galería usando WP-CLI. El comando...wp media import...permite crear adjuntos con URLs de archivos locales.