

Configuración de mail en Mozilla Thunderbird
Actualizado hace 3 meses
Para poder configurar tus correos en Thunderbird, primero debes de haberlos creado. Si aún no lo hiciste, visita nuestra guía de crear, administrar y configurar cuentas de mail.
Una vez que hayas creado tu cuenta de mail en la opción de correos en tu panel de control, al final de página encontrarás los datos de configuración. A continuación te damos un ejemplo:
Con estos datos, abre la aplicación Thunderbird en tu equipo y sigue las siguientes instrucciones:
Si es la primera vez que inicias la aplicación, el programa te solicitará que configures una cuenta nueva (transitando los mismos cuadros de diálogos que se encuentran en Herramientas > Configuración de Cuentas. Si no puedes visualizar la barra de menú, presiona el ícono con 3 franjas horizontales arriba a la derecha y dirígete a Opciones > Configuración de cuentas
Debajo, a la izquierda presiona Acciones de cuenta > Agregar cuenta de correo
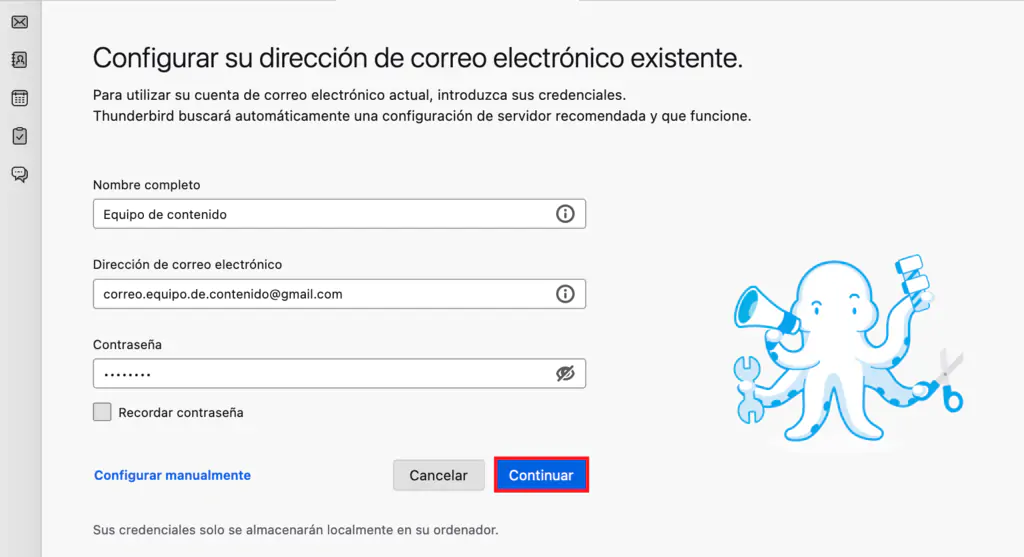
Cuando te encuentres en la página de creación de correo, coloca el nombre para mostrar (remitente), dirección de correo y contraseña según hayas creado tu cuenta
Al presionar Continuar, el programa intentará adivinar la configuración correcta
En caso de que no lo logre, o que los datos no coincidan con los del cPanel, repara la configuración según sea necesario empleando los botones Re-verificar o bien Configurarar manualmente para ingresar los datos que tenemos de nuestro cPanel (primera captura de esta guía).
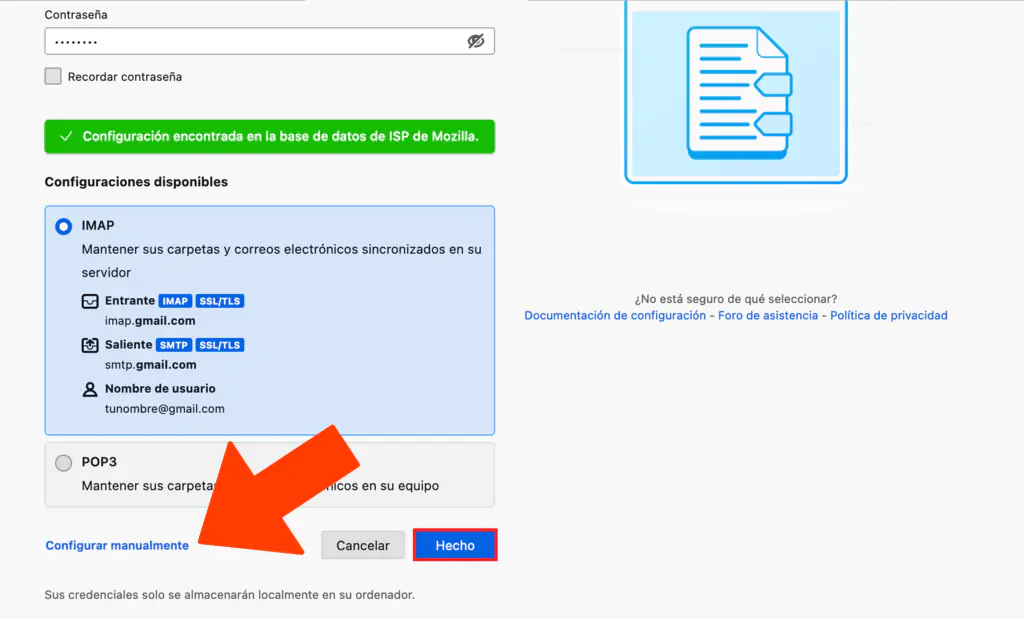
Al finalizar quedará configurada la cuenta de correo.
Si tienes configuradas varias cuentas de correo, regresa a la Configuración de cuentas
Ingresa en la opción de la izquierda Configuración del servidor saliente (SMTP)
Revisa que el predeterminado sea el nuevo correo.