

Manage and Configure Email Accounts
Updated 3 months ago

In this quick guide, we'll explain how to create email accounts from our control panel, how to access them, and how to manage them.
The first step is to log in to your control panel. You can do this by going to https://cpanel.misitio.com (replace misitio.com with your domain)

Remember to replace "misitio.com" with your domain's actual URL
Once you're logged in, please click here:
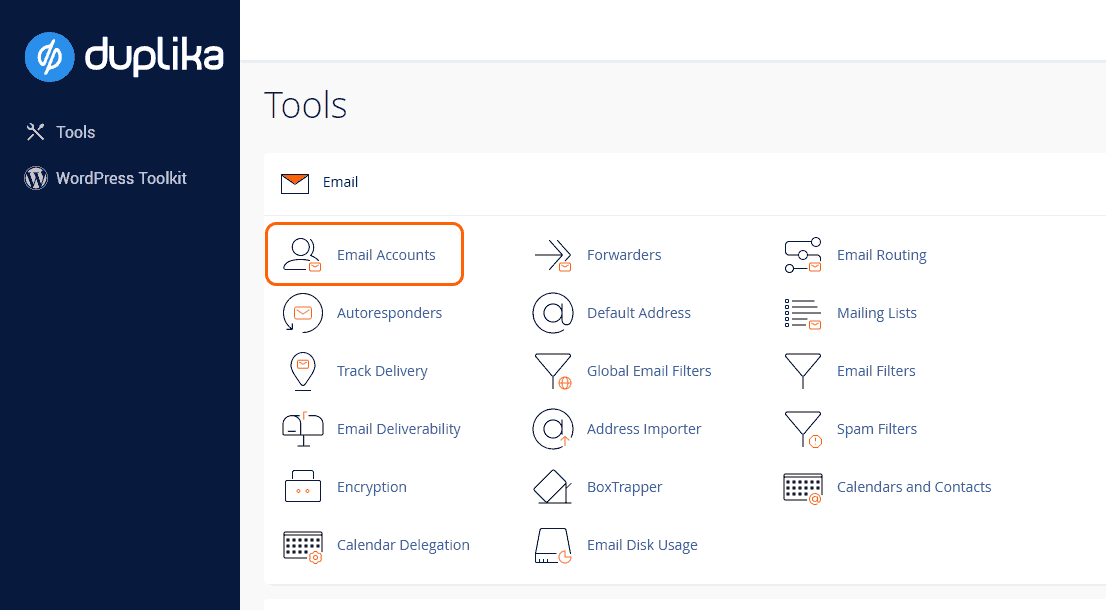
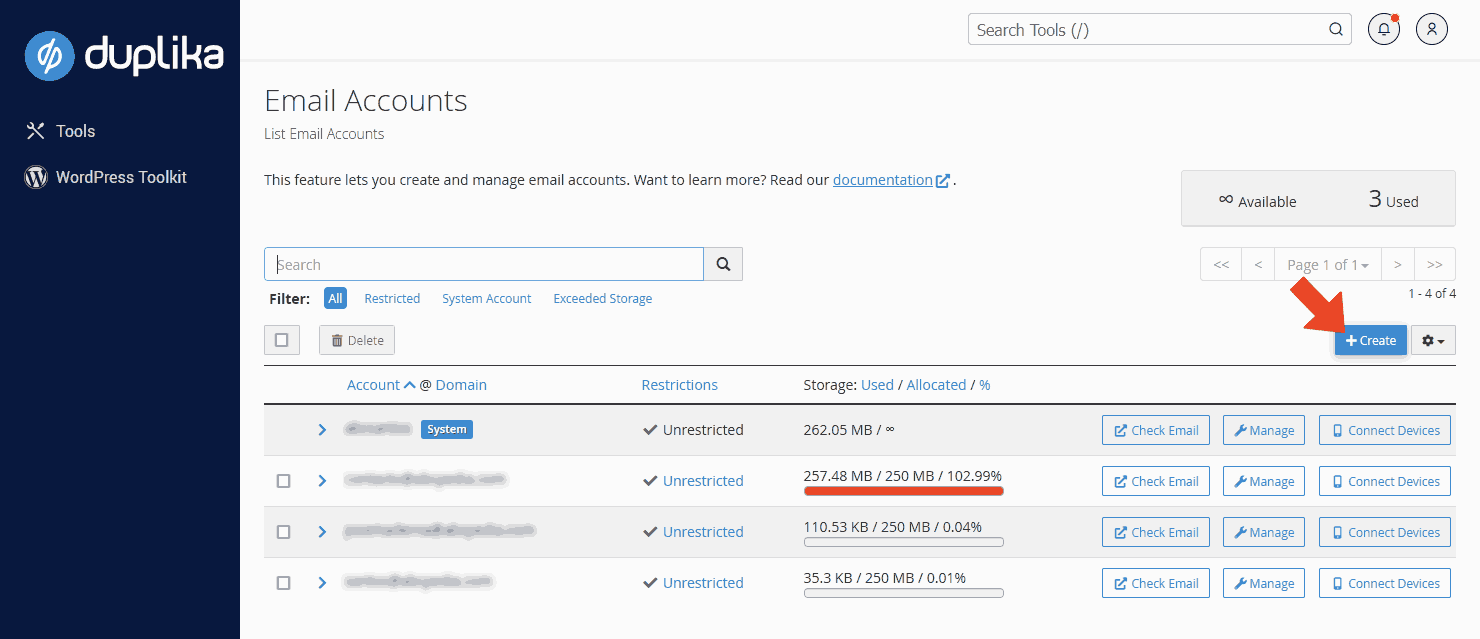
Once that's done, we'll see a screen with the Create button. Click it to create new email accounts. If email accounts have already been created, we'll see them here too (if we've never created an account, the columns will naturally be empty). We'll take a closer look at this screen later.
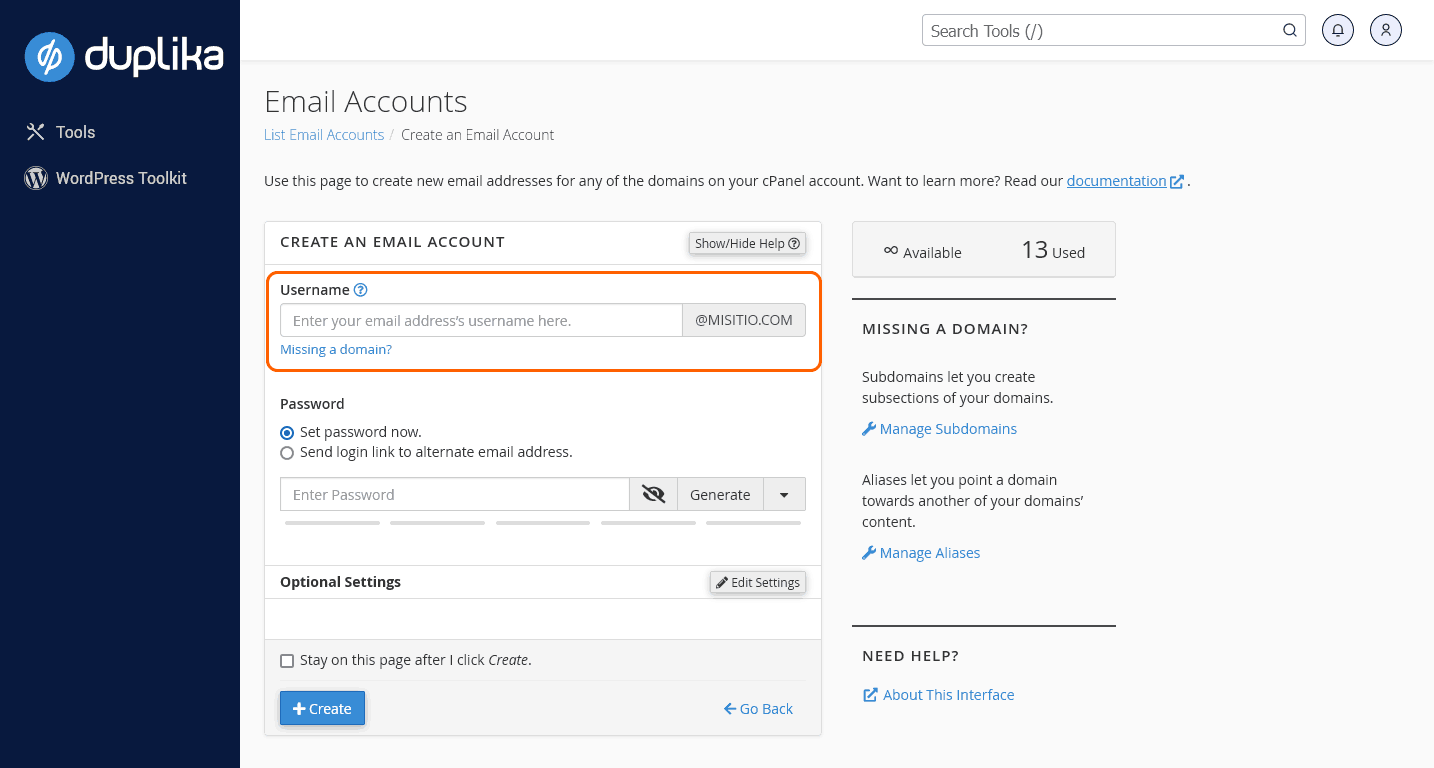
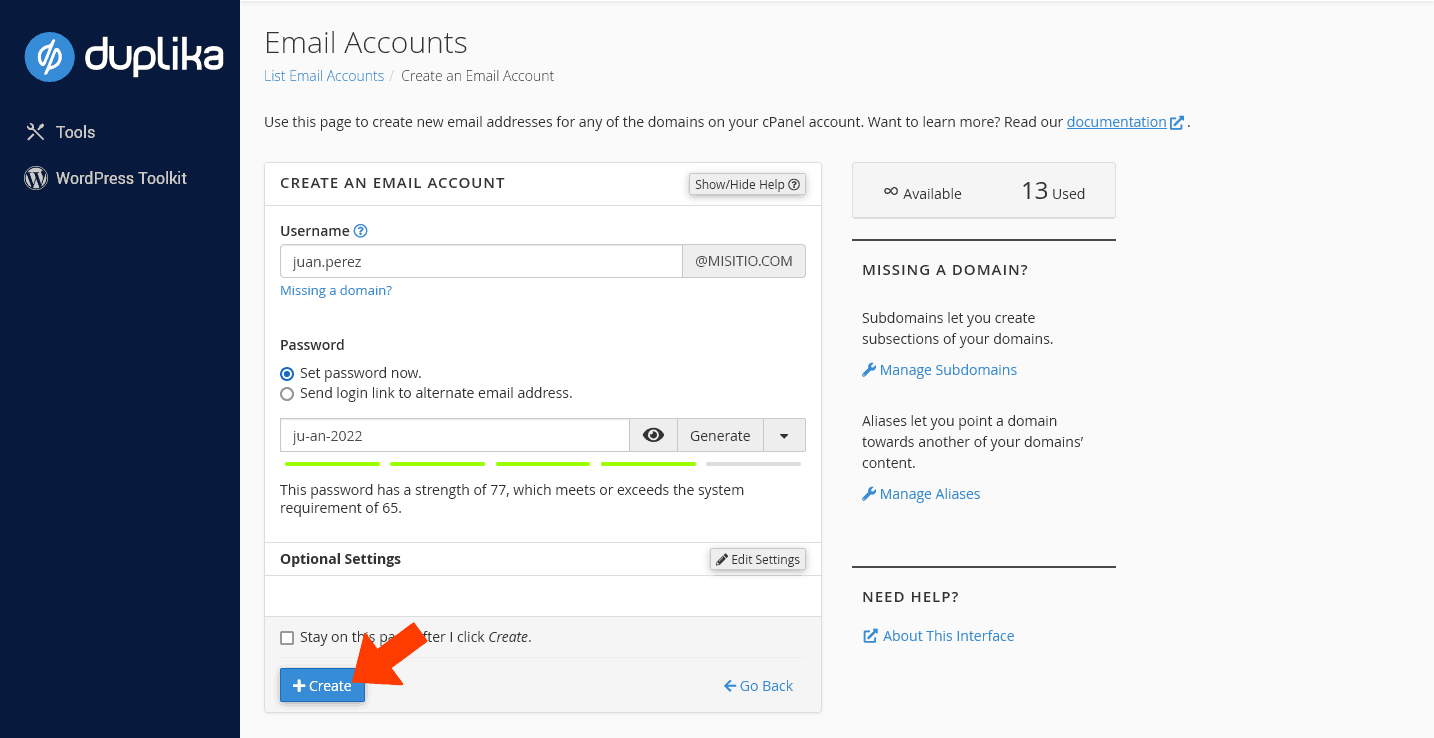
Next, we'll go to the screen for creating a new email account. In the field highlighted by an orange box (see screenshot below), enter the account name WITHOUT @misitio.com
For example, we can enter juan.perez, administración, ventas, info, contacto, or any other account name we need.
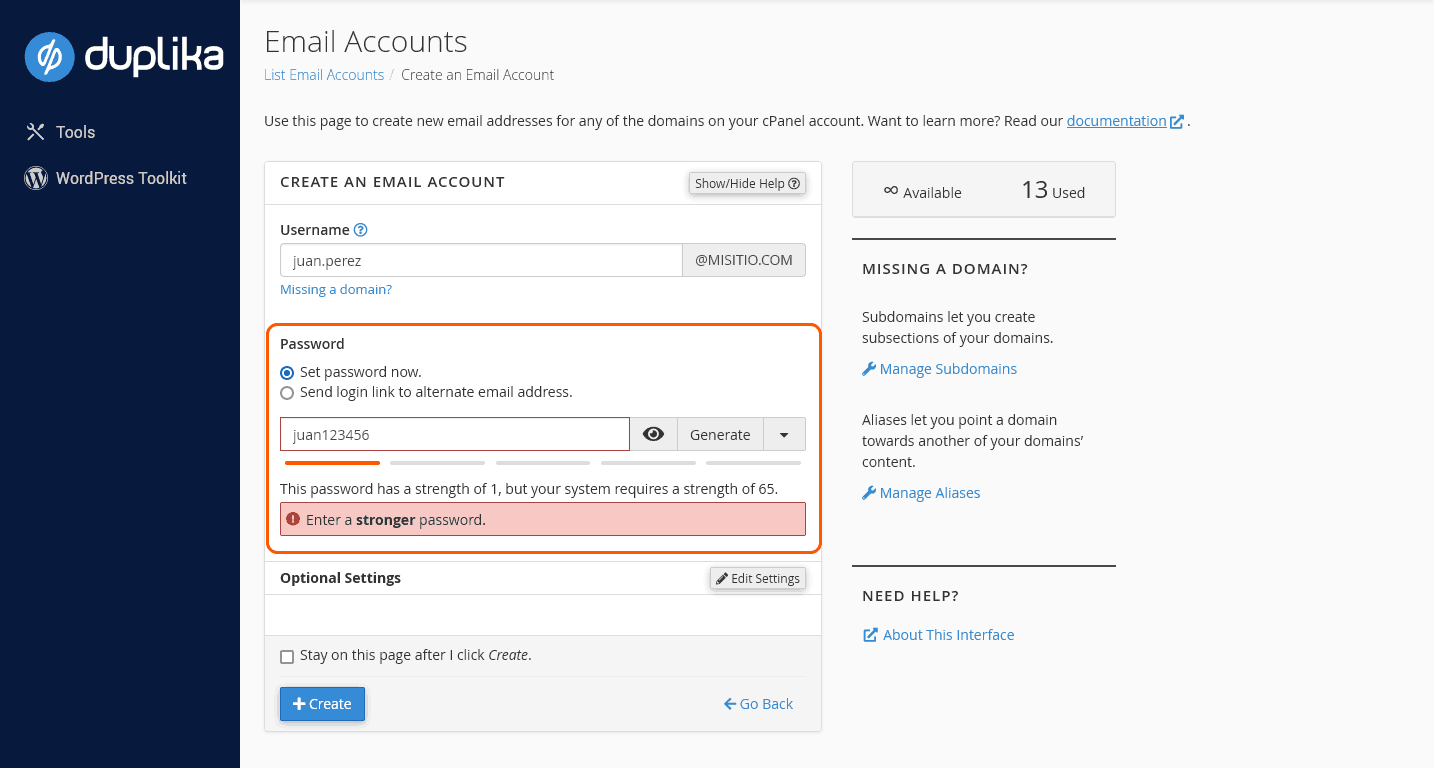
In the field below, we'll create a password. If we like, we can click the Generate button to create a random, extremely strong password. A "weak" password, on the other hand, would be something like 123456, our name and a year, or any other "obvious" choice that a bot could discover through "brute force" (automatically trying combinations of numbers and common words).
The system indicates how secure our password is with horizontal bars. This will help us feel confident about how difficult the password is to guess.
After entering a password that the system confirms is secure, we'll click the blue Create button, and we're done!
On the next screen, we'll see a confirmation message and our newly created account in the email list.
Three buttons next to the account may come in handy.
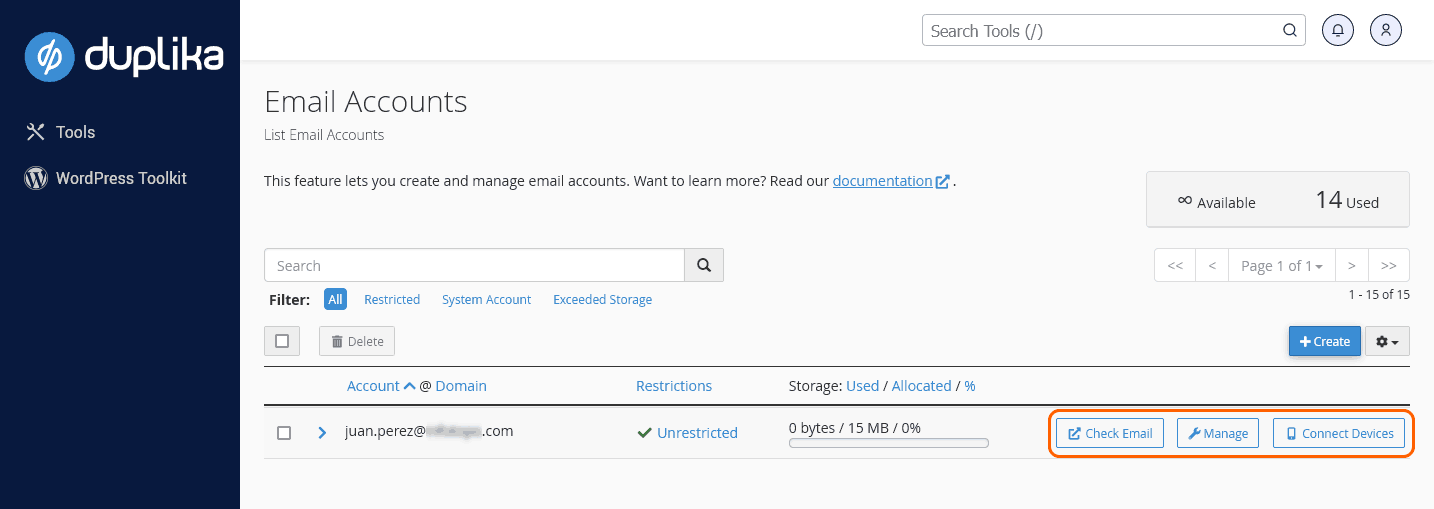
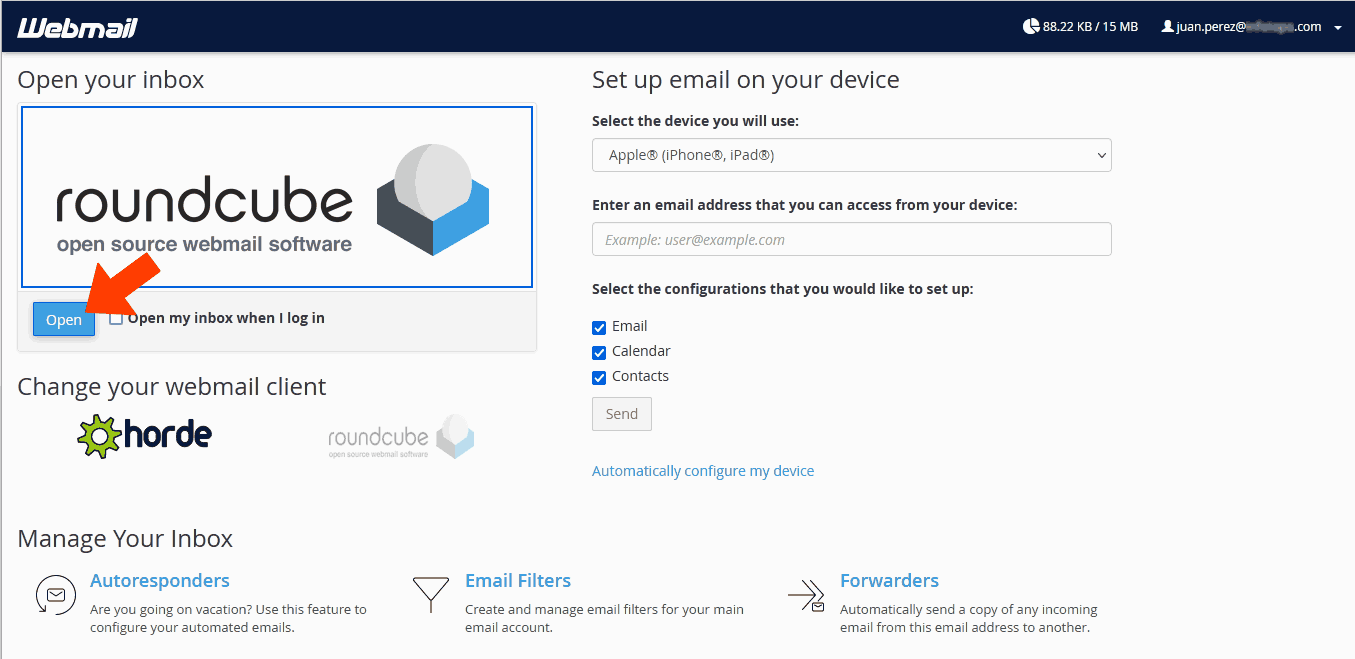
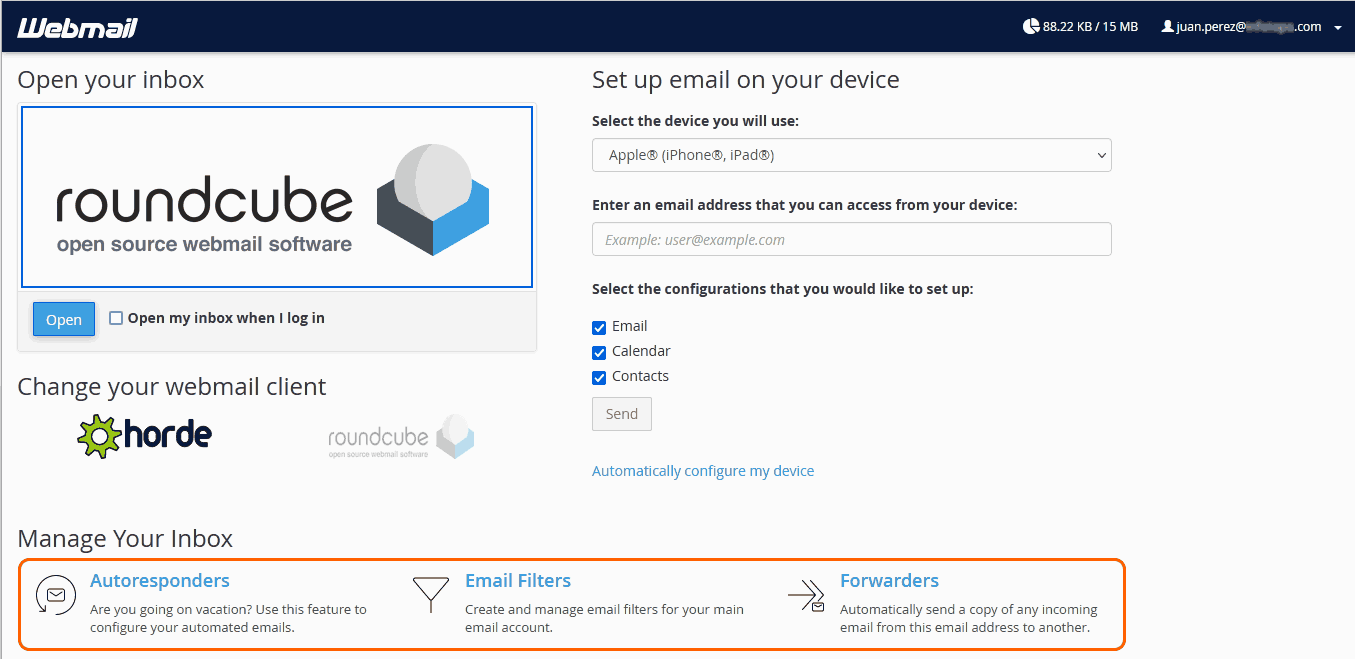
The first button, Check Email, lets us access webmail—the online client for composing and deleting emails, creating rules and folders, and more. The first window shows us several options and tools, but if we just want to open the email account we created, we'll click the button indicated in the screenshot below.
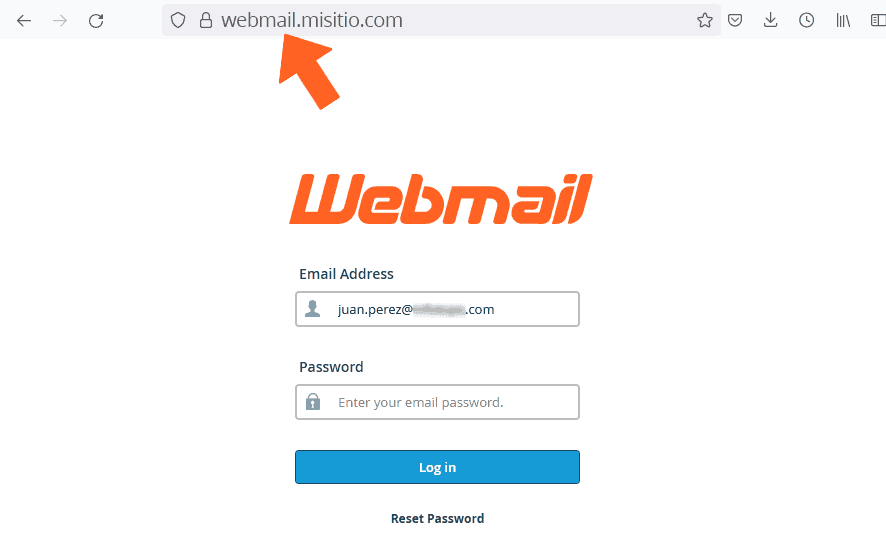
Remember, too, that we can always conveniently access our email at webmail.misitio.com
Back on the cPanel login screen, we can see tools that may come in handy, such as creating autoresponders or filtering rules.
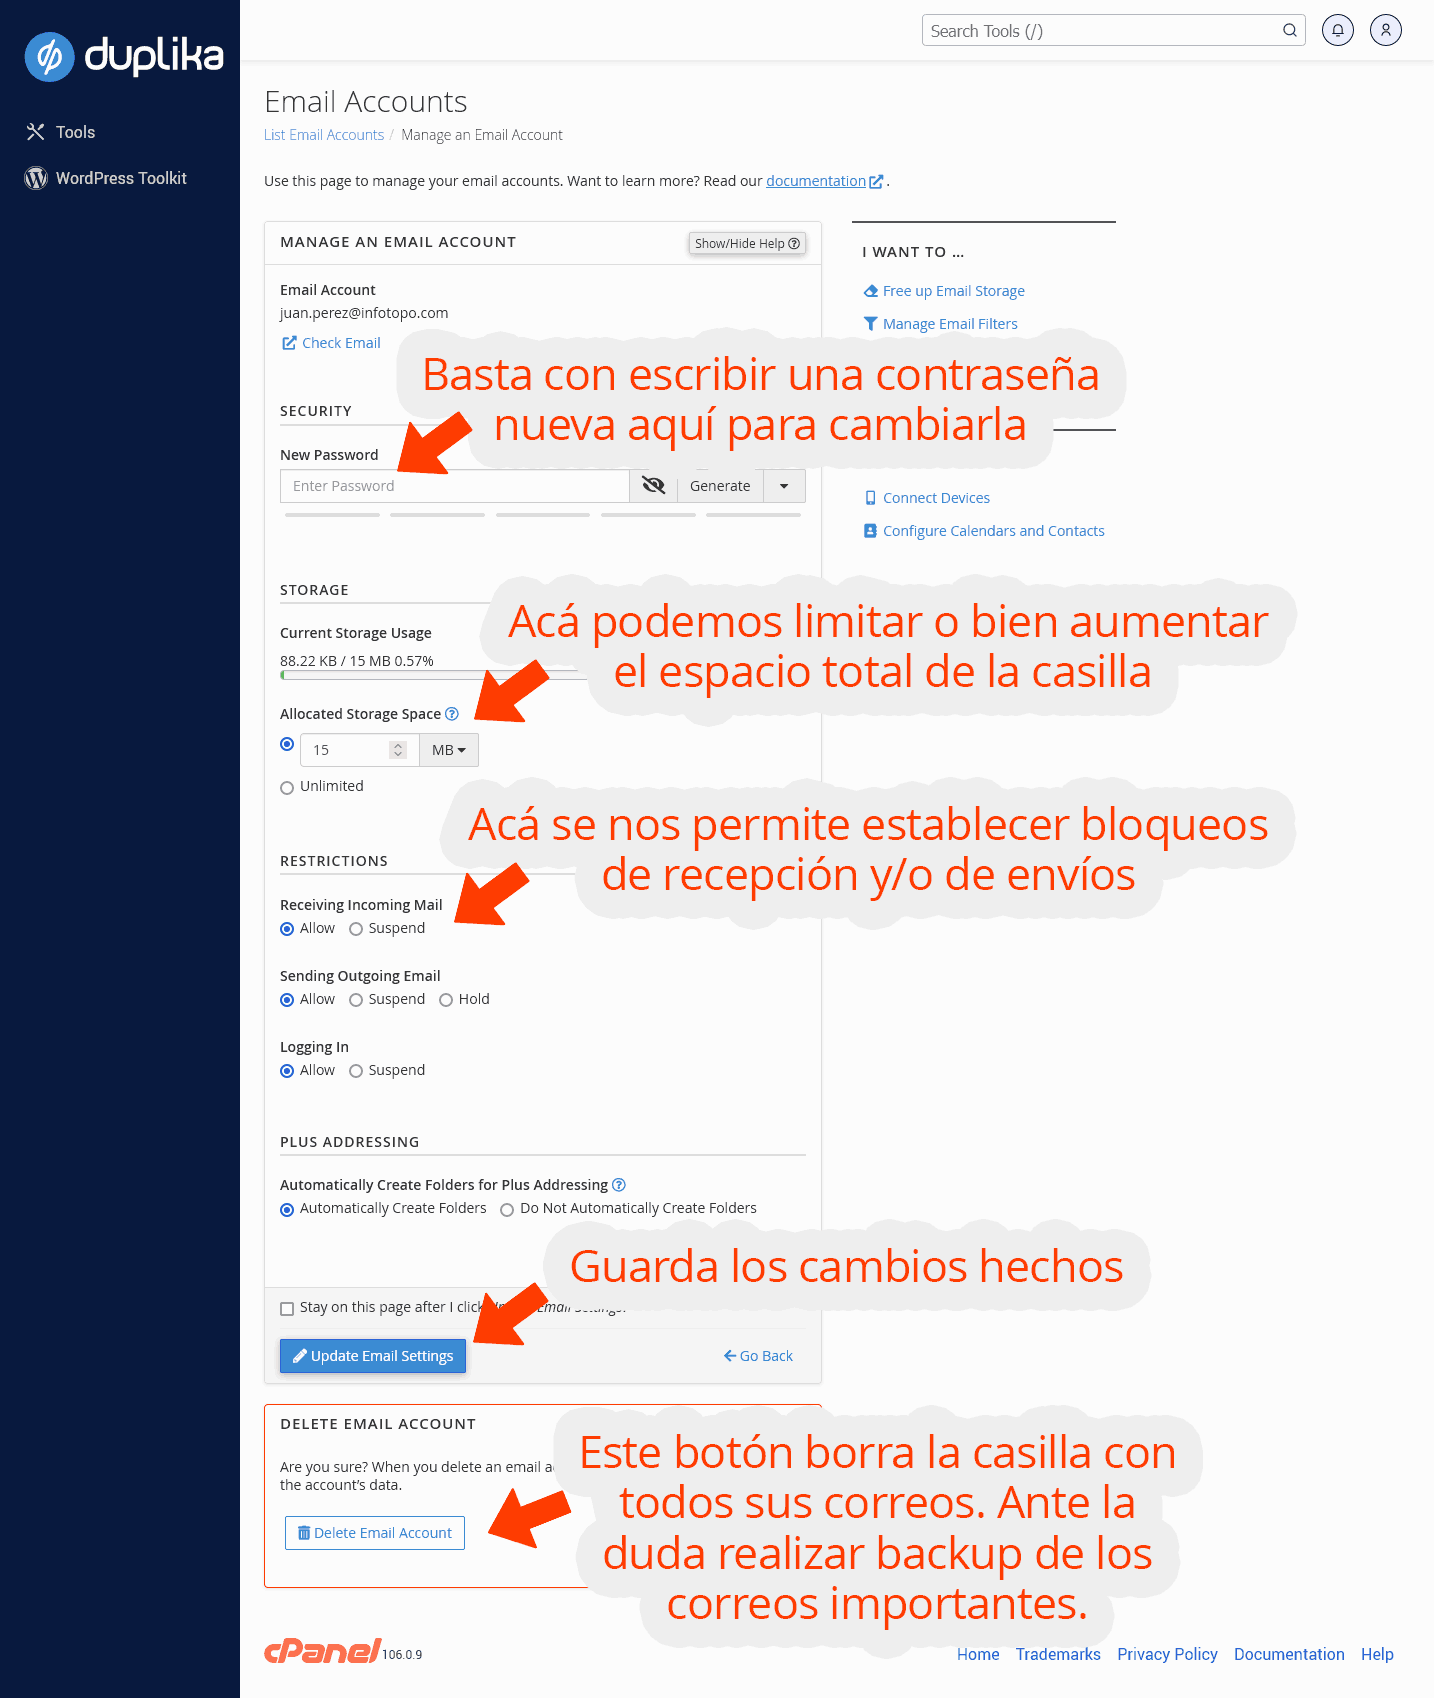
The second button next to the email account, Manage, lets us manage the account.
After clicking it, we'll see the following control panel. The screenshot explains each detail.
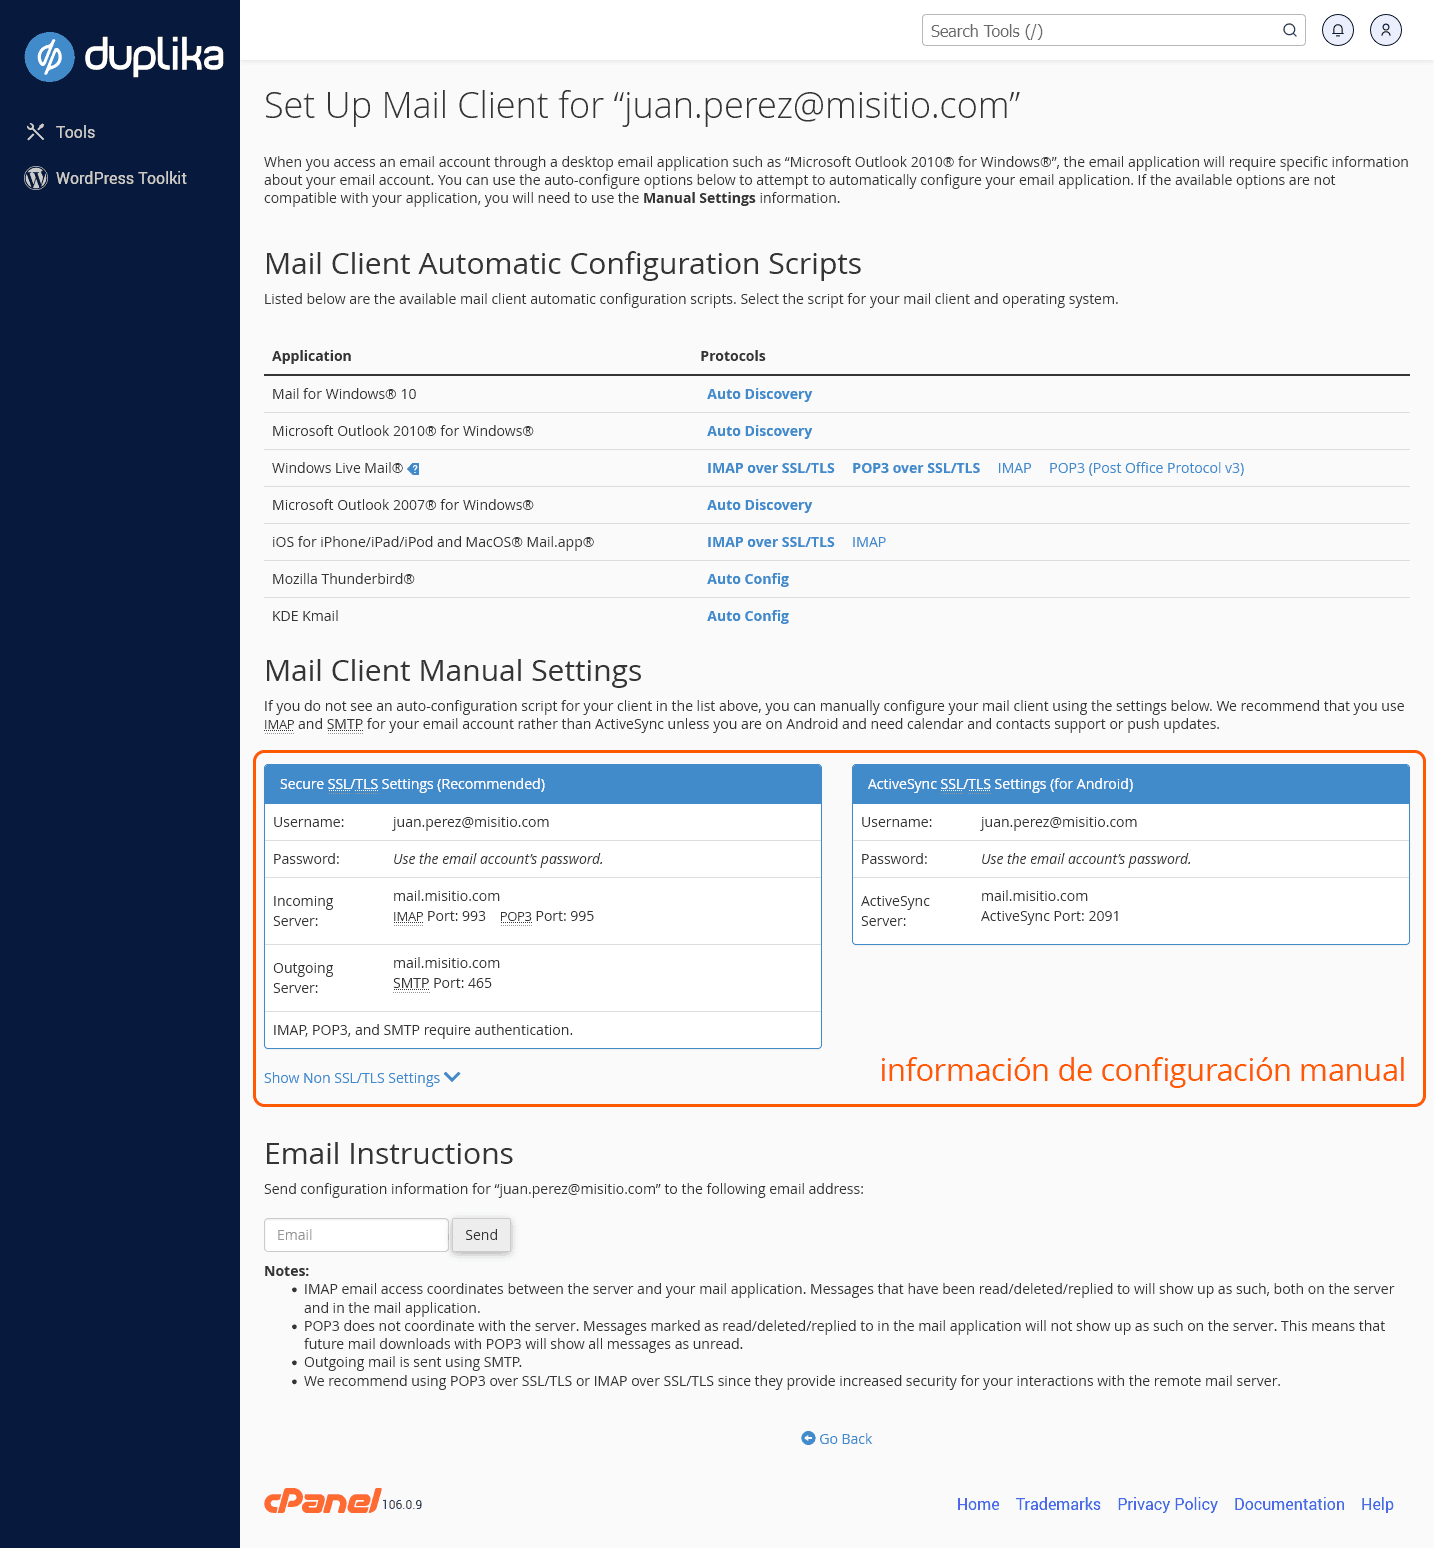
The third button, "Connect Devices," makes it easy to set up our email in different clients and platforms, such as Outlook. Note that the first section of the panel creates configuration files for different options. We can use the file we download to add our email to the selected platform with a single click. We also have the configuration details to do this manually.
That's the end of this guide. Thank you for reading, and we wish you success in your ventures.