

Cómo crear una página web paso a paso con WordPress
Actualizado el mes pasado
Para crear una página web necesitás tres elementos básicos: un dominio, un servicio de hosting y una plataforma para construir el sitio. En esta guía vamos a utilizar WordPress porque permite crear y administrar páginas sin necesidad de programar.
En resumen, los pasos son: registrar un dominio, contratar hosting, instalar WordPress, elegir un diseño, crear las páginas principales y publicar el sitio.
A continuación te explicaremos paso a paso, como crear tu sitio web en WordPress desde cero: conseguís un dominio, contratás hosting, instalás WordPress y publicás tu primer contenido. Esta guía te lleva de cero a un sitio online y enlaza la guía detallada de cada paso para que no repitas procedimientos.
Lo que necesitás
Un sitio web en WordPress se apoya en tres piezas que trabajan juntas:
Dominio: la dirección de tu sitio, por ejemplo
misitio.com. Es la cara que ven tus visitas.Hosting: el servicio donde viven los archivos, imágenes y bases de datos de tu sitio. Sin hosting, nadie puede acceder a tu web.
WordPress: el gestor de contenidos (CMS) con el que creás y administrás páginas, entradas, menús y plugins. Es gratis.
Si querés entender cada pieza a fondo, leé ¿Qué es un dominio? y ¿Qué es el hosting y para qué sirve?.
Paso 1: Elegí y registrá tu dominio
El dominio es el nombre que tus visitas escriben para entrar a tu sitio. Elegí un nombre que coincida con tu marca o proyecto y una extensión que acompañe a tu audiencia: una extensión genérica como .com, .net u .org para visitas internacionales, o una local como .com.ar si tu negocio es de Argentina.
Buscá si el dominio que querés está disponible y registralo desde el buscador de dominios de Duplika.
Paso 2: Contratá un servicio de hosting
El hosting almacena los archivos de tu sitio en un servidor conectado a Internet las 24 horas. Todos los planes de hosting de Duplika son compatibles con WordPress e incluyen cPanel, certificado SSL y soporte técnico.
Para publicar tu sitio vas a necesitar, por única vez, enlazar tu dominio con tu servidor contratado. Ese proceso se llama delegación: le indicás al registrador de tu dominio cuáles son los servidores DNS de tu hosting.
Si compraste tu dominio en Duplika, recibís las instrucciones de delegación por correo. Si lo compraste en otro lado, podés pedirnos ayuda escribiendo a [email protected].
Paso 3: Instalá WordPress
Con el hosting activo, instalá WordPress desde tu panel de control. En Duplika se hace desde cPanel → WordPress Toolkit → Instalar, donde completás el dominio, el directorio y tus datos de acceso.
Seguí los pasos exactos en la guía Cómo instalar WordPress fácilmente. Si preferís que lo hagamos nosotros, enviá un ticket de soporte y lo dejamos instalado donde lo necesites.
Si preferís comenzar sobre una plataforma ya preparada para WordPress, podés consultar nuestros planes de WordPress Hosting
Paso 4: Conectá tu dominio
Para que tu sitio esté online, tu dominio tiene que apuntar a los servidores DNS de tu hosting. Este proceso de delegación puede tardar unas horas en propagarse por Internet.
Si tu dominio es .com.ar y lo compraste en NIC.ar, seguí la guía ¿Cómo delegar mi dominio com.ar al proveedor de hosting?. La manera de verificar que tu sitio ya está online es simple: entrá a tu dirección desde el navegador.
Una vez online, confirmá que tu sitio se vea con el candado de seguridad en la barra del navegador. Los sitios con certificado SSL se muestran con el protocolo https://; desde 2021 los navegadores marcan como "no seguro" a los sitios sin certificado.
Paso 5: Ingresá al admin de WordPress
El Escritorio es el panel donde creás y administrás todo el contenido de tu sitio. Se accede desde tusitio.com/wp-admin, usando el nombre de usuario y la contraseña que creaste durante la instalación.
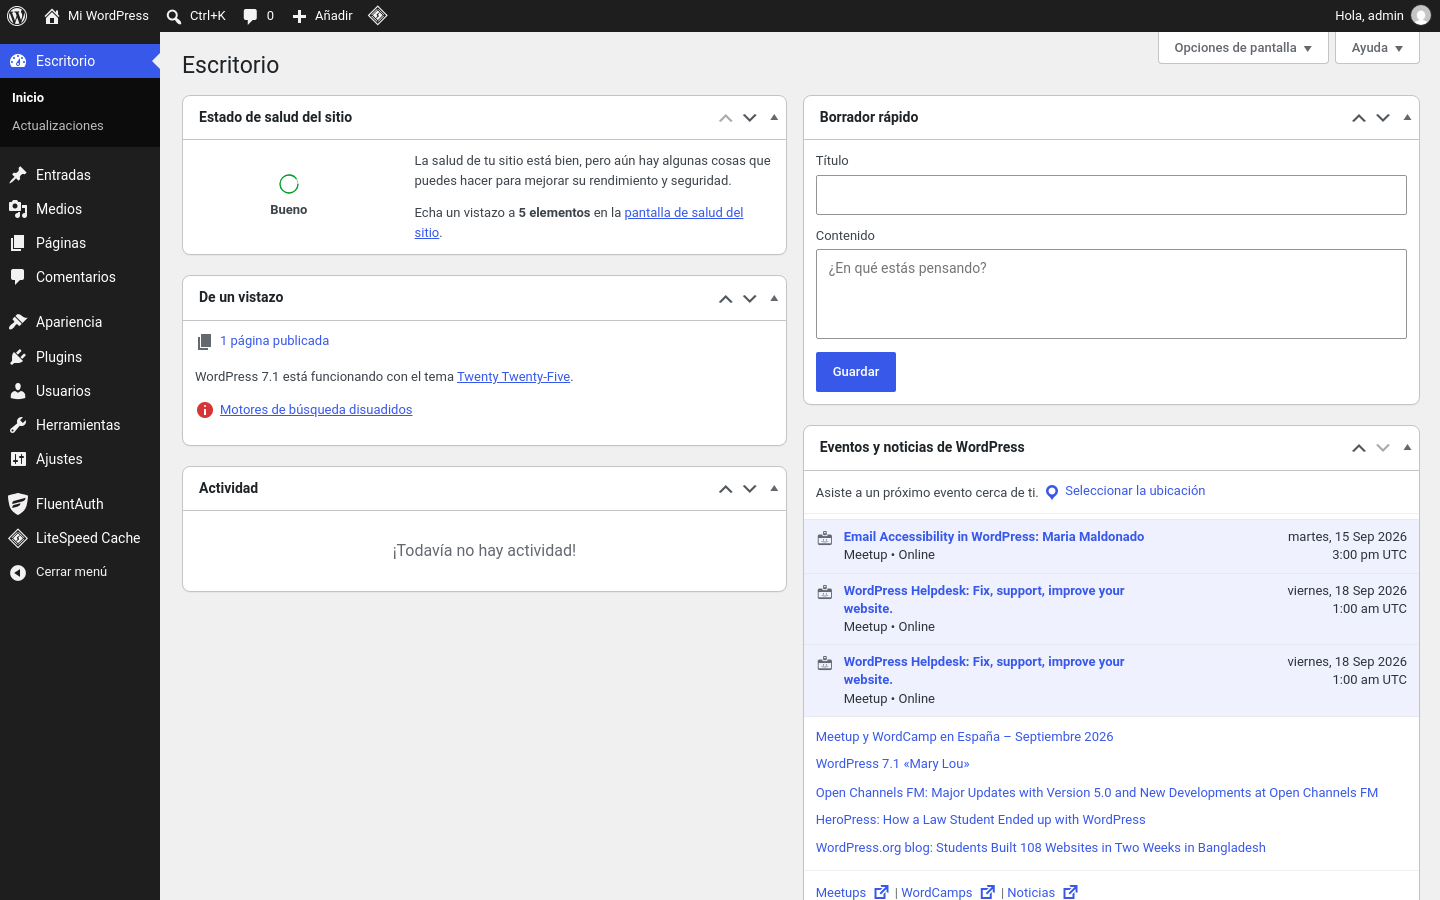
Si contrataste hosting en Duplika, recibiste un correo con los detalles de acceso. Ante cualquier duda, escribinos a [email protected].
Paso 6: Elegí un Tema
El Tema es la "ropa" de tu sitio: define su aspecto, paleta de colores y estructura. WordPress no funciona sin un Tema, por eso instala uno por defecto al inicio, que además sirve como Tema de reserva si tu Tema principal falla.
Para elegirlo, entrá a tu Escritorio y andá a Apariencia → Temas, hacé clic en Añadir nuevo y explorá la galería. Podés buscar por nombre o por palabra clave, ordenar por Destacados, Populares o Recientes, y probar cada Tema antes de decidirte.
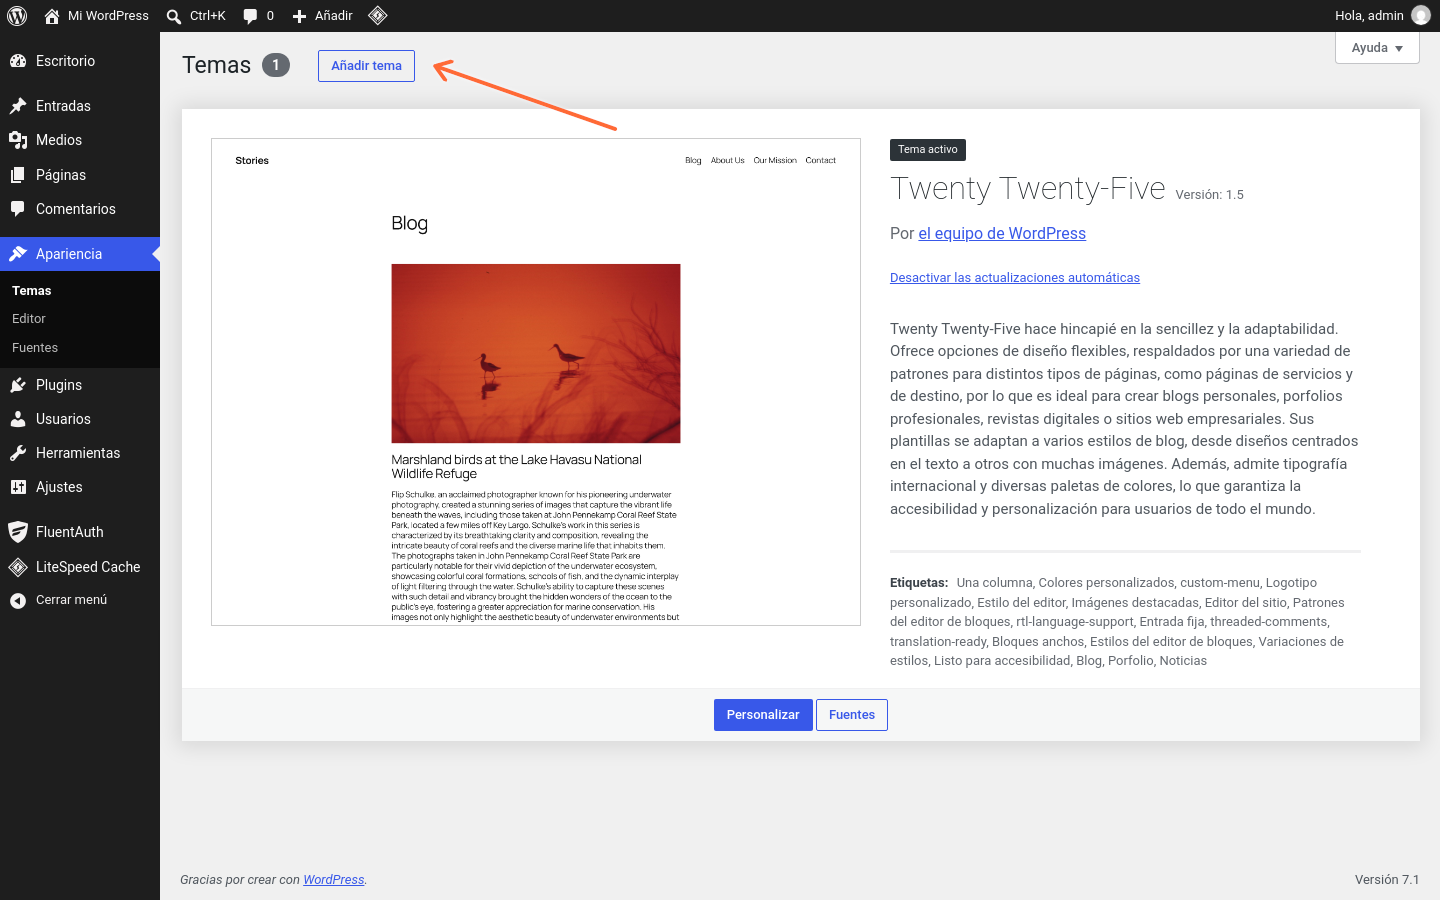
Existen miles de Temas gratis en WordPress.org y muchos más de pago. El Tema que elijas depende de tus necesidades y de cuánto tiempo quieras dedicarle; los Temas pagos suelen traer más plantillas y opciones de diseño listas para usar.
Si descargaste un Tema desde WordPress.org u otro sitio, tenés que subir sus archivos al servidor de tu hosting. Una forma de hacerlo es con el programa gratuito FileZilla; seguí la guía ¿Cómo subir archivos a WordPress por FTP?.
Paso 7: Personalizá tu sitio
Con el Tema instalado, podés darle identidad propia a tu sitio desde el menú de personalización.
Logo: en Apariencia → Personalizar → Identidad del sitio, usá Seleccionar el logotipo para subir tu marca desde tu computadora o desde la Biblioteca de medios. Podés recortar la imagen o ensanchar la selección para enmarcarla completa.
Colores: en la opción Colores del menú de personalización podés cambiar los tonos del sitio, como el color del texto de la cabecera, el fondo de las páginas y el color de acento.
Fuentes y títulos: según el Tema, podés modificar la familia de letras, el tamaño y el color de los títulos. Los Temas pagos suelen ofrecer flexibilidad total de diseño.
Recordá presionar el botón Publicar para guardar los cambios que hagas en la personalización.
Paso 8: Creá tu contenido
WordPress tiene dos tipos de contenido: Páginas y Entradas. Las Entradas son artículos de blog con fecha de publicación, Categoría y Etiquetas; las Páginas son contenidos más institucionales como "Sobre nosotros", "Contacto" o la Página de inicio.
Las páginas típicas de un sitio son la Página de inicio, Acerca de, Contacto, Blog (o Novedades), Servicios y, si vendés online, Tienda.
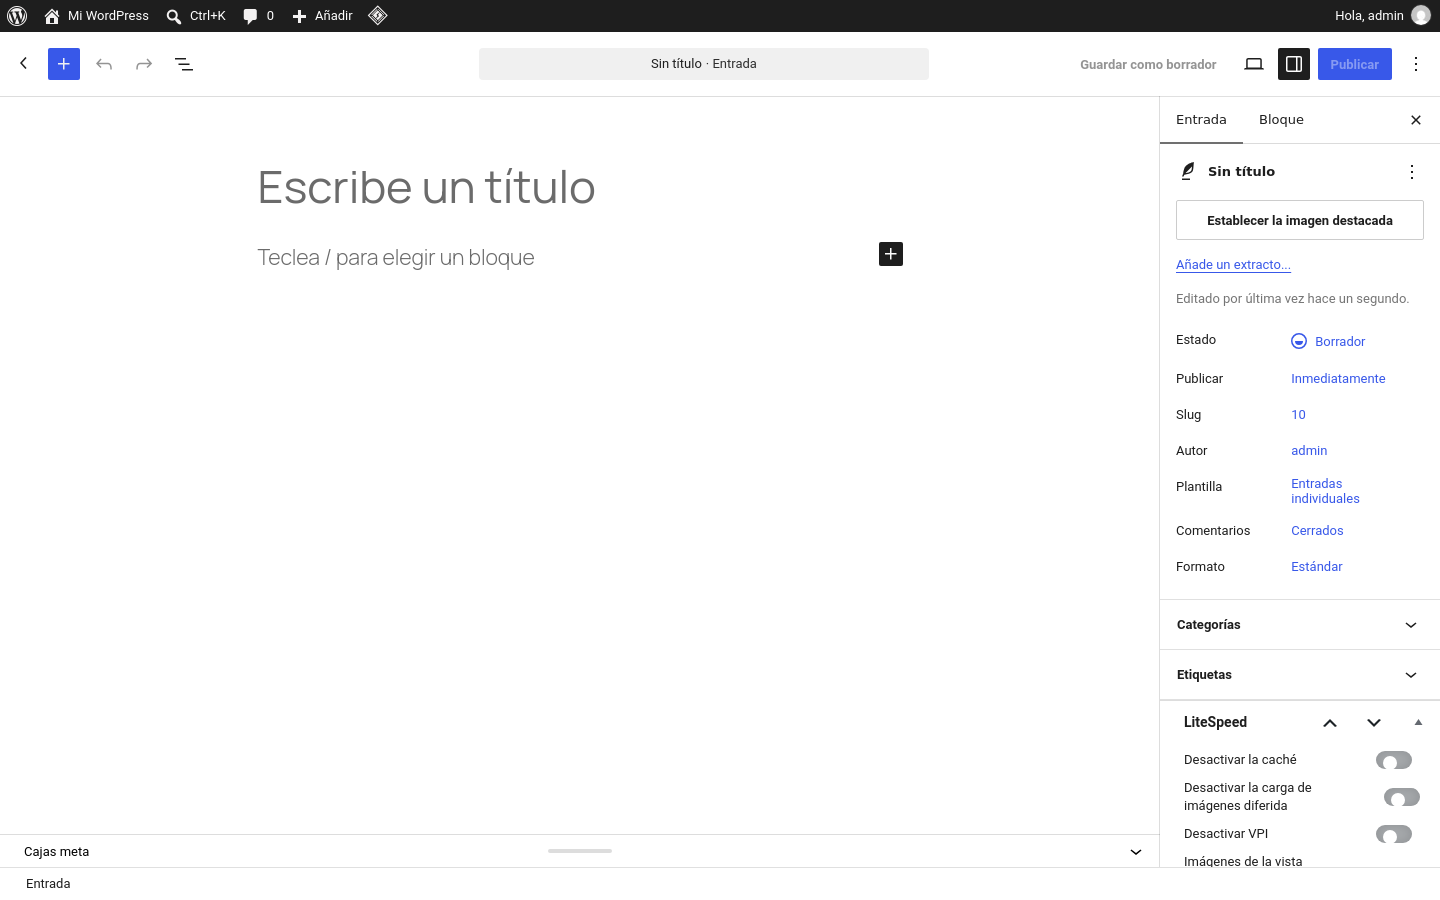
Para crear contenido sin saber programación, WordPress incluye el editor Gutenberg, un constructor de sitios que te permite armar páginas arrastrando y soltando bloques de texto, imágenes, botones y formularios. Otra opción muy usada es el plugin Elementor, que se descarga gratis desde la sección de plugins.
Paso 9: Creá un menú de navegación
El menú de navegación es la serie de enlaces que permite a tus visitas saltar entre las secciones de tu sitio. En general, los sitios promedian cinco o seis enlaces en su menú, y pueden incluir menús desplegables.
Andá a Apariencia → Menús, creá un menú nuevo con un nombre (que solo verás vos), tildá la opción de Menú primario para que se muestre junto a tu logo en el encabezado, y agregá los enlaces a tus Páginas, Entradas o Categorías. Podés arrastrar los elementos para ordenarlos y correrlos a la derecha para convertirlos en subelementos. Recordá guardar con Guardar Menú.
Paso 10: Añadí plugins
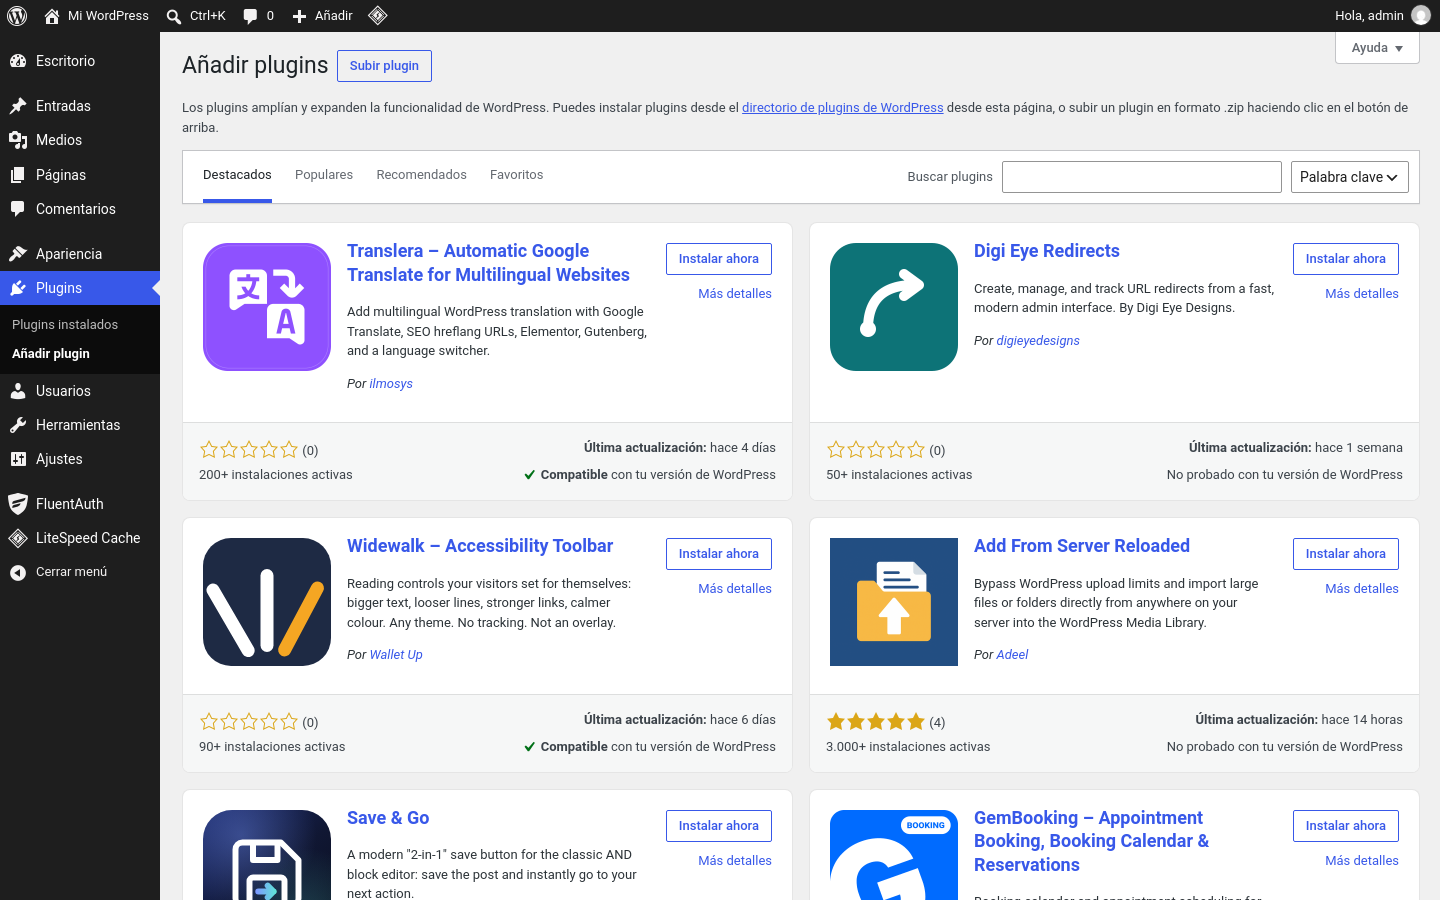
Los plugins son pequeños programas que añaden funcionalidades específicas a tu sitio, como formularios, calendarios de reservas, estadísticas o protección contra spam. La gran mayoría son gratuitos, y un sitio típico no necesita más de tres o cuatro.
Para instalarlos, andá a la sección de plugins de tu WordPress, usá el buscador para encontrar el que necesitás, hacé clic en Instalar ahora y luego en Activar. Para mejorar el posicionamiento, el plugin más recomendado es Yoast SEO.
Creá una tienda online (opcional)
Si tu objetivo es vender online, el plugin estrella de WordPress es WooCommerce: es gratis, permite publicar productos, cobrar y gestionar impuestos, cobranzas y envíos. Se instala desde la sección de plugins.
Cuando lo tengas activo, seguí la guía Guía para crear productos en WooCommerce para montar tu tienda lo más rápido posible.