

Administrar y configurar cuentas de mail
Actualizado hace 3 meses

En esta guía rápida te explicamos cómo crear cuentas de correo desde nuestro panel de control, el método para acceder a ellas y poder administrarlas.
El primer paso será ingresar en tu panel de control. Puedes hacerlo ingresando a https://cpanel.misitio.com (reemplazando misitio.com por tu dominio)

Recuerda cambiar "misitio.com" por la URL real de tu dominio
Tras haber accedido, por favor haz clic aquí:
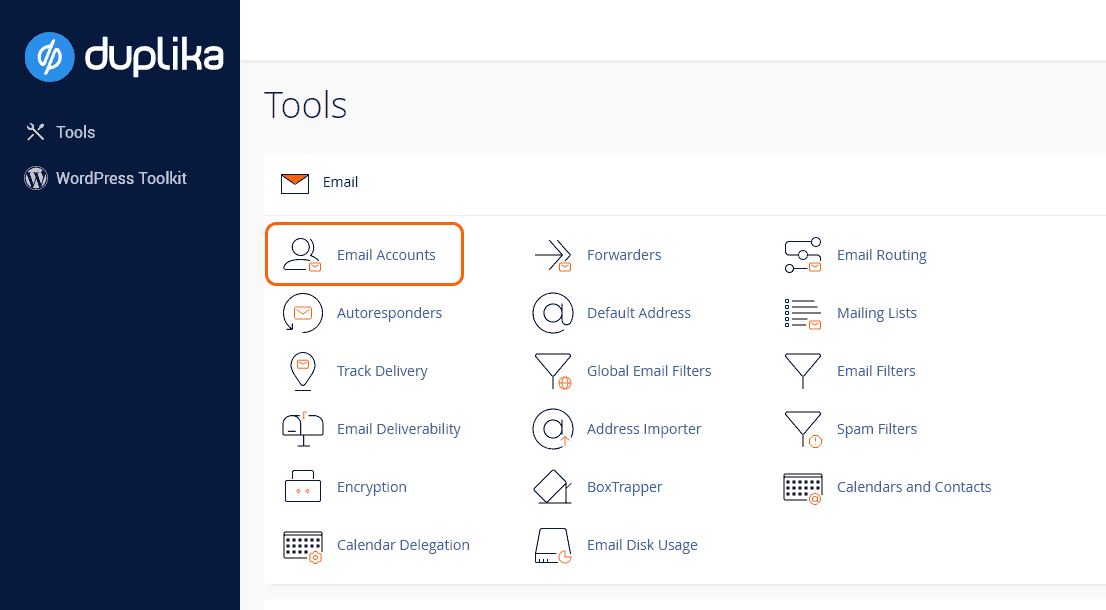
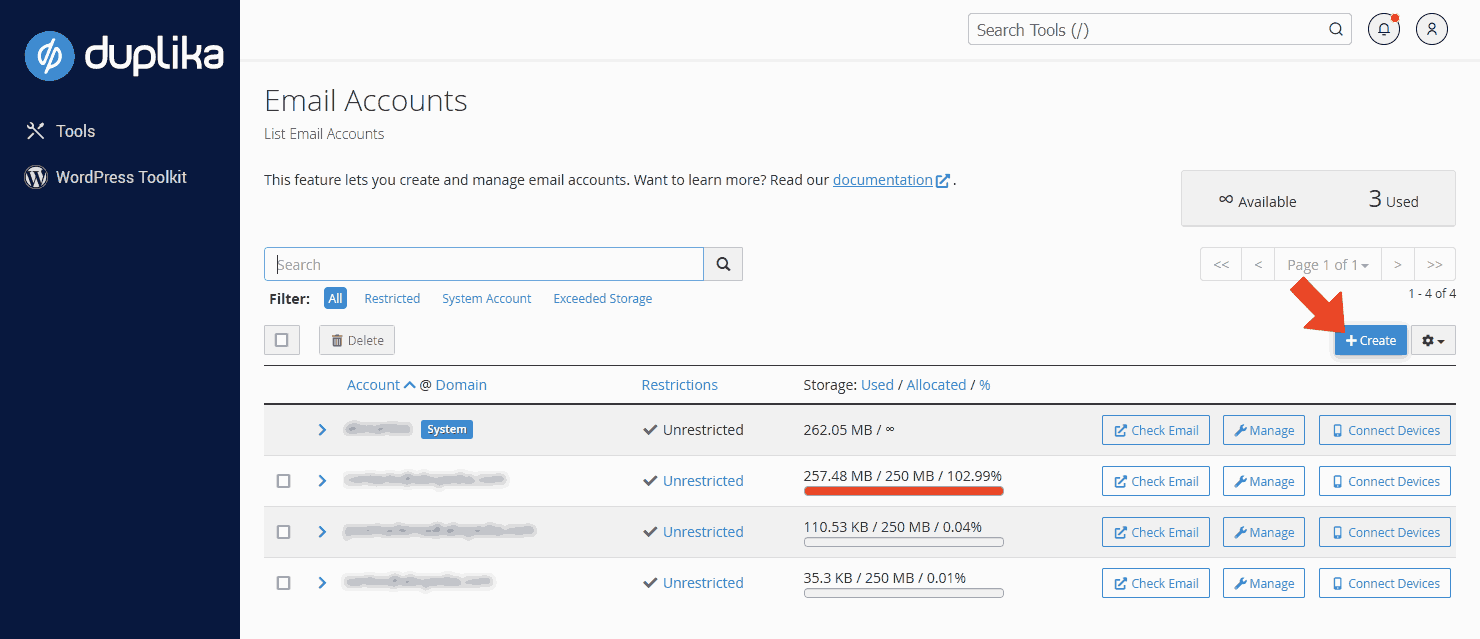
Hecho esto, veremos una pantalla con el botón de Crear. Es lo que debemos cliquear para crear cuentas de correo nuevas. Si existen casillas de correo creadas con anterioridad, también las veremos acá (si nunca hemos creado ninguna cuenta, las columnas por lógica aparecerán vacías). Más sobre esta pantalla luego.
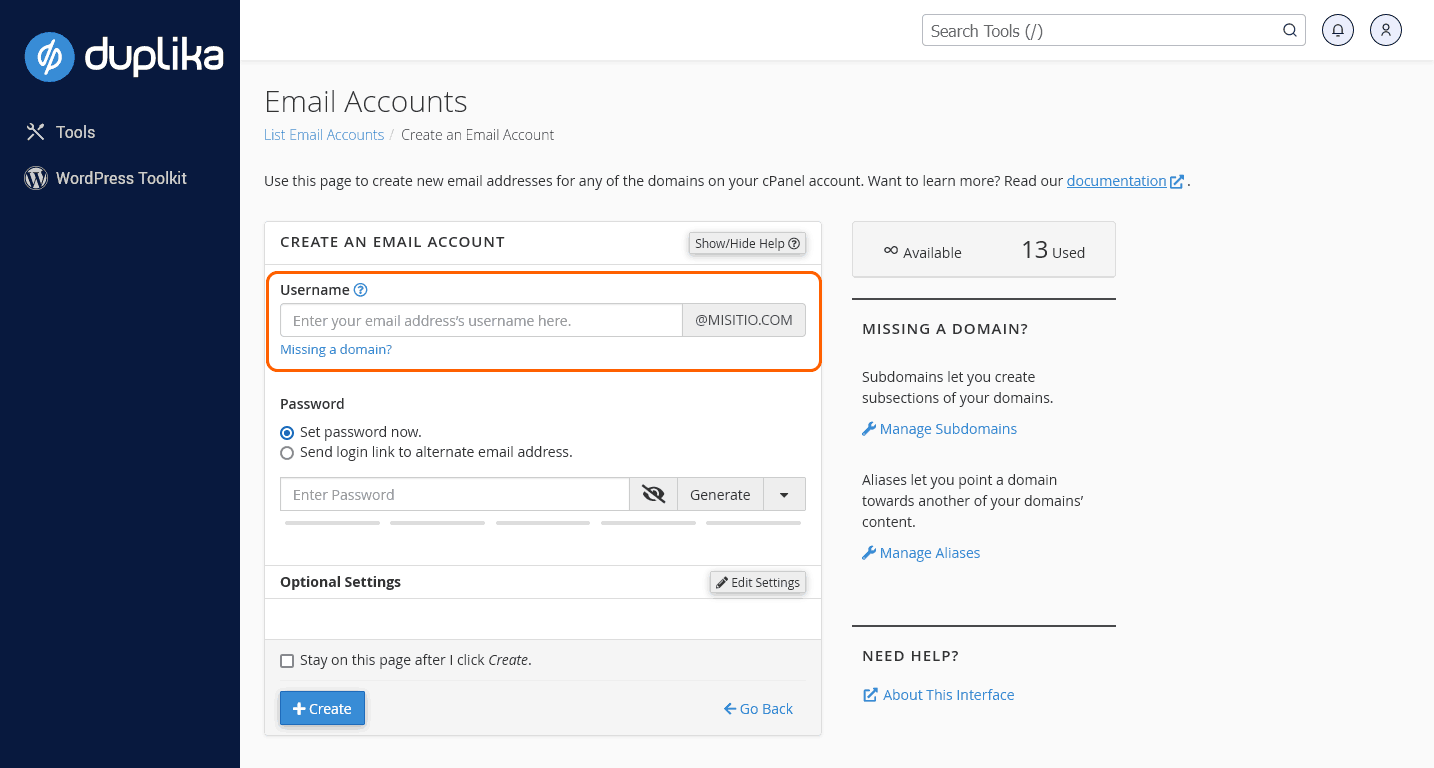
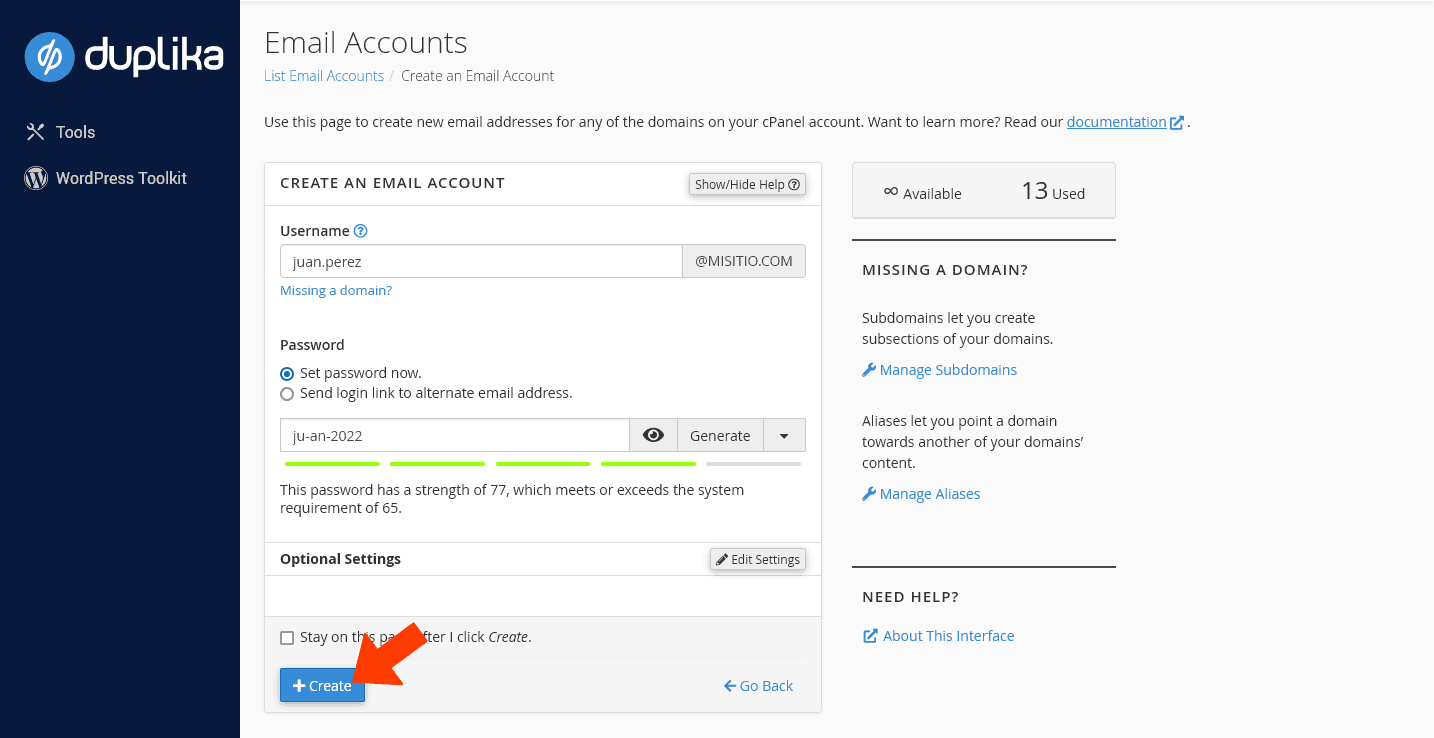
Tras este paso accederemos a la pantalla de creación de una nueva casilla. En el campo destacado con un recuadro naranja (captura inferior) ingresaremos el nombre de la casilla SIN @misitio.com
Por ejemplo, podemos ingresar juan.perez ó administración o ventas o info o contacto o cualquier otro nombre de casilla según nuestra necesidad.
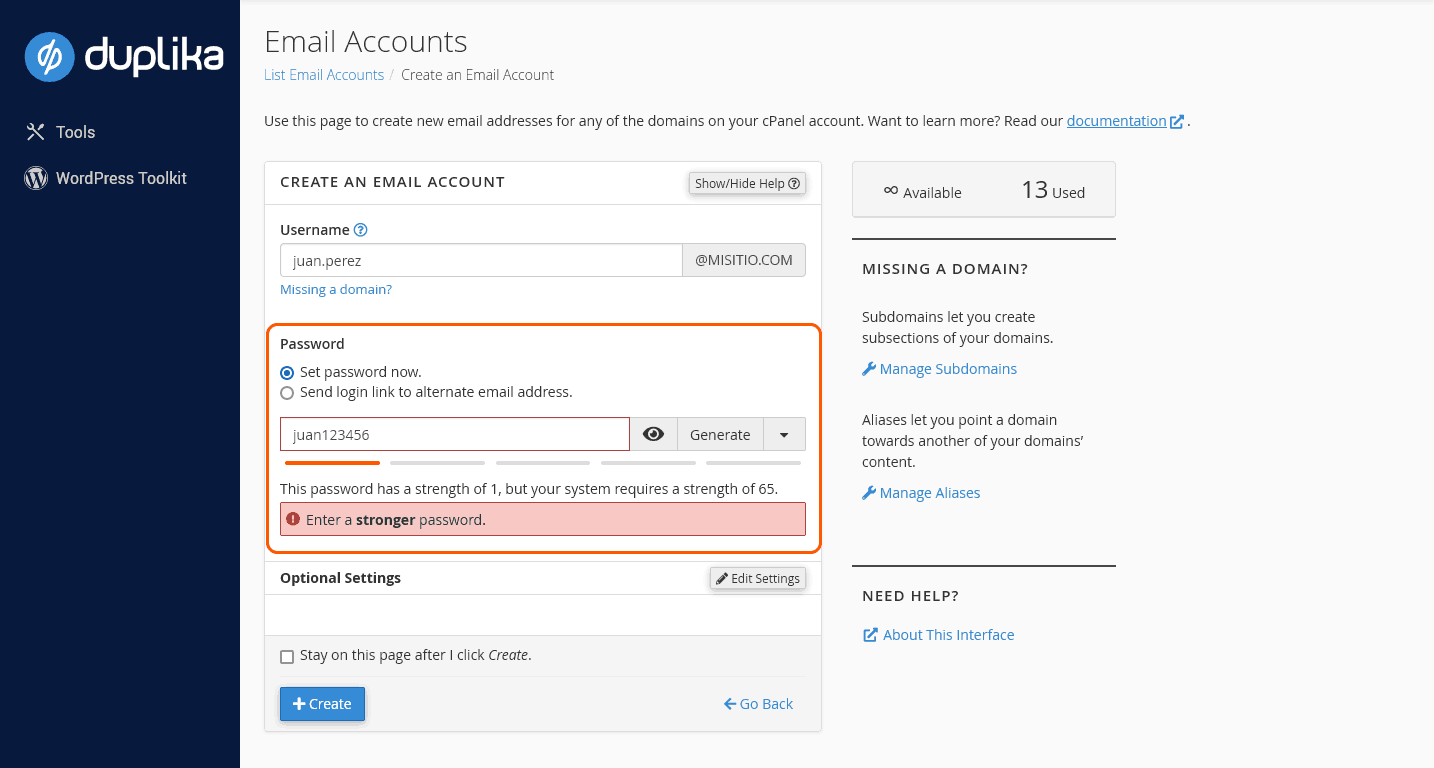
En el campo inferior crearemos una contraseña. Si lo deseamos, podemos hacer clic sobre el botón Generate para crear una contraseña al azar, extremadamente fuerte —por su parte, una contraseña "débil" sería algo en el estilo de 123456, o bien nuestro nombre y un año, o bien cualquier "obviedad" que un robot pudiera revelar a base de "fuerza bruta" (probar automáticamente combinaciones de números y palabras comunes).
El sistema nos indica, con barras horizontales, la seguridad de nuestra contraseña. Esto nos servirá de guía para poder estar tranquilos con respecto a la dificultad de la contraseña.
Tras ingresar una contraseña que el sistema nos valida como segura, haremos clic al botón azul Create y listo!
En la pantalla que sigue veremos un mensaje de confirmación y, además, nuestra casilla recién creada en la lista de correos.
Junto a la casilla, tres botones podrán sernos de utilidad.
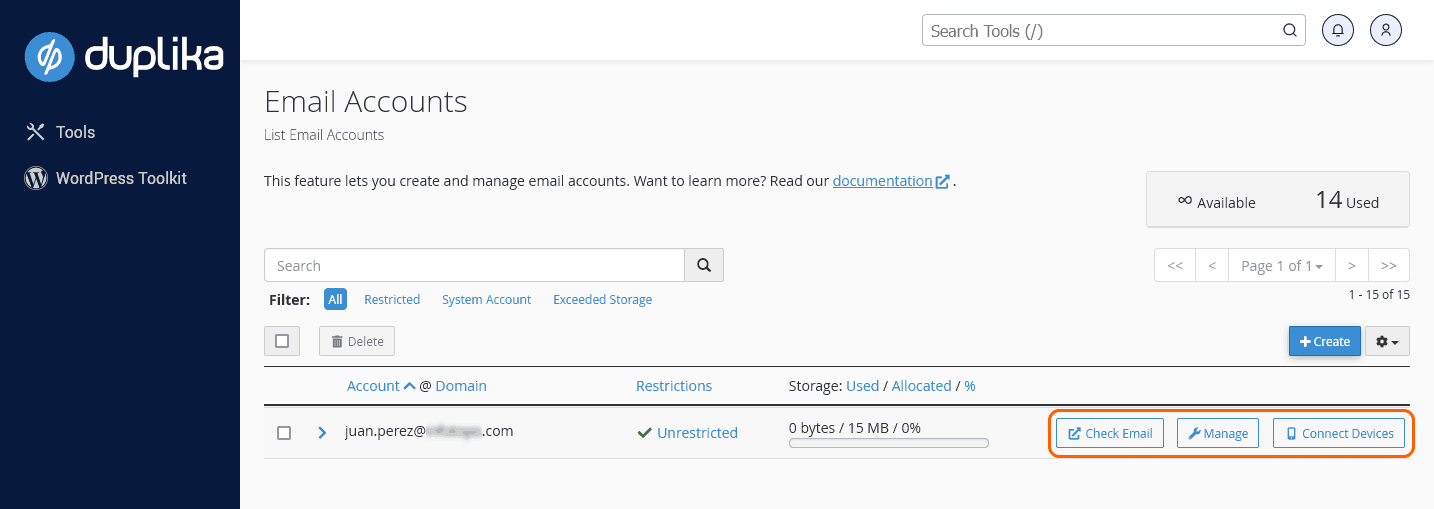
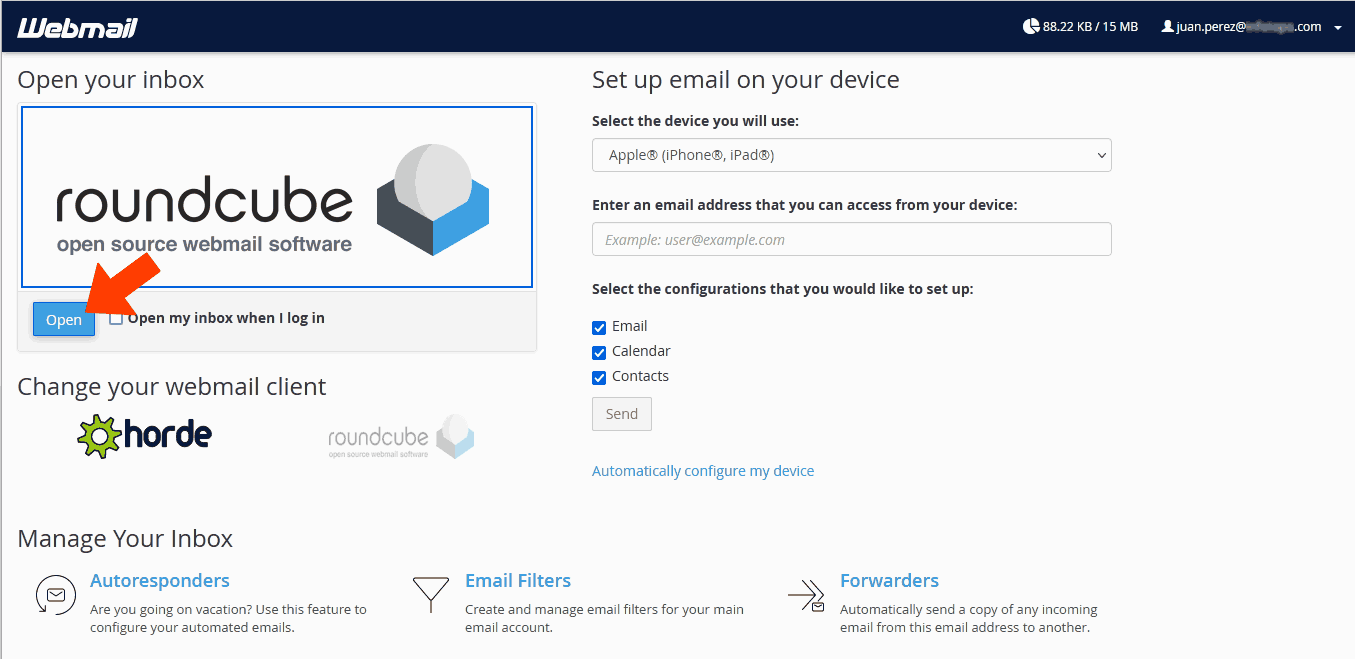
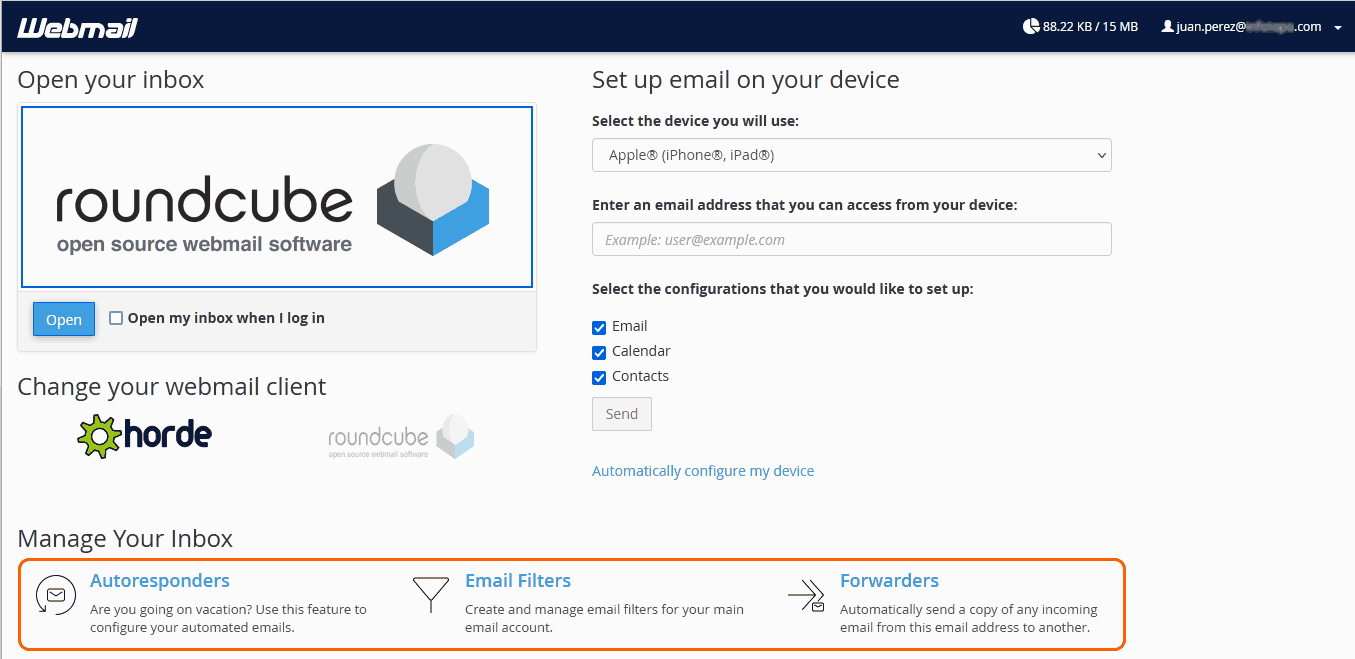
El primer botón, Check Email, nos permite acceder al webmail, es decir el cliente online para redactar correos, borrar, crear reglas, carpetas, etc. La primera ventana nos presenta varias opciones y herramientas, pero si sólo pretendemos ingresar al correo creado haremos clic sobre el botón señalado en la captura inferior.
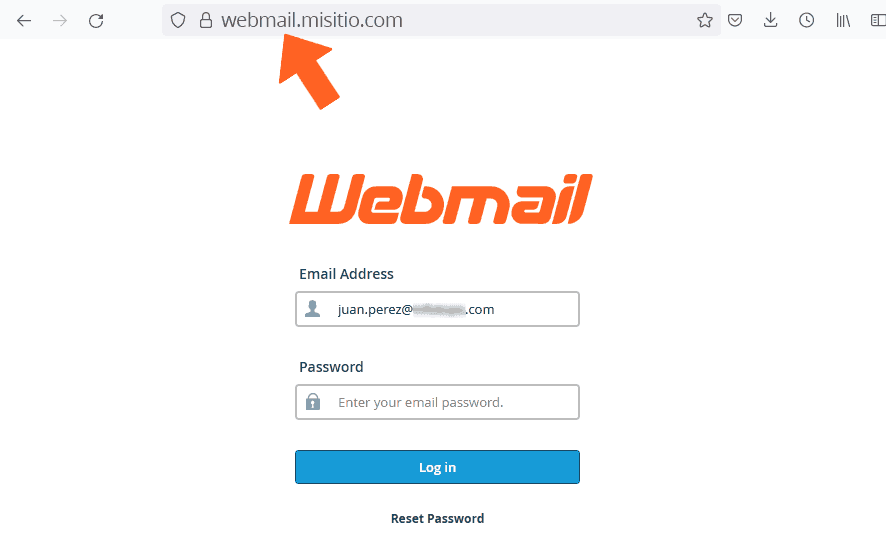
Recordemos asimismo que siempre podremos ingresar a nuestros correos de manera cómoda vía la dirección webmail.misitio.com
Volviendo a la pantalla de ingreso por cPanel, señalamos herramientas que eventualmente podrían ser de utilidad, como la creación de correos de autorespuesta o de reglas de filtrado.
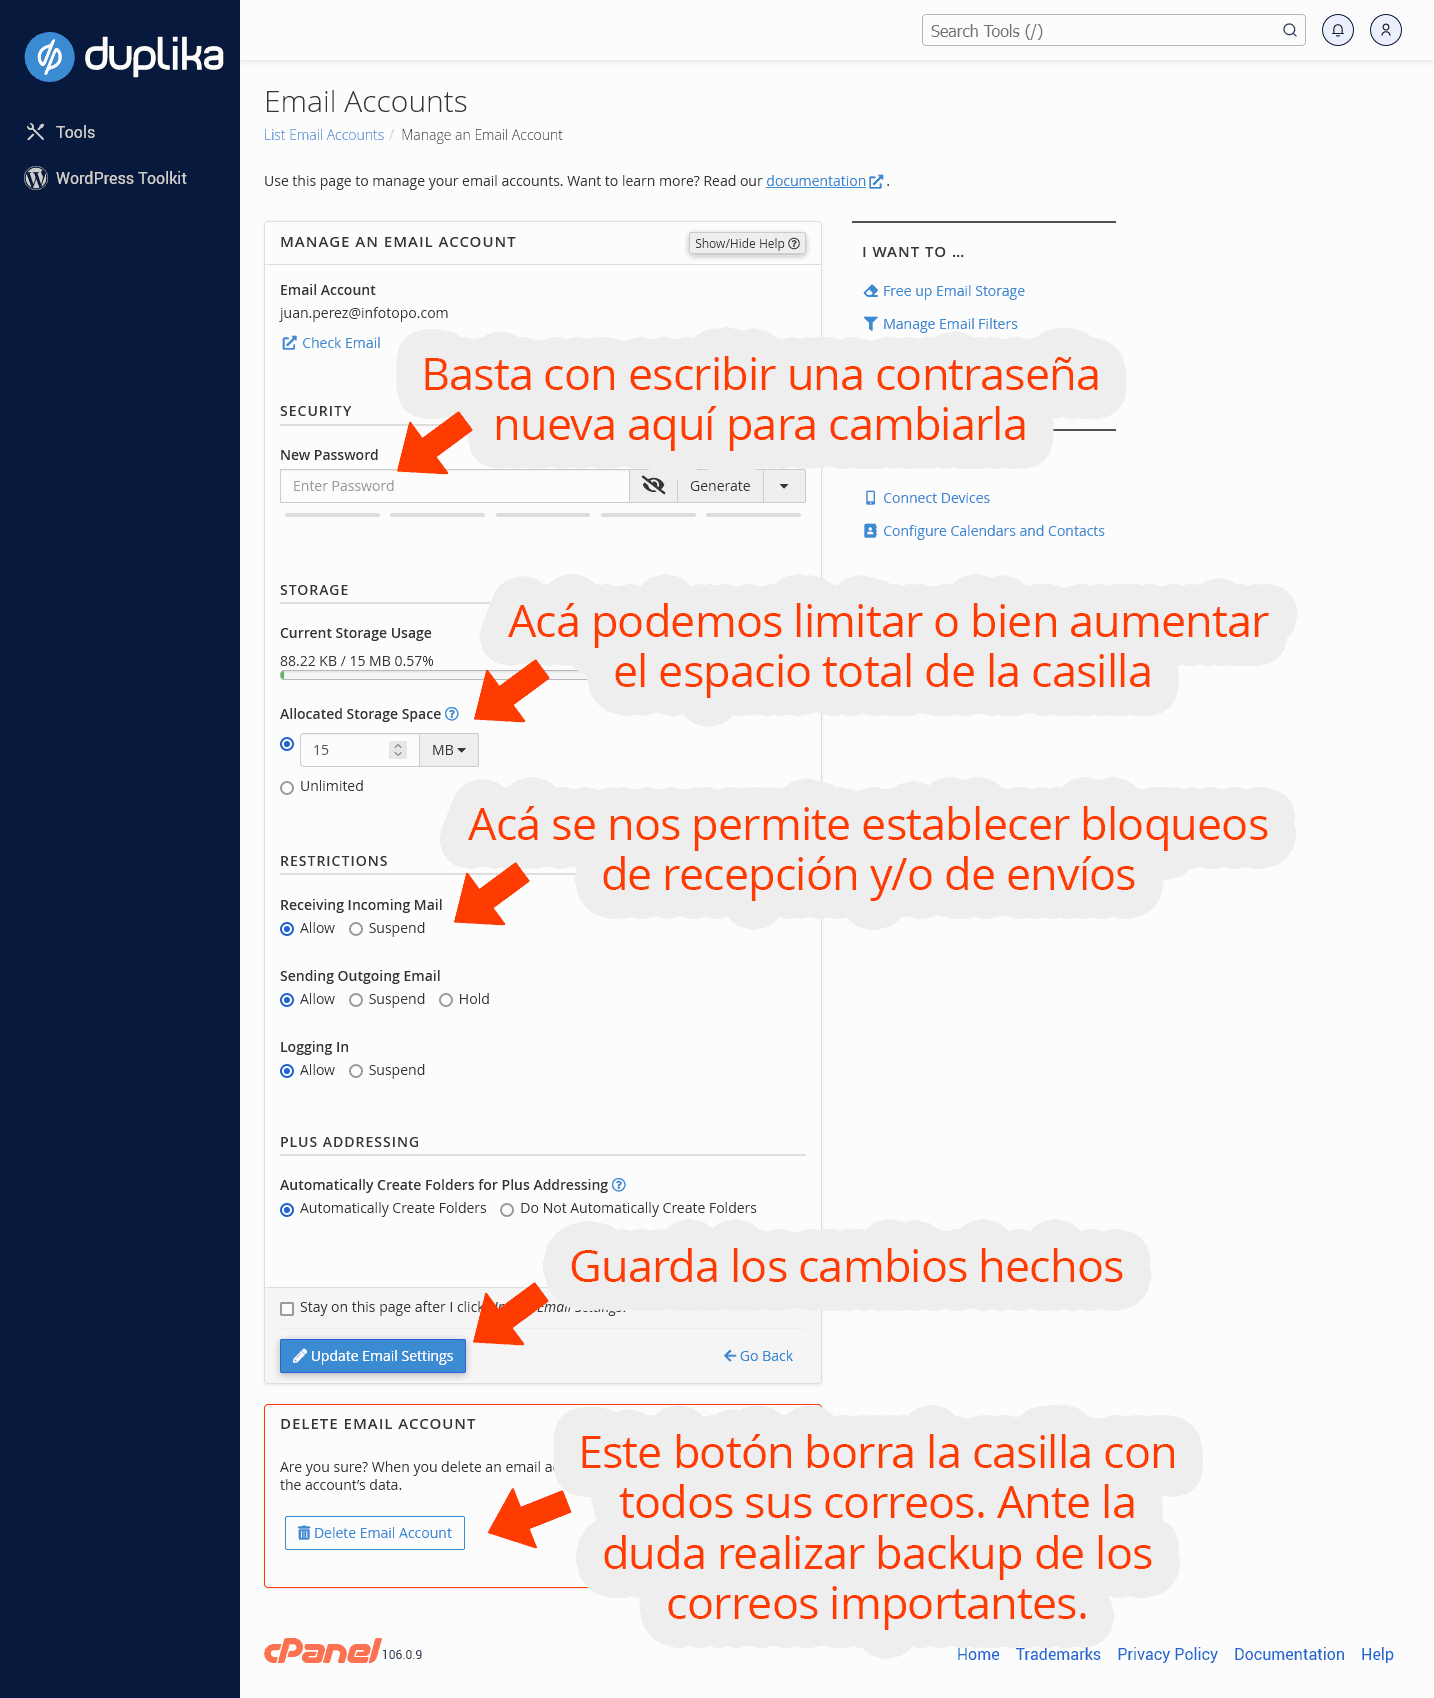
El segundo botón junto al correo creado, Manage, nos permitirá administrar la casilla.
Tras hacer clic, veremos el siguiente panel de control. En la captura explicamos cada detalle.
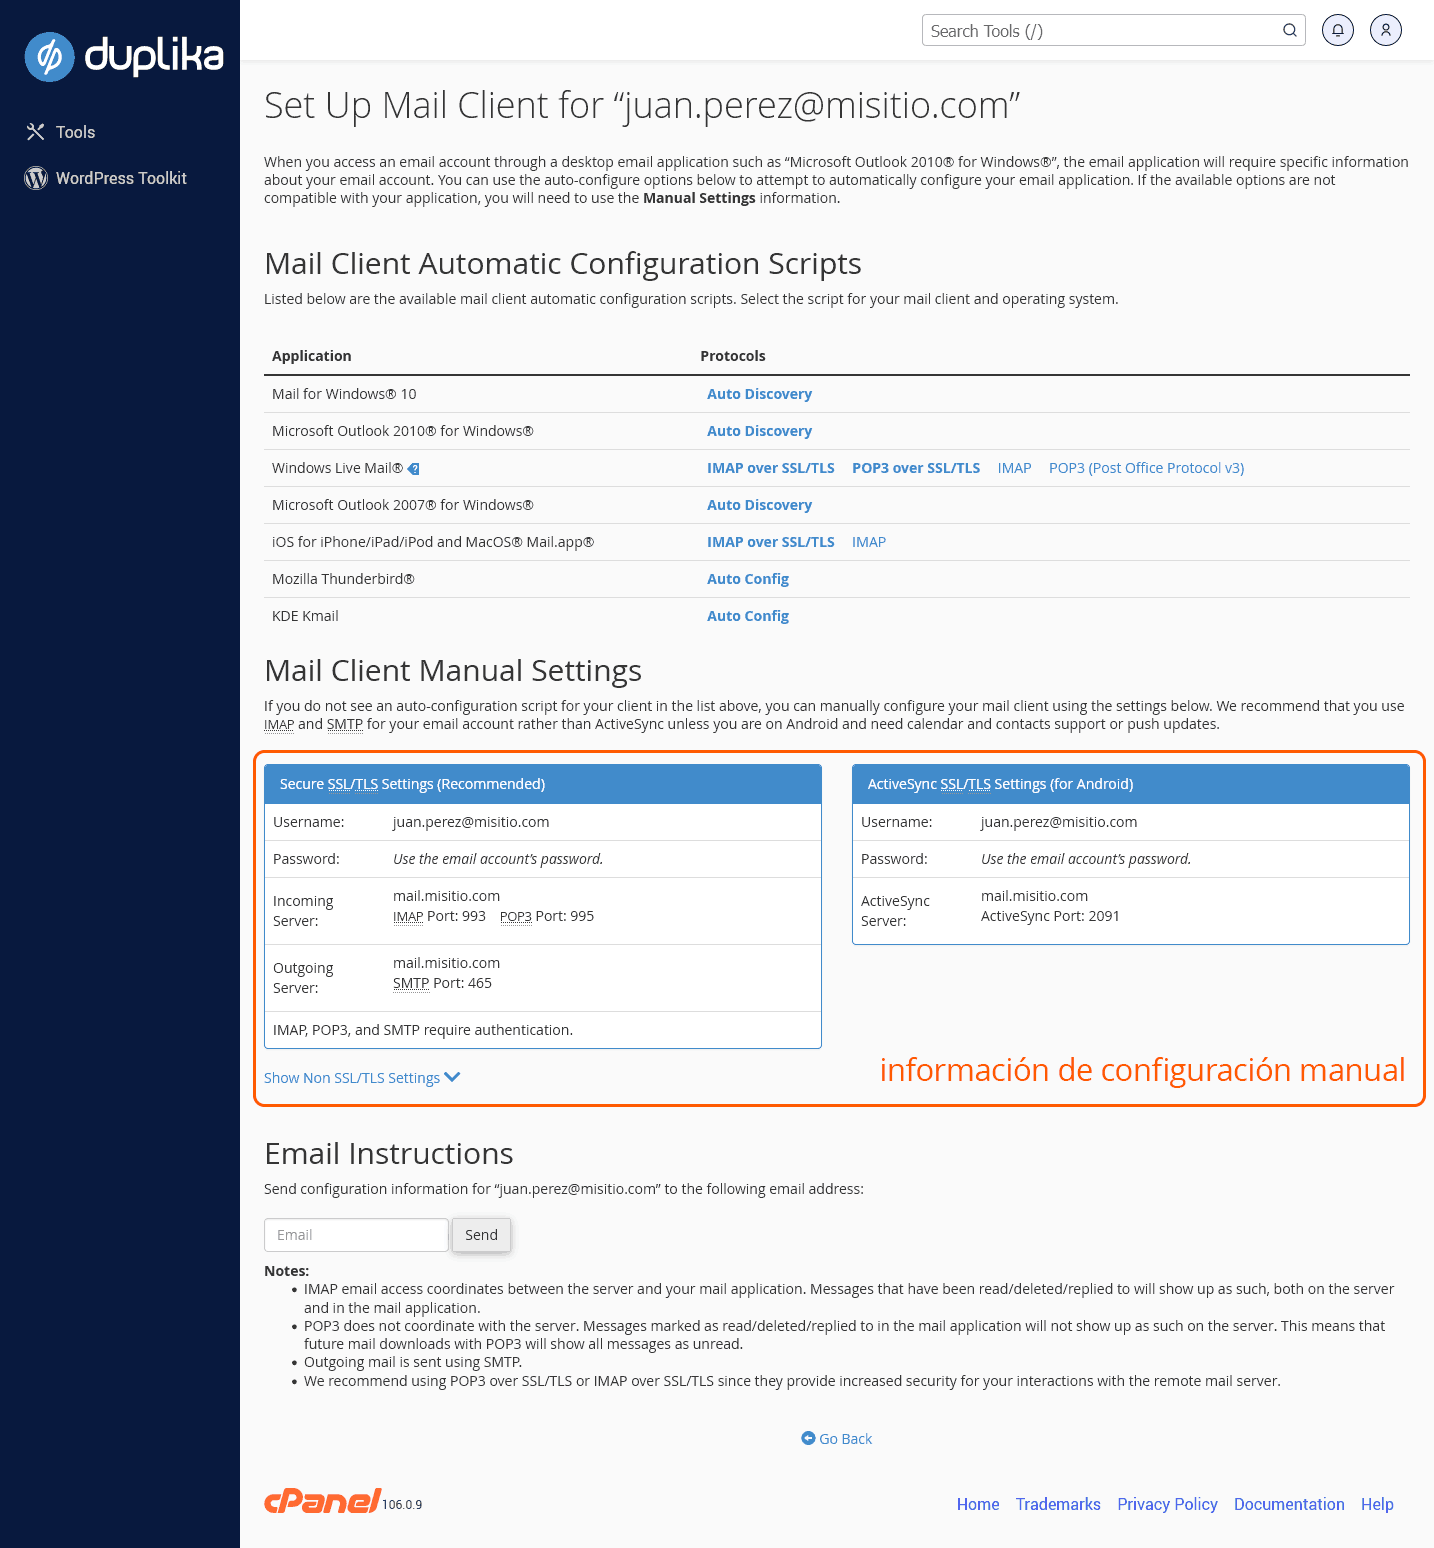
El tercer botón de "Connect Devices" facilita que configuremos nuestro correo en diferentes clientes y plataformas. Por ejemplo, en Outlook. Nótese que la primera sección del panel crea archivos de configuración para diferentes alternativas. Con ese archivo que descargaremos podremos incorpar nuestro correo a la plataforma seleccionada con un clic. También disponemos de los datos de configuración para realizar esta acción de manera manual.
Hemos llegado al final de la guía. Agradecemos la lectura y les deseamos éxitos en sus emprendimientos.