

Subir y administrar archivos de tu cuenta
Actualizado hace 3 meses
Existen dos métodos para subir, descargar y editar los archivos existentes en tu hosting.
El primero (y más tradicional) es través de tu panel de control, en la opción Administrador de Archivos.
El administrador de archivos en cPanel
Primero, accede a tu panel de control ingresando a la dirección cómo se indica abajo (reemplazando misitio.com por el nombre de tu dominio correcto):

Una vez ingresado, busca la herramienta Administrador de archivos.
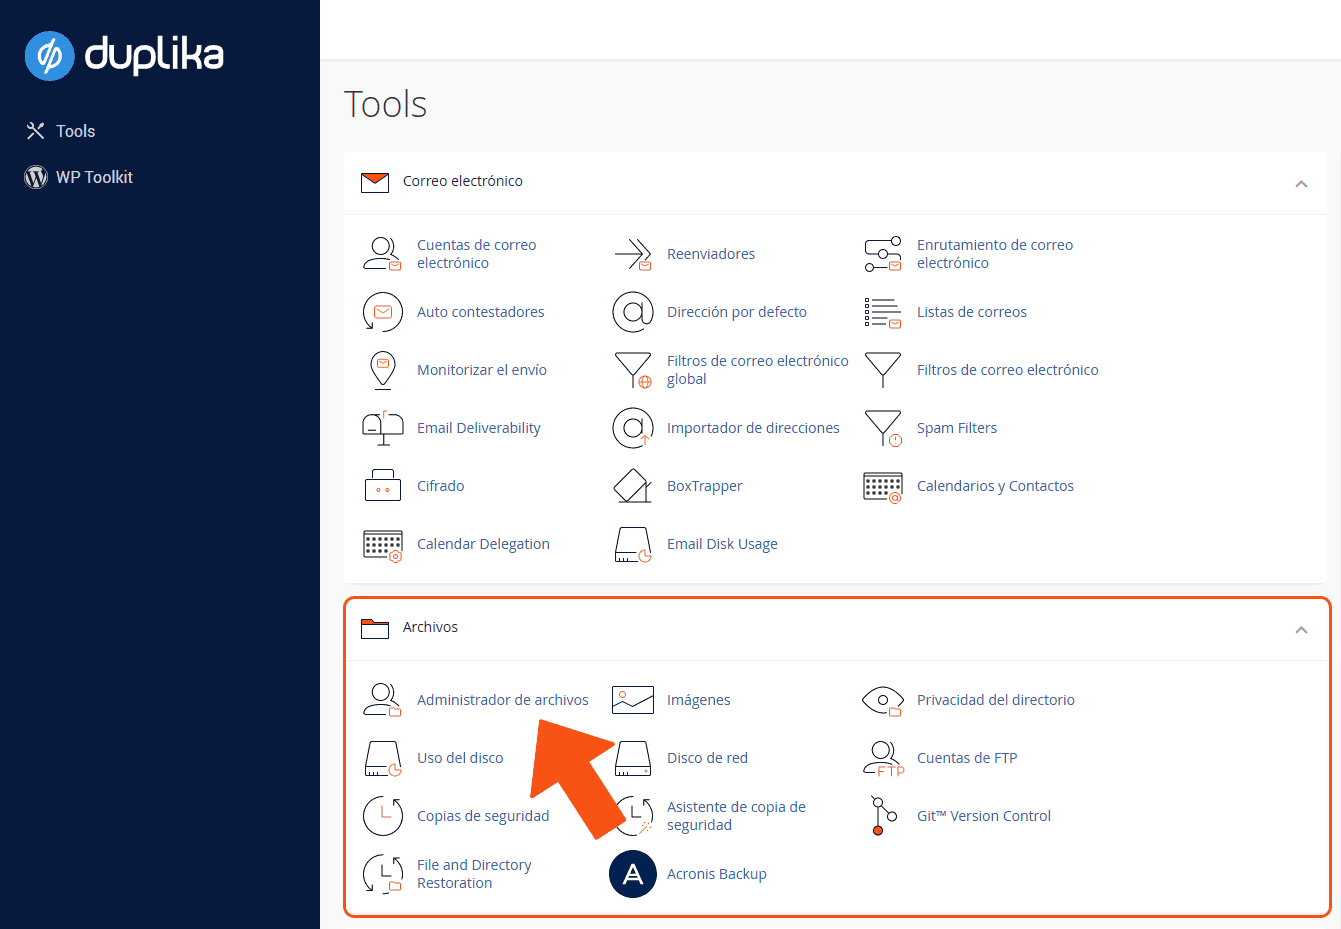
Tras hacer clic en la herramienta señalada, veremos una pantalla prácticamente idéntica a la captura inferior:
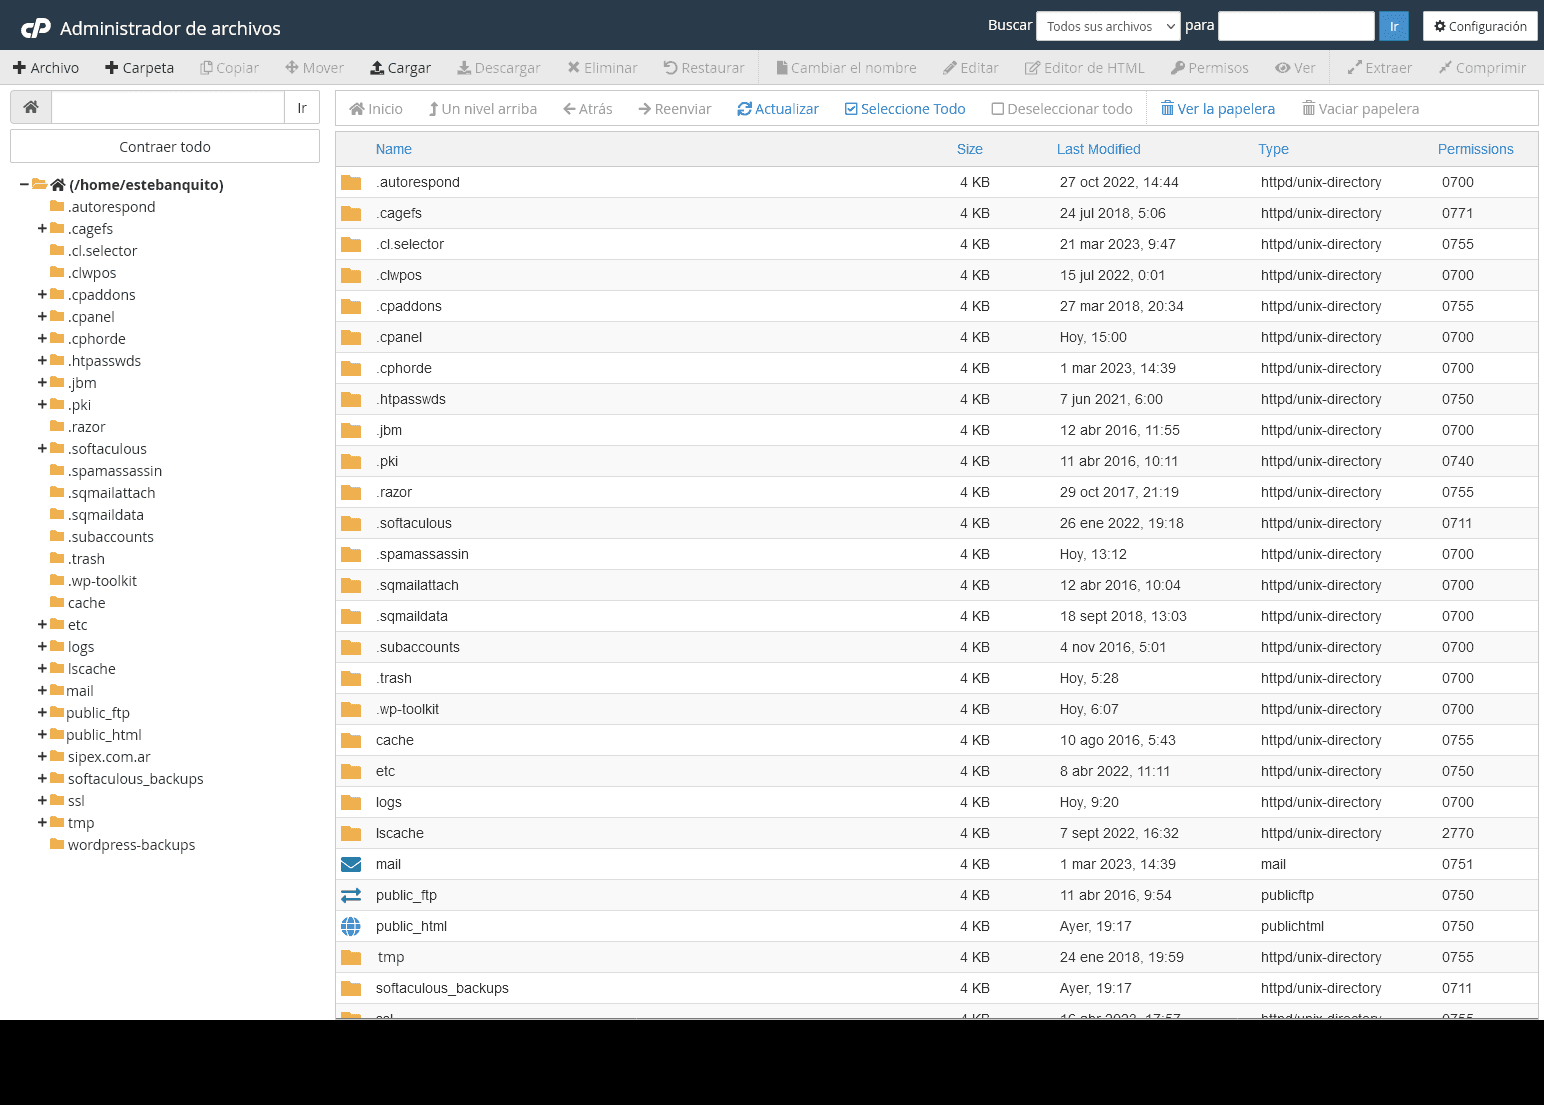
La administración de archivos de comporta de una manera muy similar al de un explorador de archivos de Windows. Para realizar acciones, selecciona el o los archivos que deseas copiar o borrar o renombrar. Las herramientas apropiadas se "encenderán" en la barra de herramientas superior, así:
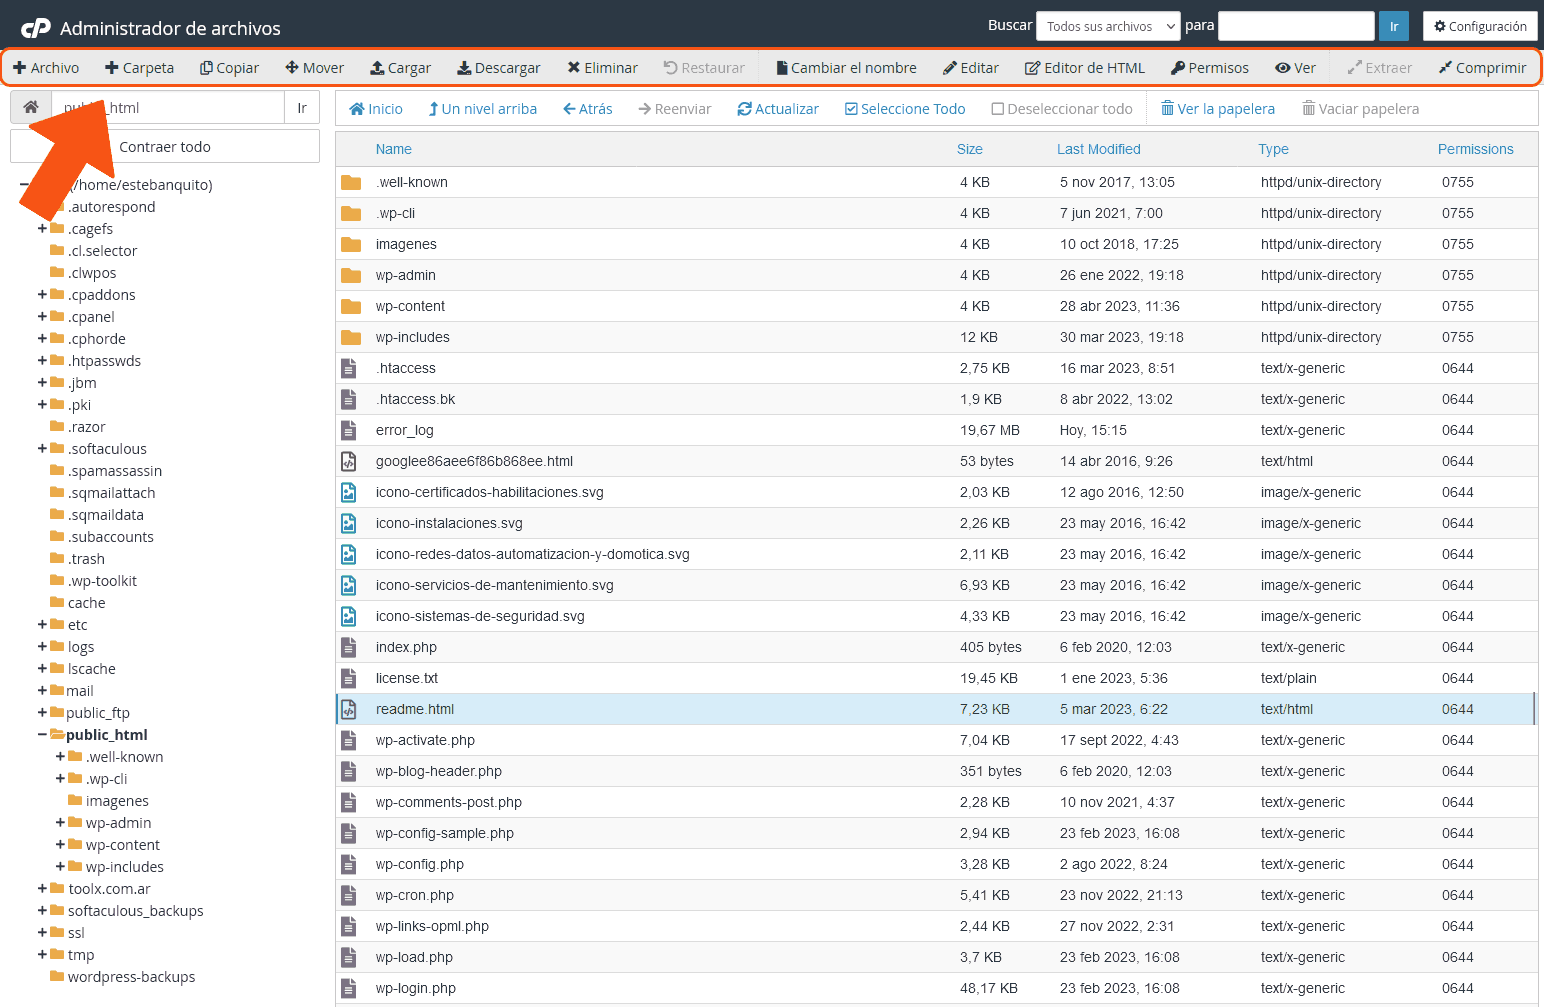
Como te mostramos en esta captura, se brindan opciones incluso para descargar archivos, o subir nuevos. También existe una opción para editar los permisos.
Alternativa: emplear un programa (cliente) FTP
La segunda alternativa es a través de FTP ó File Transfer Protocol. Aquí en lugar de emplear una herramienta online como es cPanel y su Administrador de archivos, deberás descargar un programa gratuito llamado FileZilla.
Descargado este programa, debes instalarlo, correrlo y configurar el acceso a tu sitio empleando los datos de acceso que te hemos enviado en el email de bienvenida cuando contrataste tu plan.
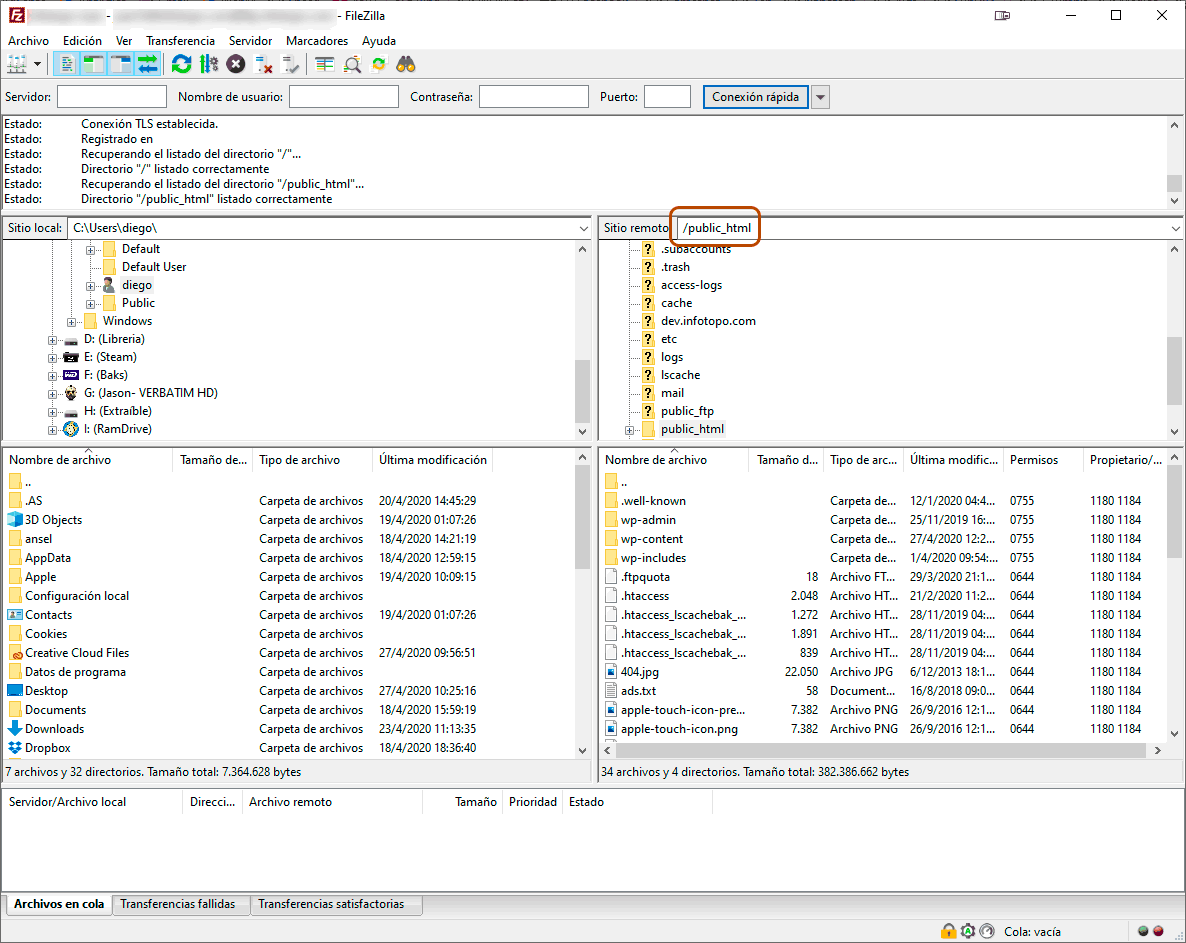
Los archivos de un sitio por lo general se alojan dentro de la carpeta public_html. En la captura superior puedes ver dos columnas: la primera, a la izquierda, es el explorador de archivos locales (es decir de tu computadora); a la derecha podrás ver y realizar cualquier acción con los archivos remotos (es decir en el servidor).
Arrastrar y soltar archivos en la ventana derecha los sube al servidor de manera instantánea, así que asegúrate de entrar a la carpeta indicada para realizar esta acción (por ejemplo, public_html/wp-content/plugins)
FileZilla es una herramienta muy fácil de usar; sin embargo, y dependiendo de la acción que necesites realizar en el servidor, puede que la descarga de este cliente FTP no sea necesaria para acciones esporádicas.