

Wordfence Free: Installing and Activating a License
Updated last month
What is Wordfence? It’s a plugin designed for WordPress sites that significantly improves your website’s security. In fact, many administrators install it as one of their first steps when starting work on a new site.
This easy-to-follow guide explains, step by step, how to set it up on your site.
Installing Wordfence for free
Fortunately, although Wordfence has a paid PRO version, it also offers a free alternative that, honestly, is a favorite among the general public.
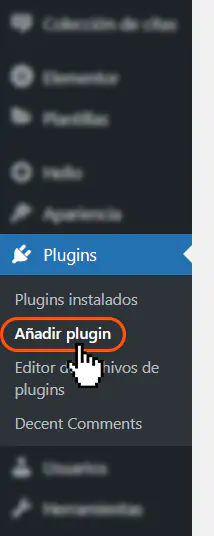
To install this free version, which is recommended for just about any site, go to Plugins → Add Plugin.
Next, search for "Wordfence" in the search field and, once the results appear, install the plugin shown in the screenshot below.
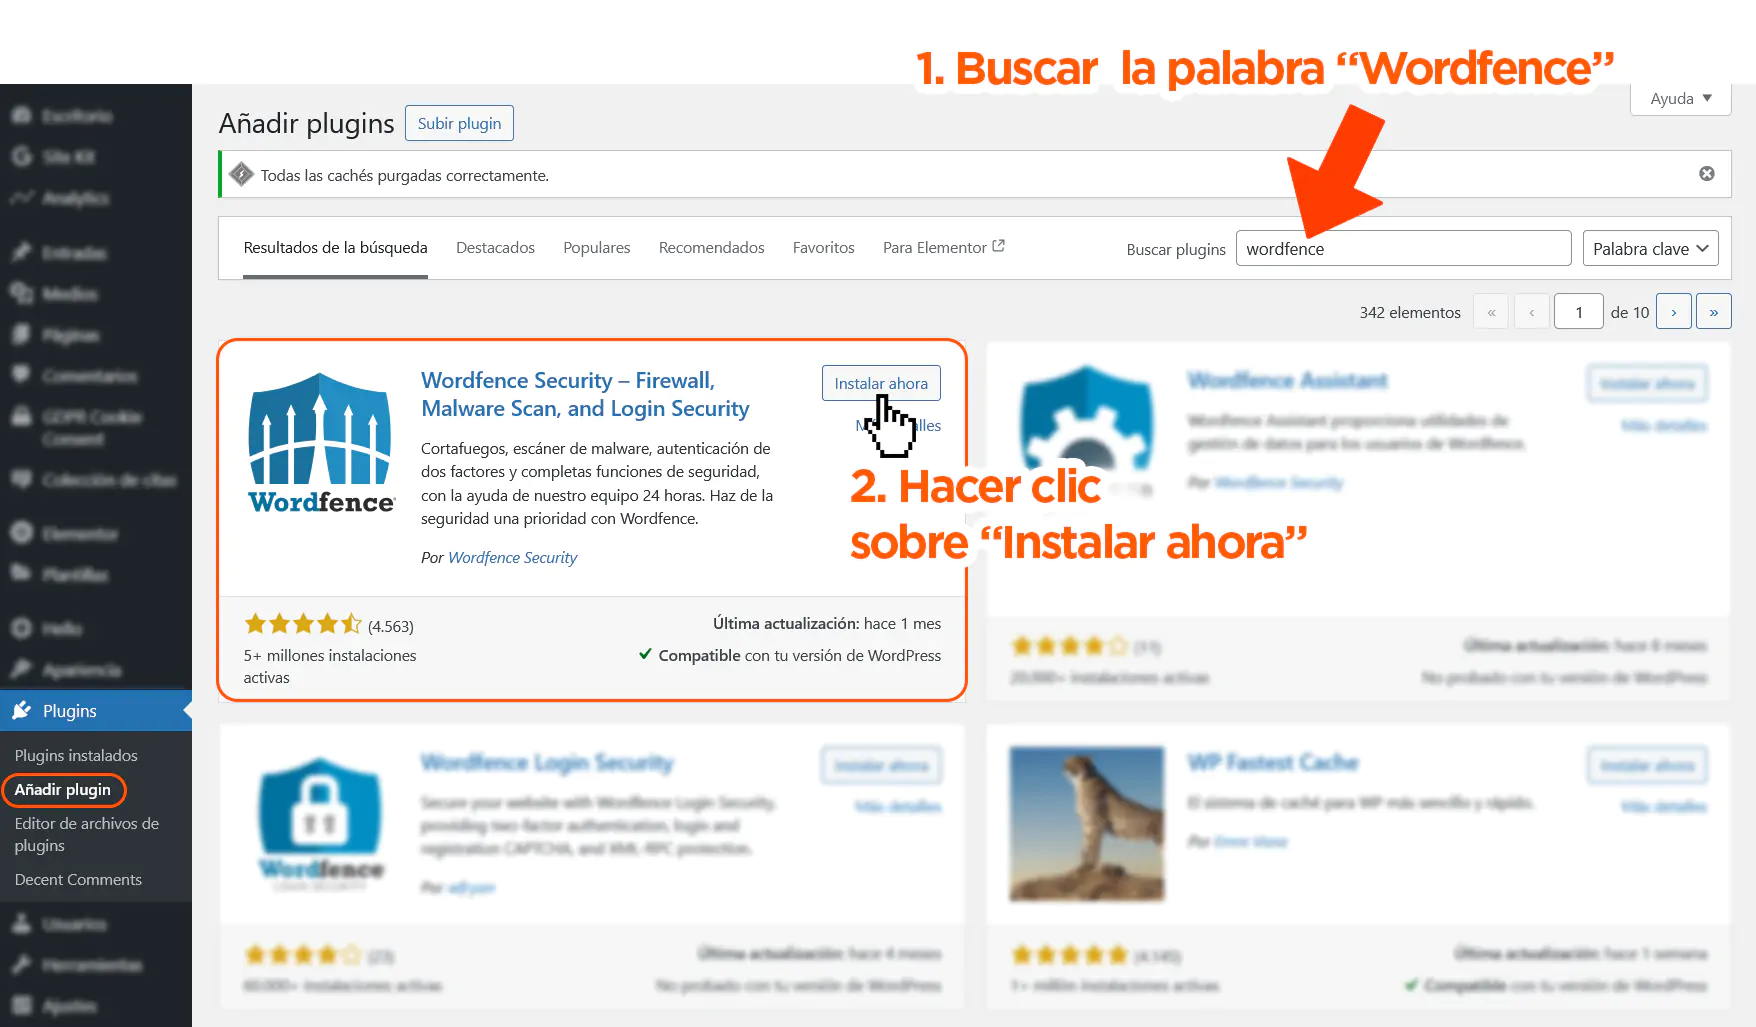
After the plugin has been downloaded to your site, the same "Install Now" button will change to "Activate." Click it again.
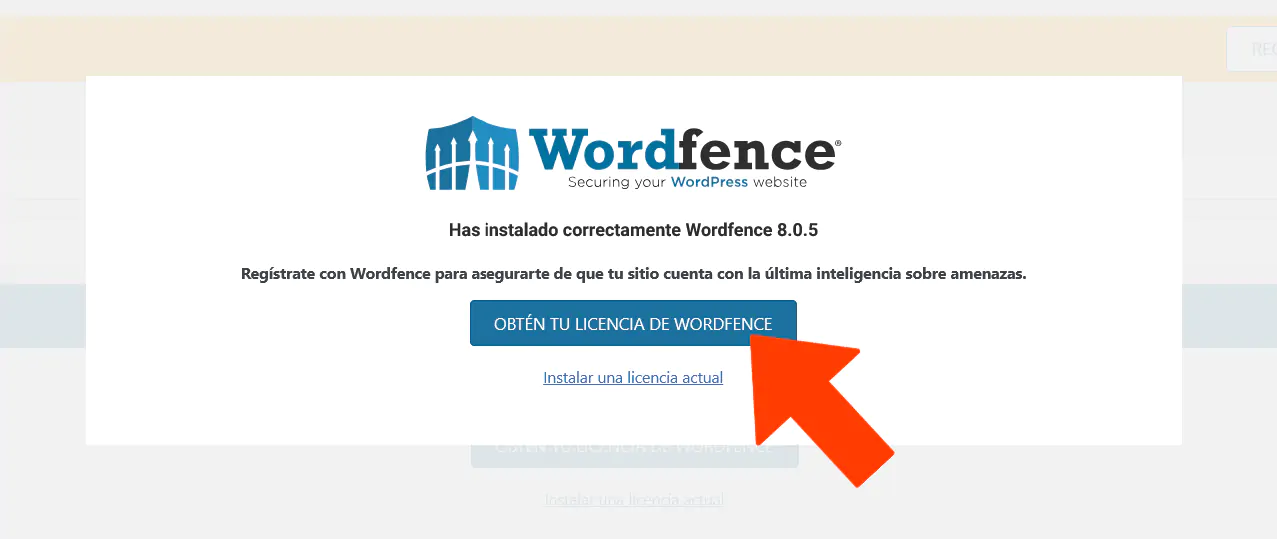
You’ll then see a pop-up asking you to get a license. Don’t worry, you don’t have to pay anything!
Click the blue button labeled GET A WORDFENCE LICENSE.
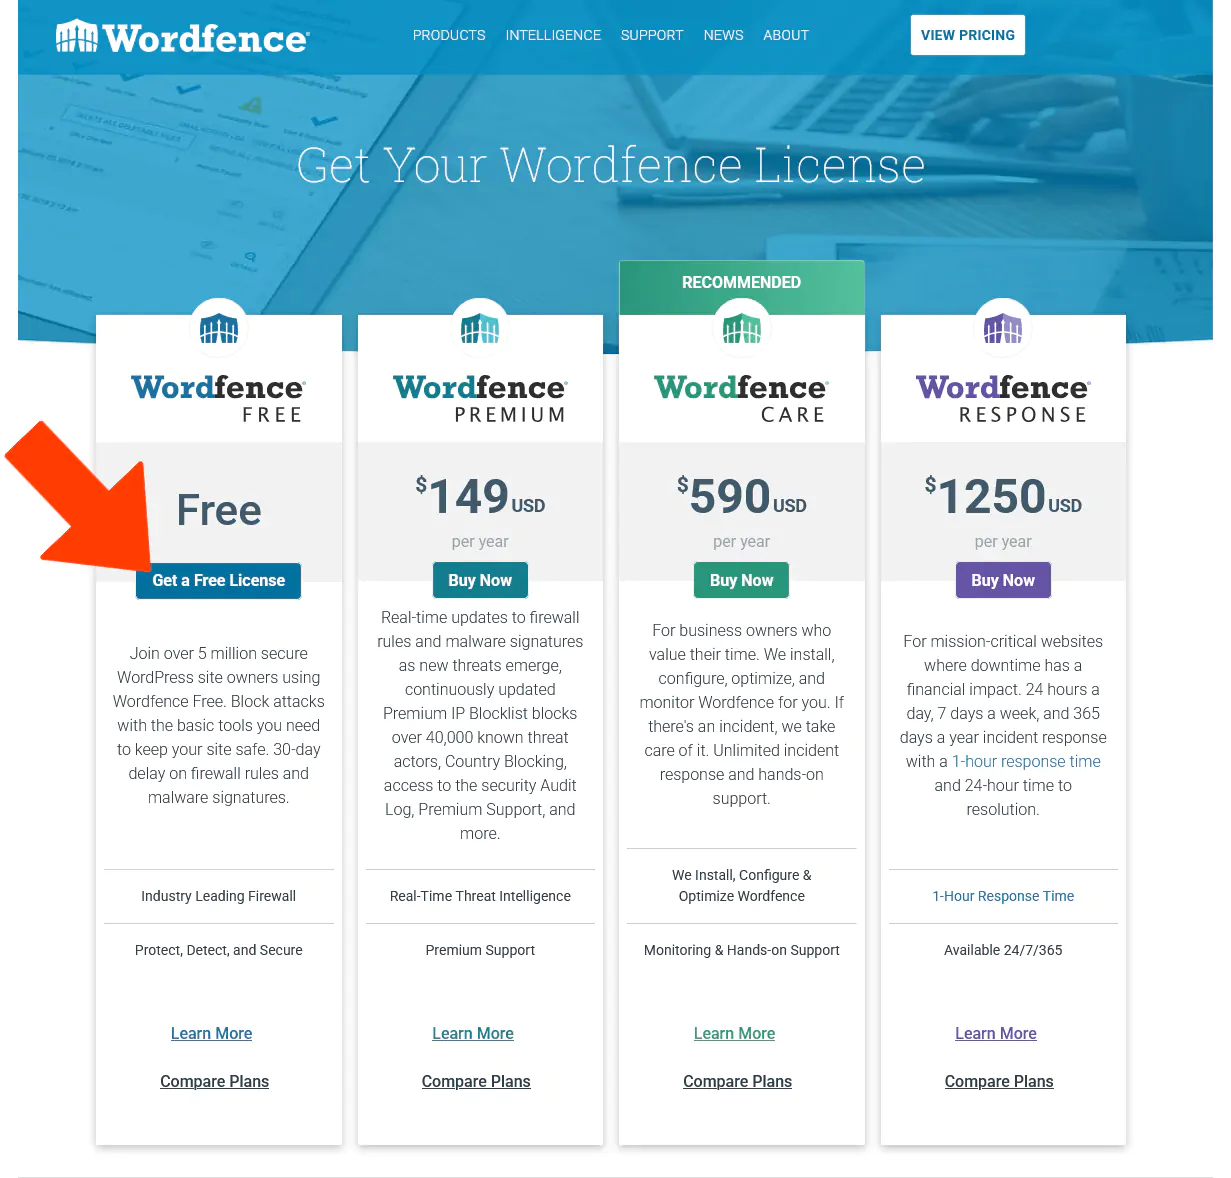
You don’t have to pay anything.
On the plans screen, simply choose the FREE PLAN.
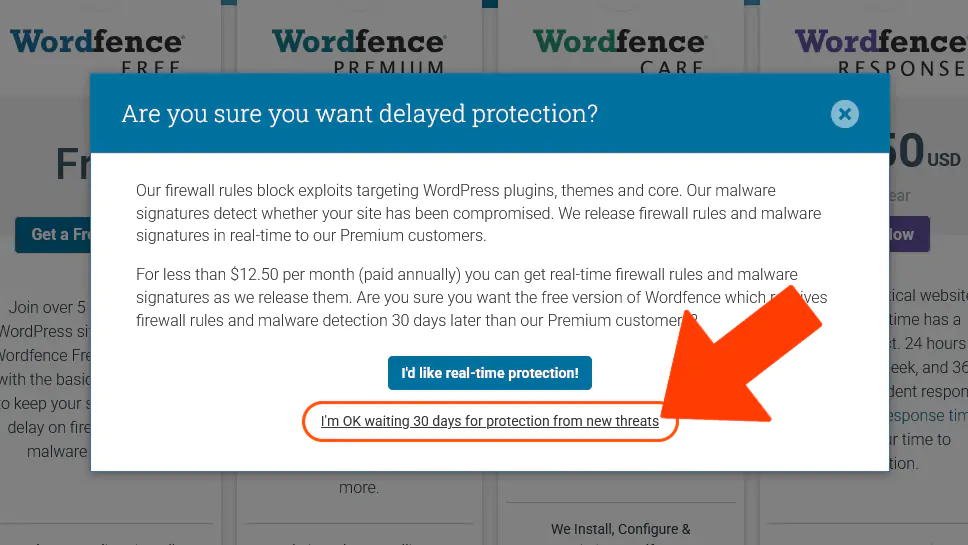
Next, Wordfence will show a message trying to persuade us to pay for its Premium version, highlighting the difference in protection speed. It says more or less the following:
Our firewall blocks attacks that attempt to exploit vulnerabilities in plugins, themes, and the WordPress core. We also have systems that detect whether your site has been infected with malware, so we recommend simply using the free version on our servers.
The free version is still secure, but it receives updates 30 days later. Are you sure you want to use the free version?
We’ll ignore this sales pitch by clicking the text indicated in the screenshot below.
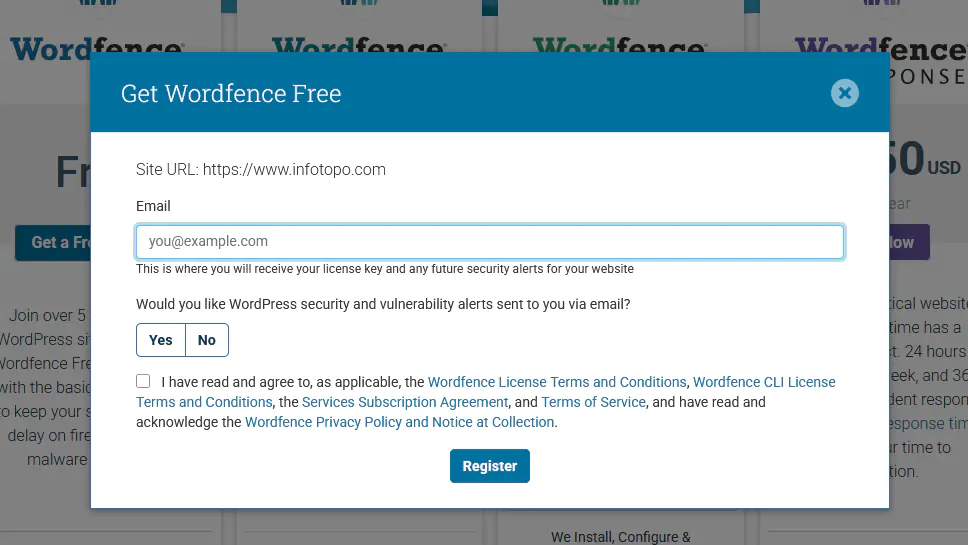
Next, we’ll create an account by entering our email address. We can also choose whether we want to receive alerts at that address (Yes/No). Each person can decide based on how cautious they want to be, although it’s probably helpful to know if our site is under attack so we can take action.
Finally, we must accept the Terms and Conditions by checking the box above the Register button.
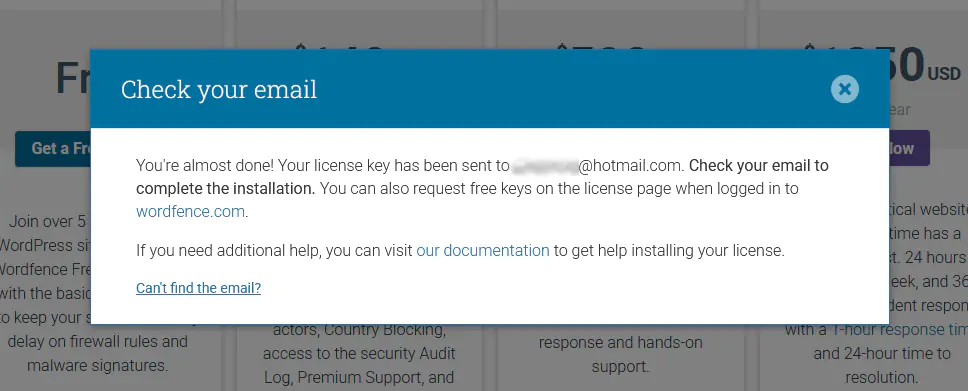
After a few seconds, our account will be created, and we’ll receive the product license key at the email address we entered.
When we check our email, we’ll find a message similar to the one below. The good news is that all we have to do is click the indicated button, and the product key will be loaded "magically" into our WordPress plugin.
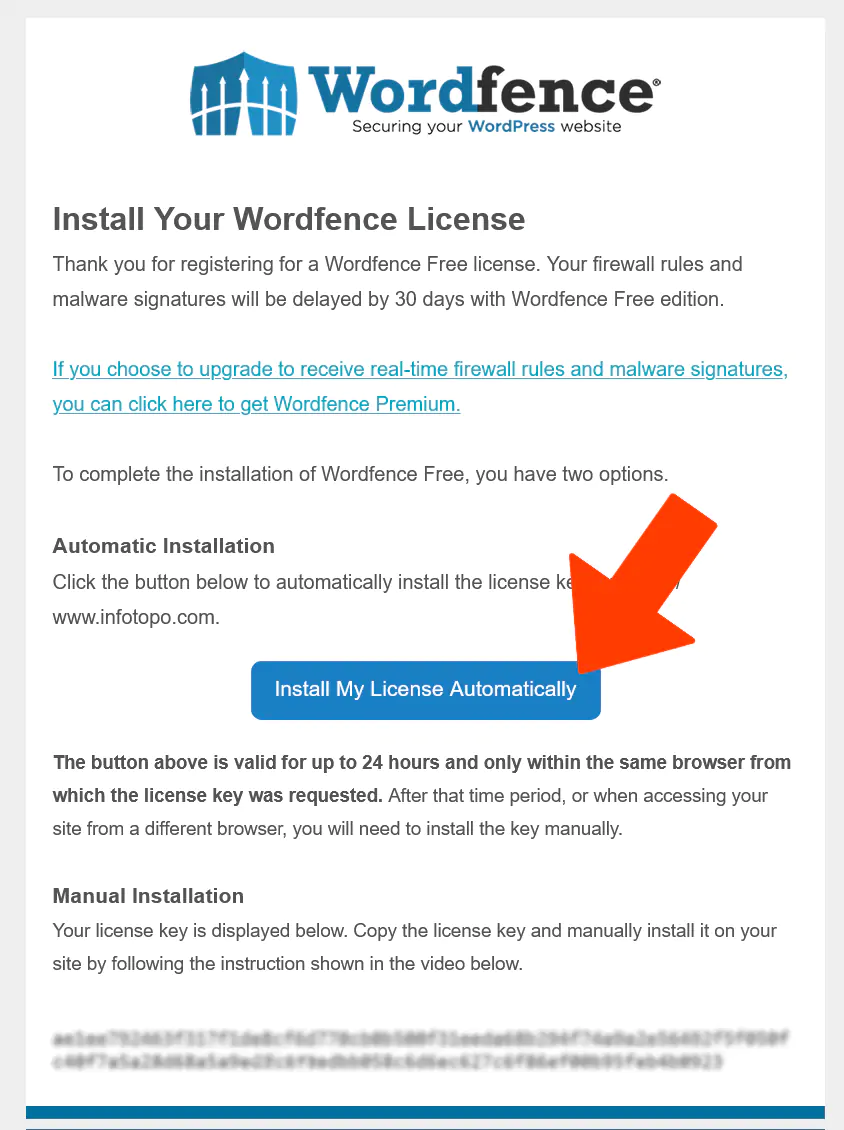
After clicking, our Dashboard will open with the key already loaded and ready to activate.
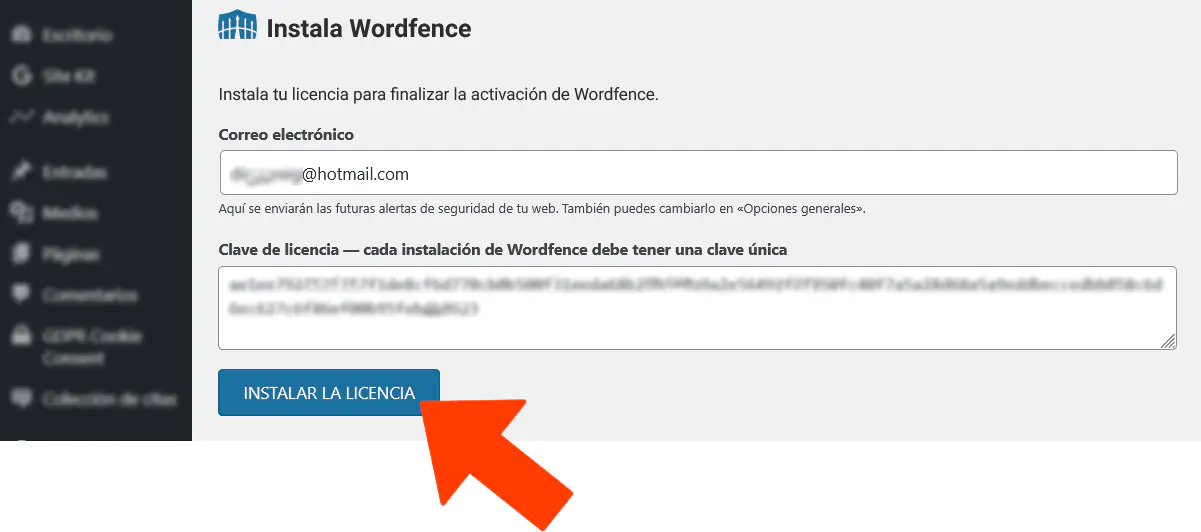
Once everything is up and running, we’ll see that this plugin is friendly enough to provide us with a quick tutorial. It’s worth watching since it only takes a few seconds.
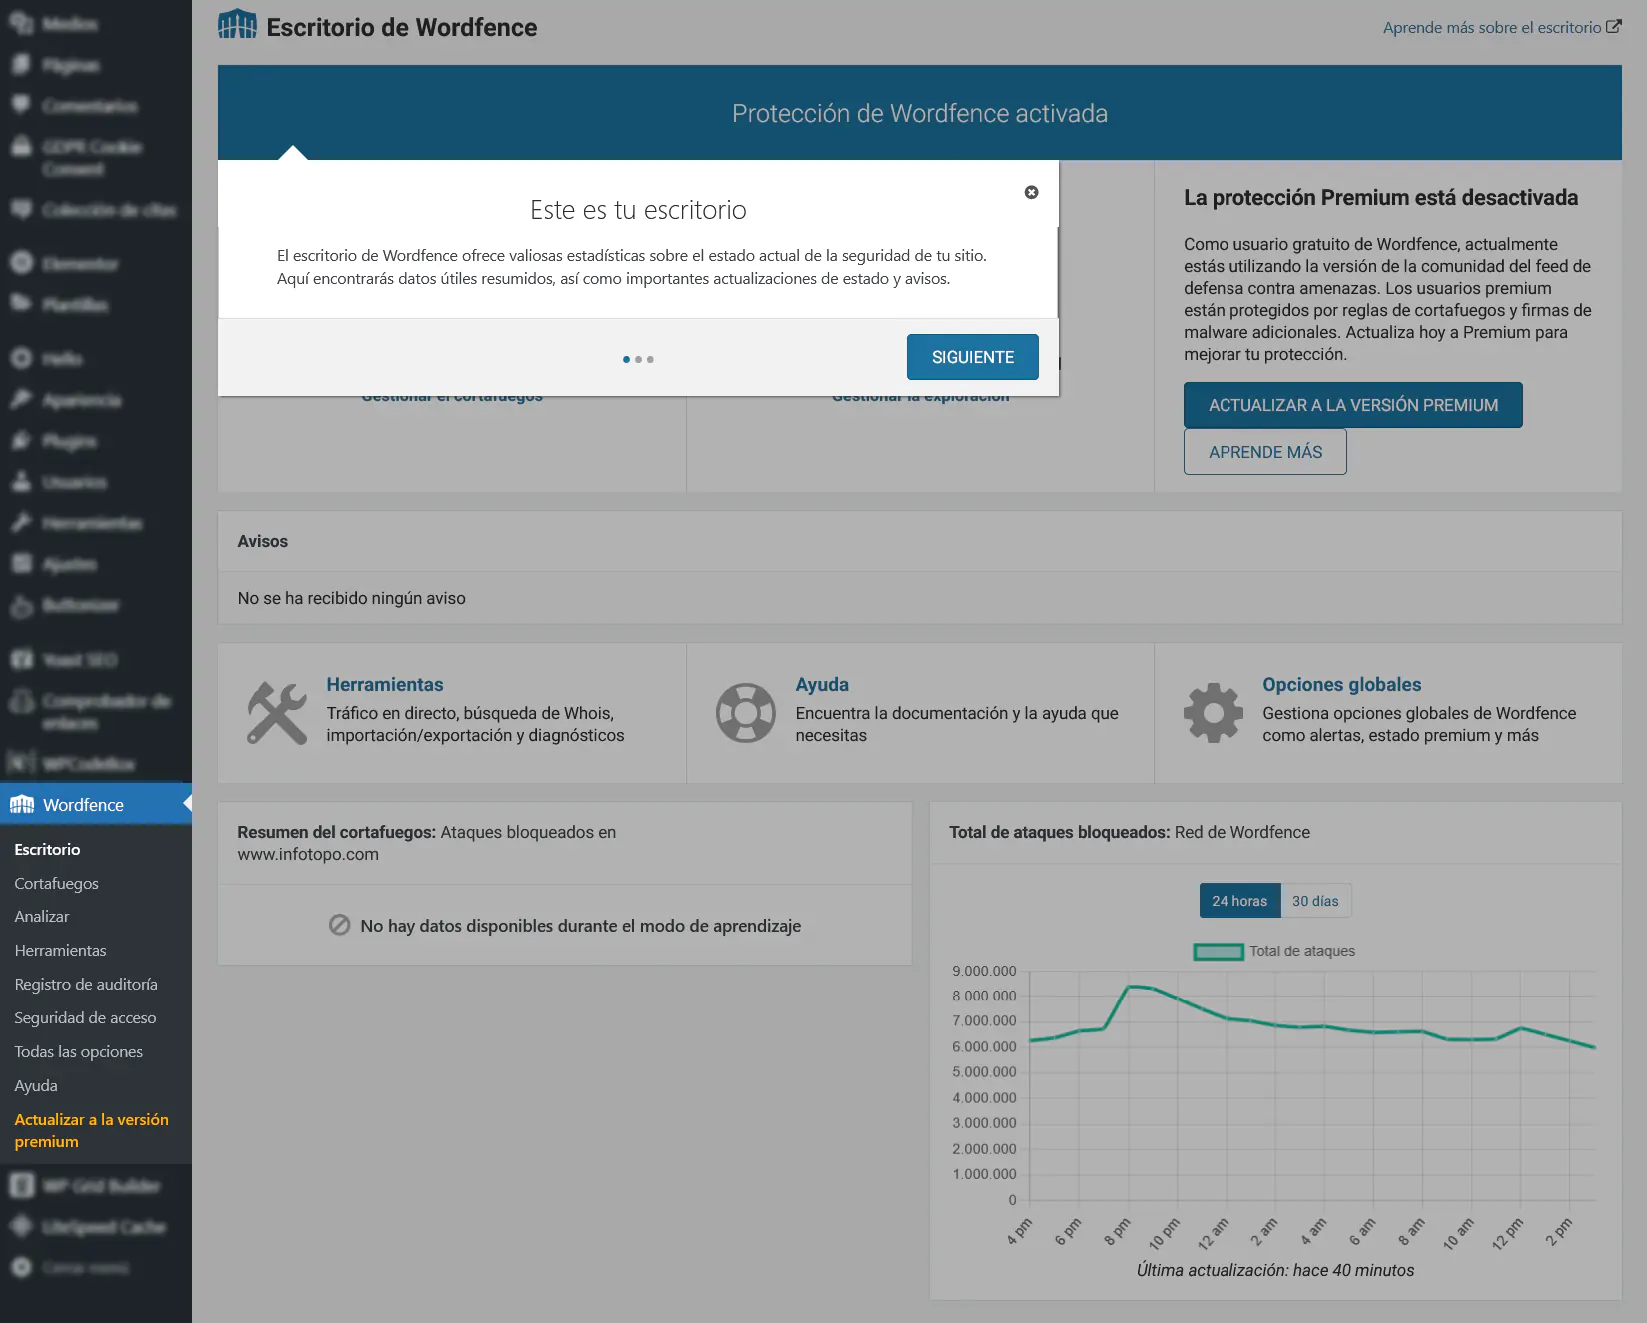
The newly installed Wordfence plugin already includes all the basic protection settings. So unless we have advanced development experience and know how to fine-tune WordPress, we shouldn’t change anything.
If you have any questions, of course, email us at [email protected] and describe the issue or what you’re unsure about. We’re here to help.
That’s the end of this Wordfence tutorial. We hope you found it useful and wish you success with your online ventures. Thanks for reading.