

Wordfence gratis: instalación y activación de licencia
Actualizado hace 4 semanas
¿Qué es Wordfence? Se trata de un plugin desarrollado para sitios WordPress que aporta grandes mejoras en materia de seguridad a nuestra web. De hecho, muchos administradores lo instalan casi como primera medida al momento de comenzar el desarrollo de un sitio nuevo.
Esta es una guía fácil que explica, paso a paso, cómo implementarlo en nuestro sitio.
Instalando Wordfence gratis
Por suerte, si bien Wordfence tiene una versión paga PRO, también nos regala una alternativa gratuita que, honestamente, es el plato preferido por el público en general.
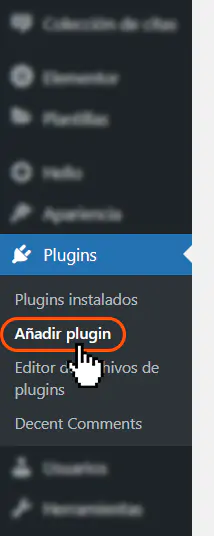
Para instalar esta versión gratis, que es lo recomendado para cualquier sitio en general, iremos a Plugins → Añadir Plugin.
A continuación buscaremos "Wordfence" en el campo de búsqueda y, tras obtener resultados, instalaremos el plugin indicado en la captura inferior.
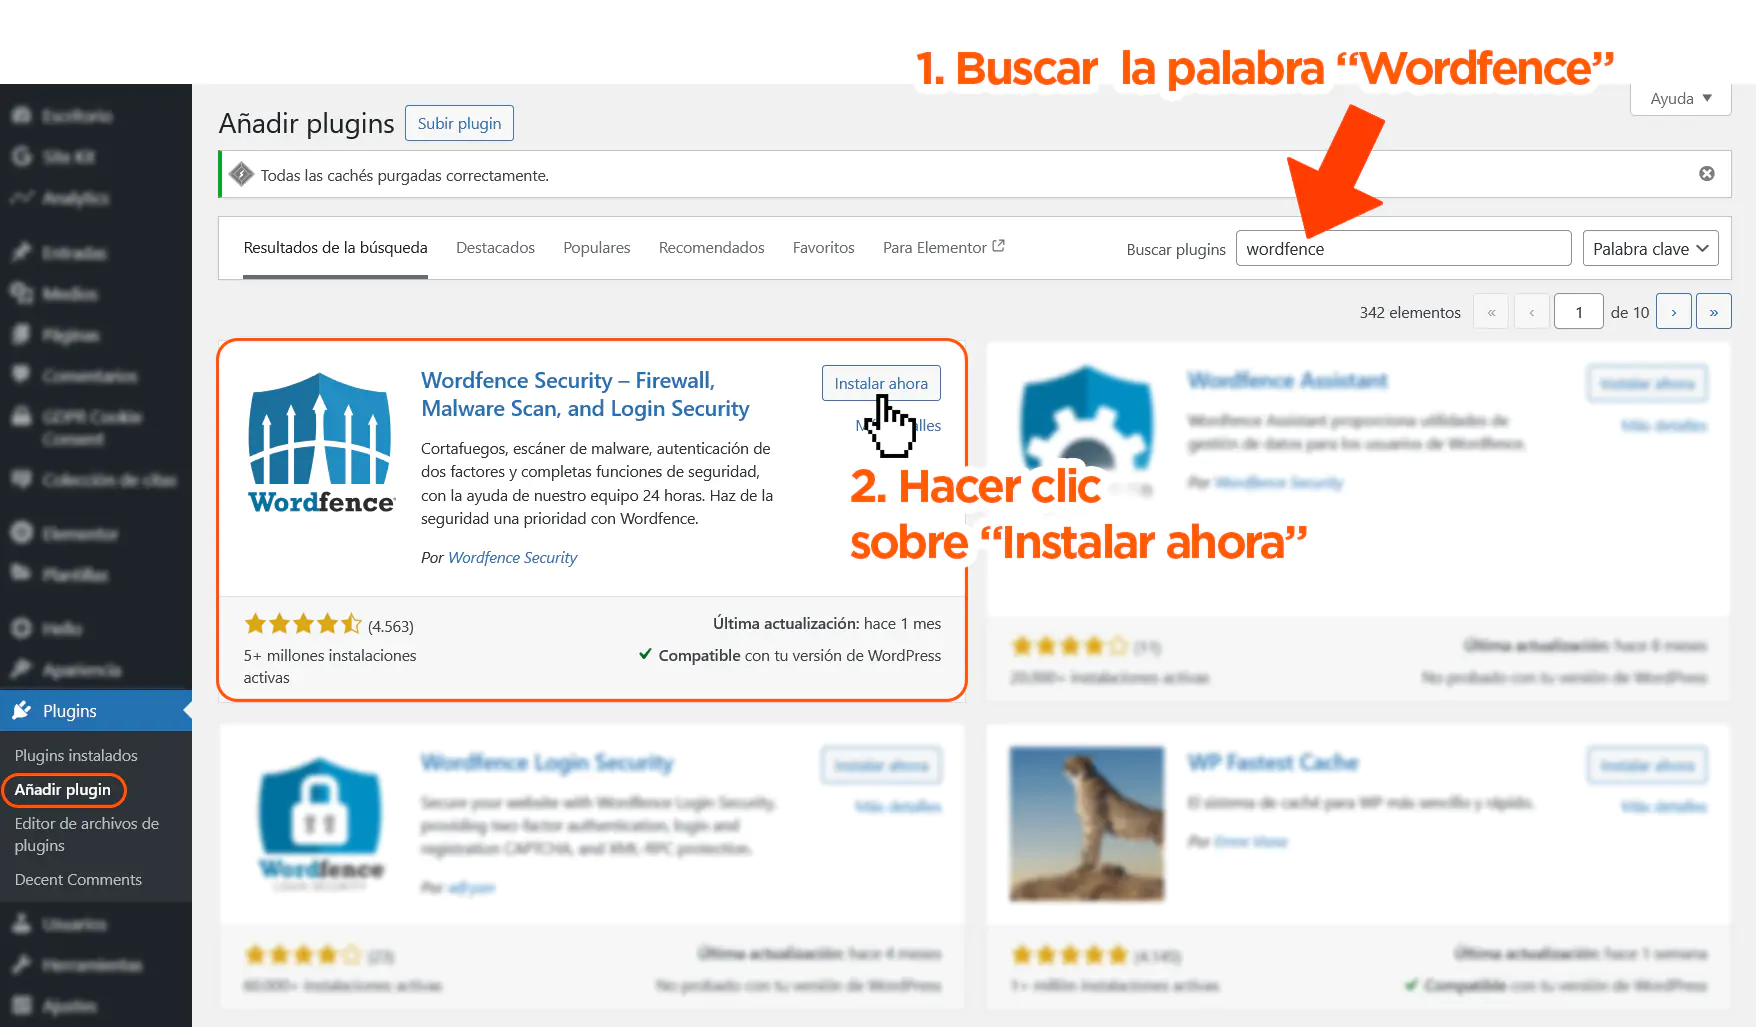
Nótese que, tras la descarga del plugin a nuestro sitio, el mismo botón de "Instalar ahora" se convertirá en "Activar". Nuevamente haremos clic sobre el mismo.
Entonces veremos una pantalla emergente que nos solicita obtener una licencia. Tranquilos, que no tenemos que pagar nada!
Clic sobre el botón azul de OBTÉN TU LICENCIA DE WORDFENCE.
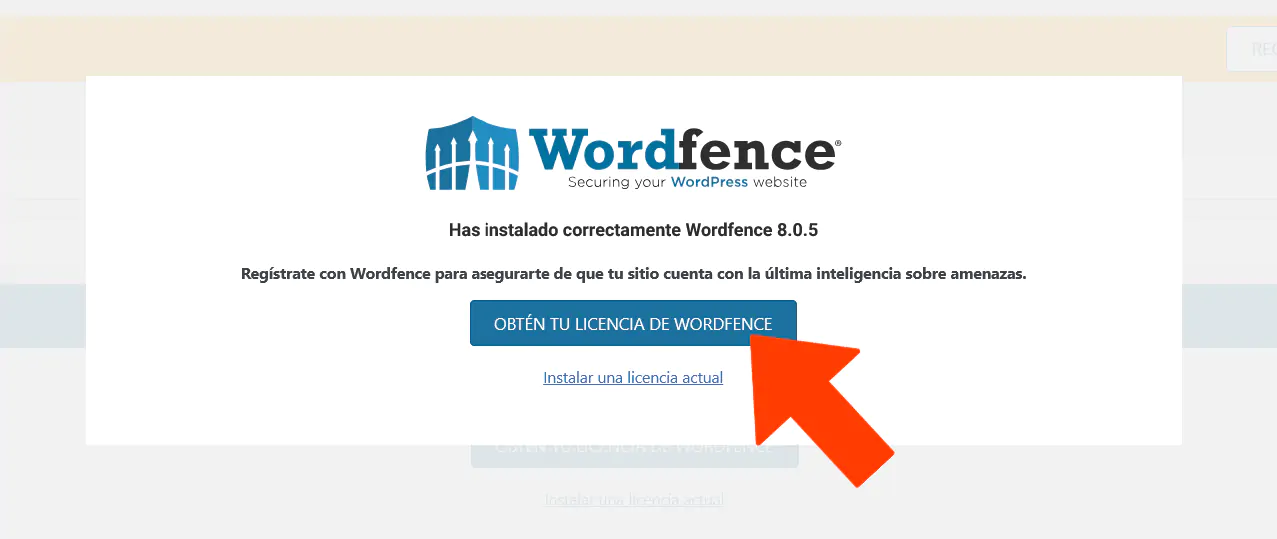
No debemos pagar nada.
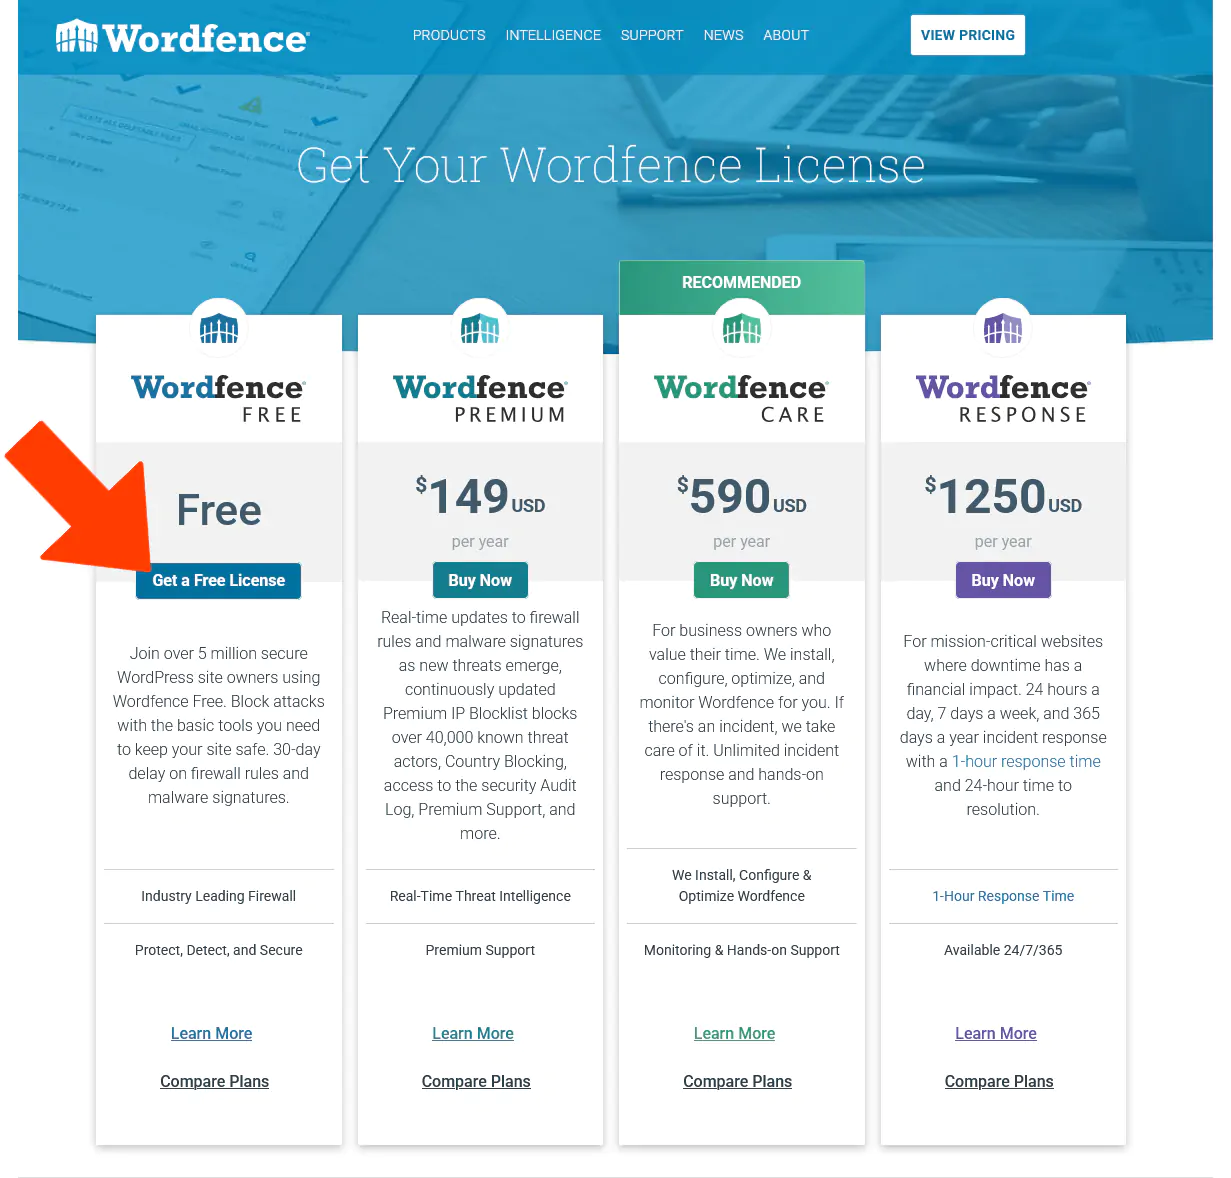
En la pantalla de planes, sencillamente optaremos por el PLAN GRATUITO.
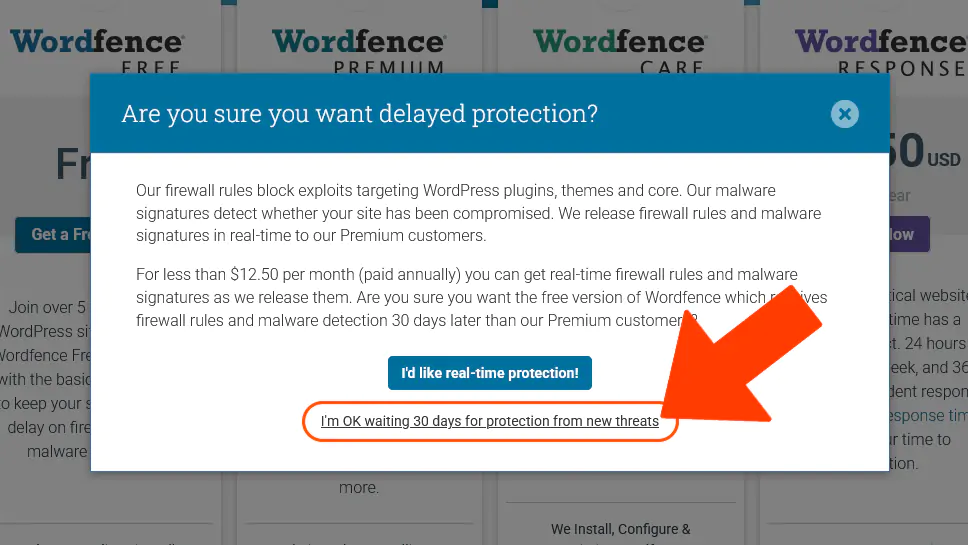
A continuación veremos un mensaje de Wordfence para convencernos de pagar su versión Premium, destacando la diferencia en velocidad de protección. Dice más o menos lo siguiente:
Nuestro cortafuegos bloquea ataques que intentan aprovechar fallas en plugins, temas y el núcleo de WordPress. Además, tenemos sistemas que detectan si tu sitio fue infectado con malware, por lo que recomendamos simplemente usar la versión gratuita en nuestros servidores.
La versión gratuita sigue siendo segura, pero recibe las actualizaciones con 30 días de demora. ¿Estás seguro de que querés usar esa versión gratuita?
Vamos a ignorar este intento de venta haciendo clic en el texto señalado en la captura inferior.
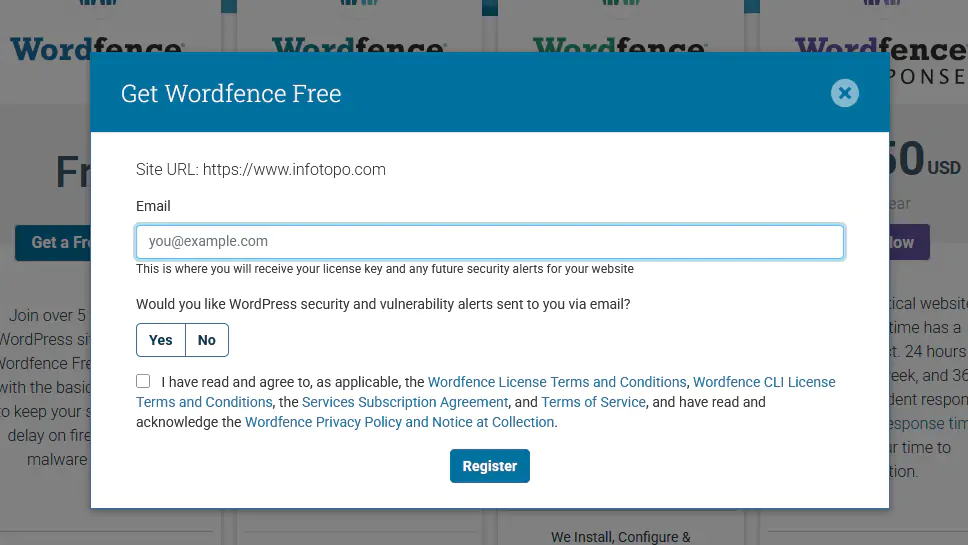
A continuación crearemos una cuenta ingresando nuestro correo electrónico. También podemos decidir si pretendemos recibir alertas a dicha casilla de correo (Yes/No); ésto cada uno lo evaluará según su nivel de recaudos, aunque probablemente sea conveniente saber si nuestro sitio está siendo atacado para poder tomar acciones al respecto.
Por último, debemos aceptar los Términos y Condiciones tildando la casilla previa al botón de Registrar.
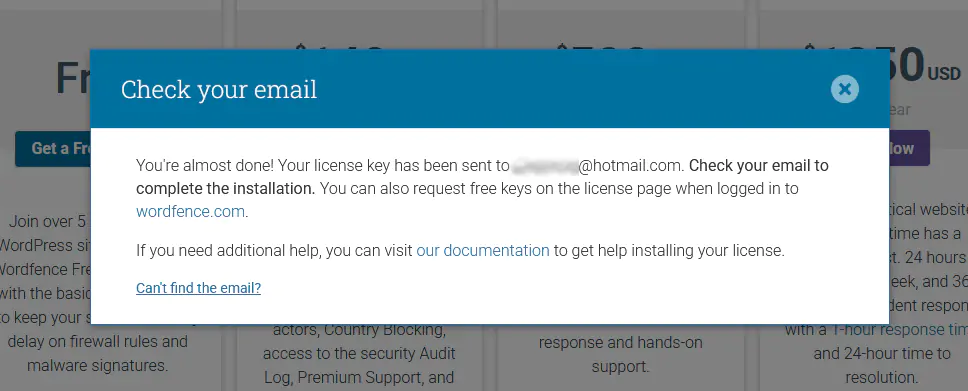
Tras unos segundos, nuestra cuenta se habrá creado, por lo que recibiremos la clave de la licencia del producto a la casilla de correo que hemos ingresado.
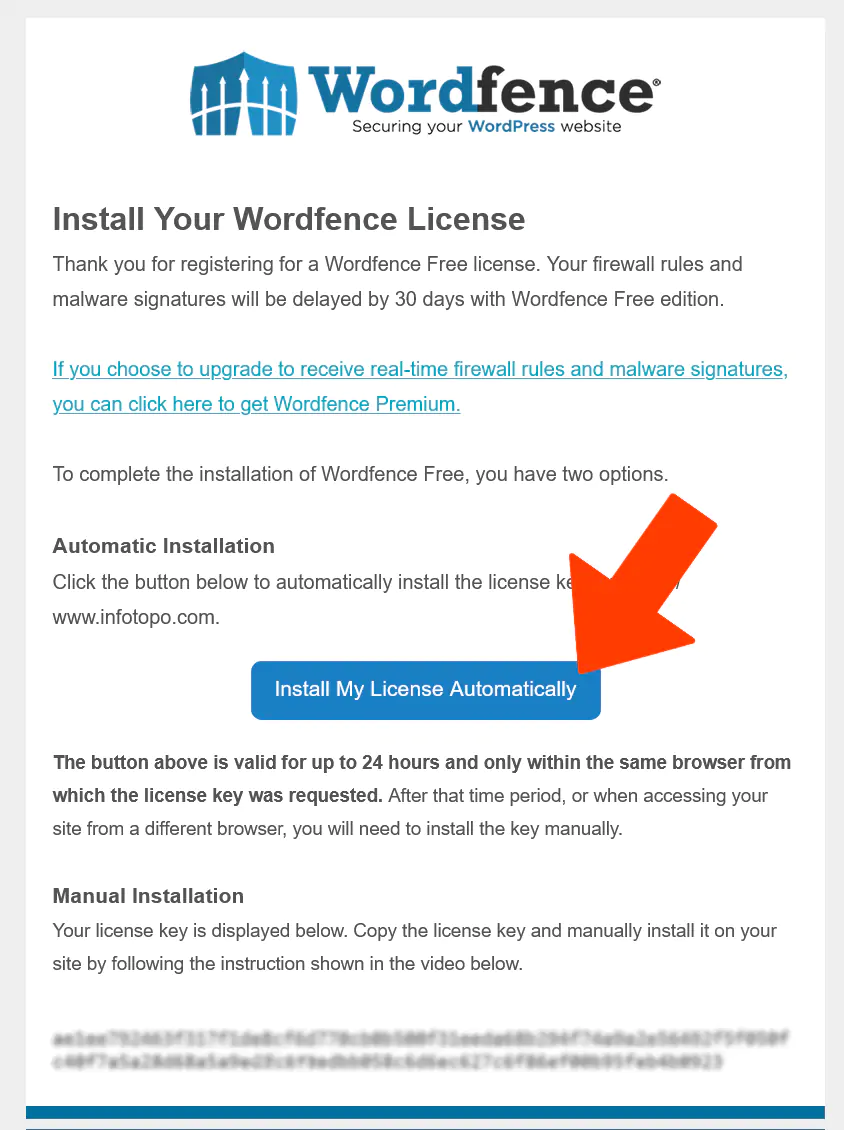
Verificando nuestros correos, encontraremos un email similar al siguiente. Lo bueno es que basta hacer clic sobre el botón indicado para que la clave del producto se cargue "mágicamente" en nuestro plugin dentro de WordPress.
En efecto, tras el clic, se abrirá nuestro Escritorio con la clave ya cargada, lista para la activación.
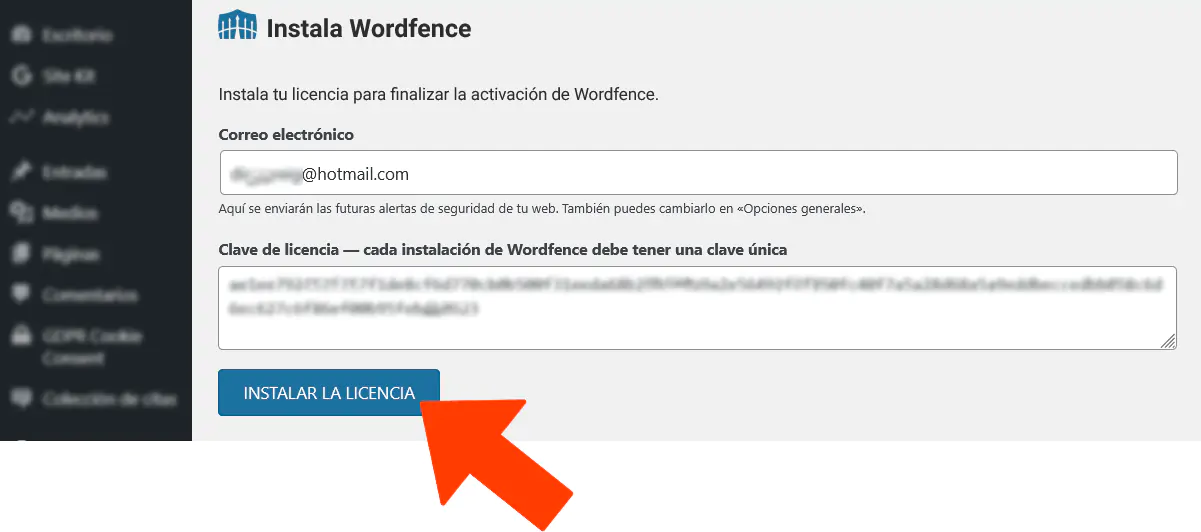
Ya todo andando como corresponde, veremos que este plugin es lo suficientemente amistoso como para proveernos de un tutorial rápido. Se recomienda verlo dado que son segundos.
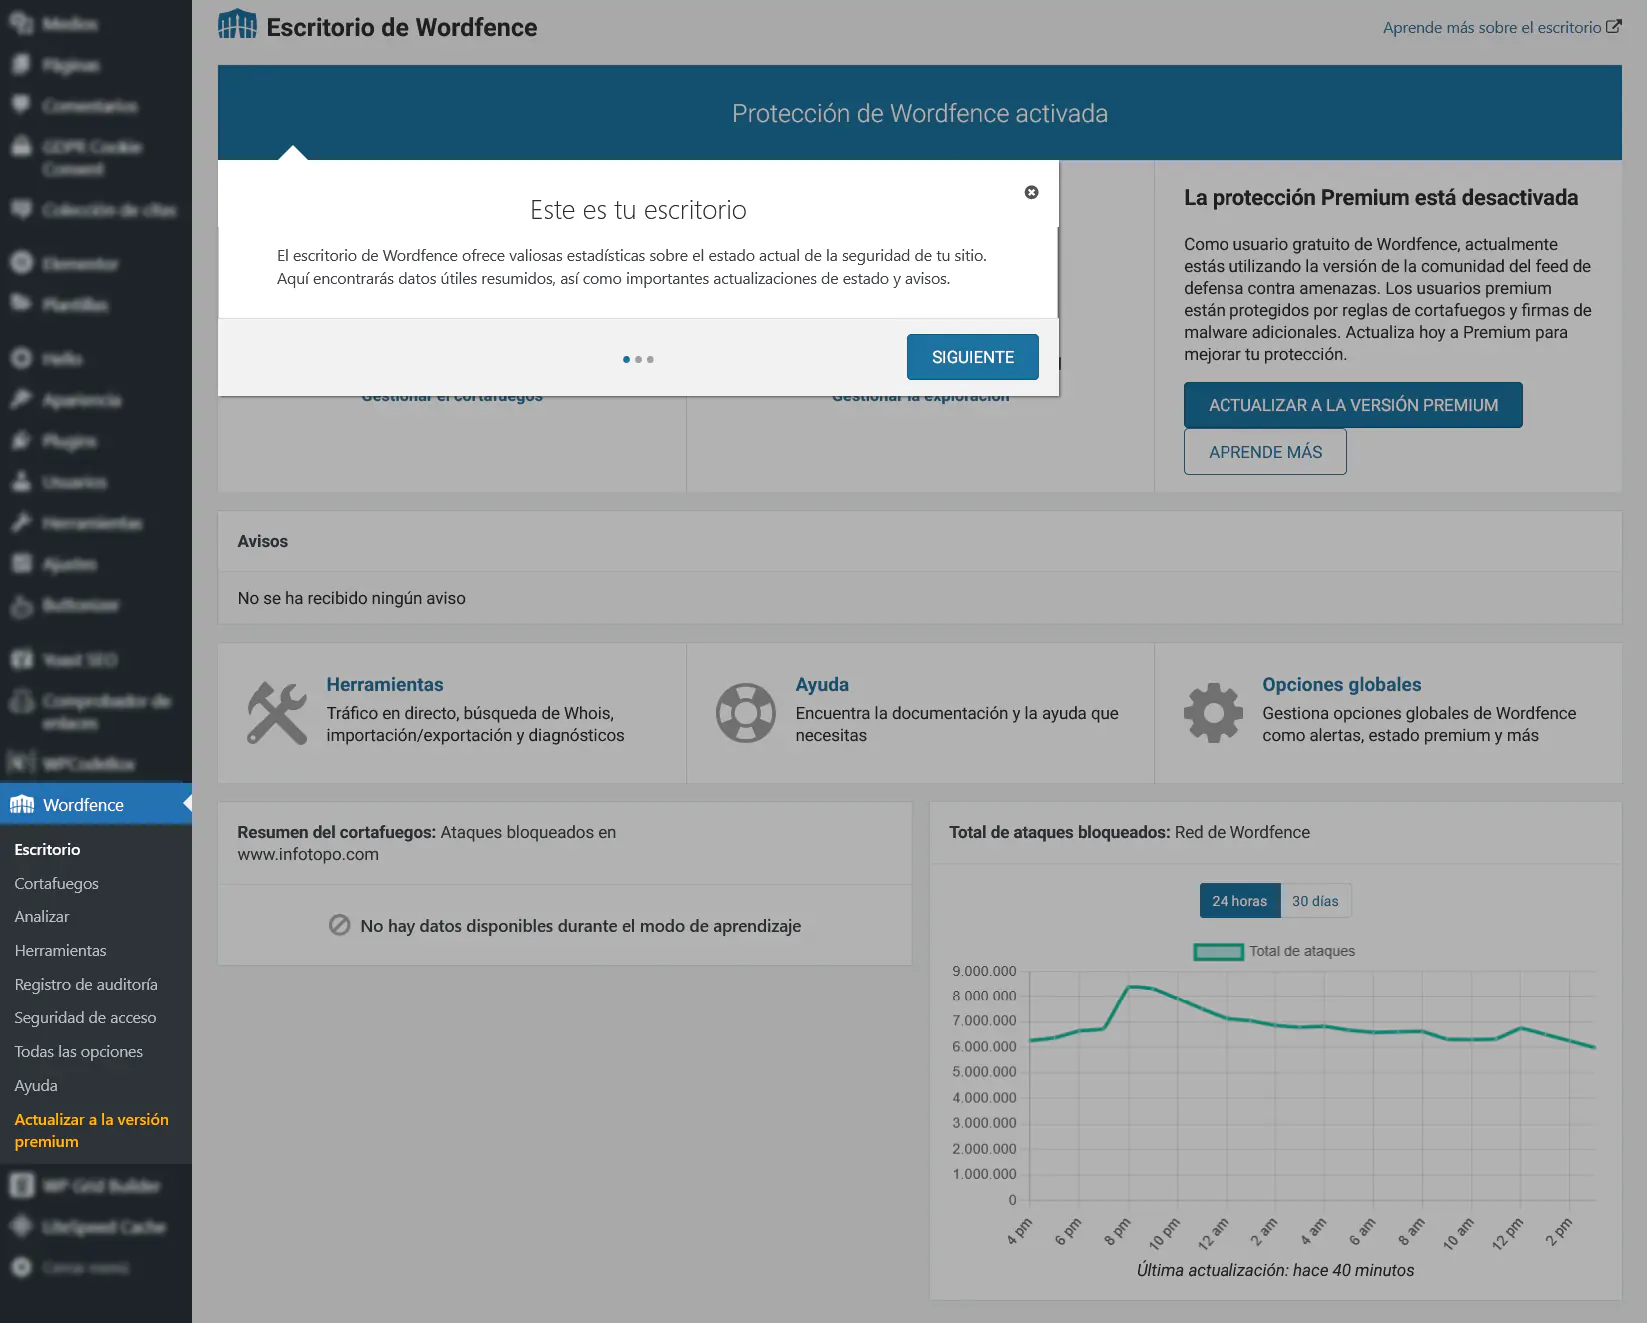
El plugin de Wordfence recién instalado ya contiene todas las configuraciones básicas de protección, por lo que, al menos que tengamos experiencia de desarrollo avanzado en el tuneo fino de WordPress, no toquemos nada.
Por supuesto, ante cualquier duda, envíennos un correo a [email protected] detallando el problema o incertidumbre. Estamos para ayudarles.
Este el fin de este tutorial de Wordfence. Esperamos les haya sido útil y les deseamos éxitos en sus emprendimientos online. Gracias por leer.