

Create and Configure an Astro Application with Setup Node.js App
Updated 5 days ago
Astro applications run on your hosting through the CloudLinux Node.js Selector: in cPanel, Setup Node.js App creates the application, installs its dependencies, and runs it under your domain. This guide covers the entire process: preparing your project with the Node adapter, creating the application, uploading the code, building it, and managing it.
Prepare your Astro project
For Astro to serve pages rendered on demand by the server, your project needs the official @astrojs/node adapter in standalone mode. You can add it from your project with npx astro add node, or configure it manually in astro.config.mjs:
import { defineConfig } from 'astro/config';
import node from '@astrojs/node';

export default defineConfig({
  adapter: node({
    mode: 'standalone',
  }),
});
If your site is entirely static, you don't need Node: build it locally and upload the generated files like any other site. The rest of this guide applies to projects that use the Node adapter.
Create the application
The application is registered in cPanel, in the Software section.
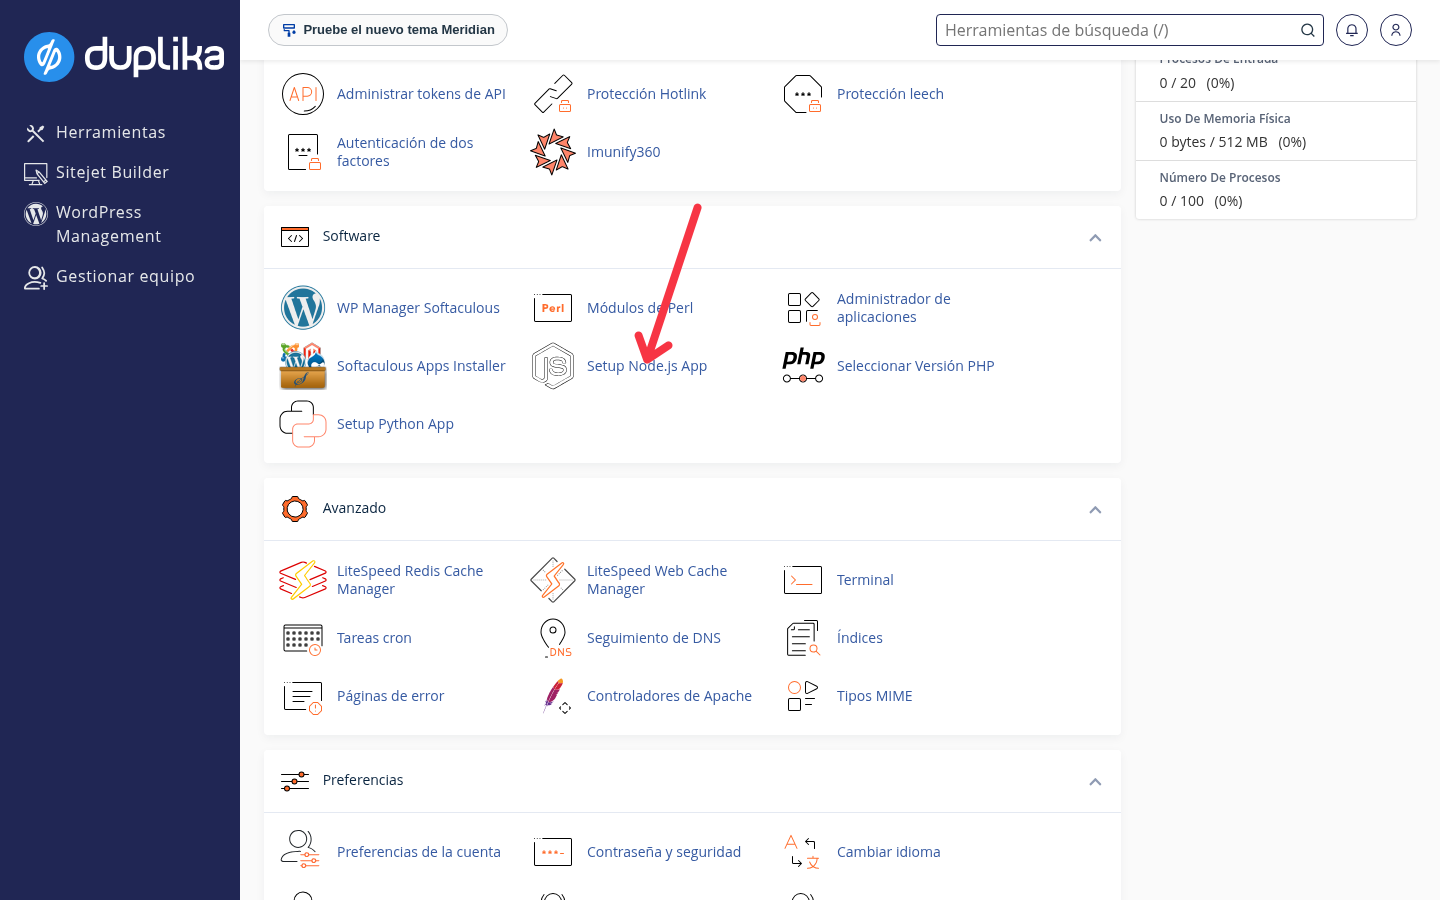
Log in to cPanel and, in the Software section, click Setup Node.js App.
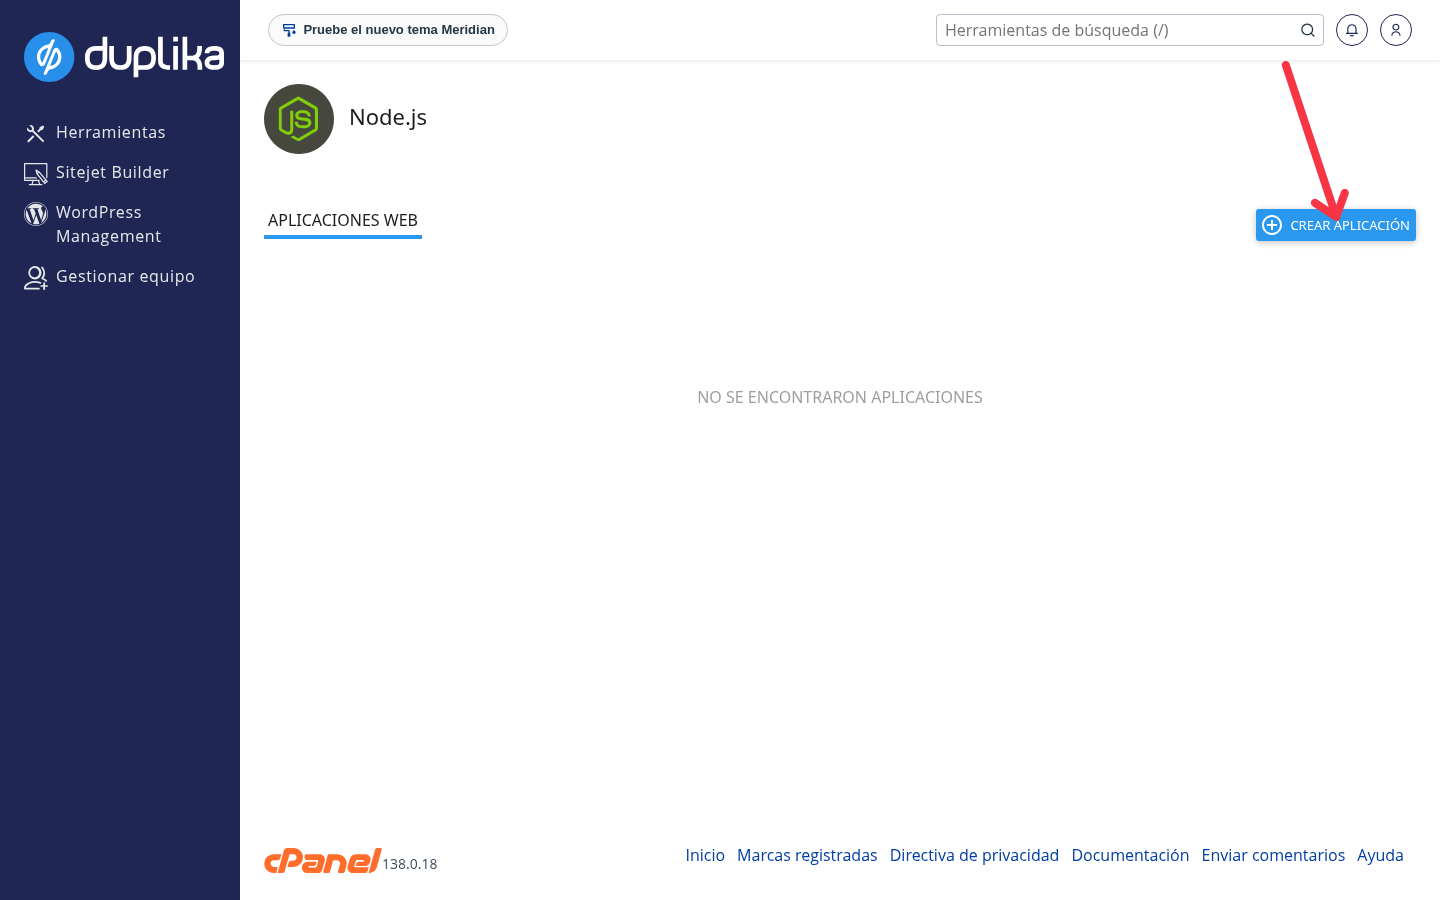
Click CREATE APPLICATION.
Under Node.js version, choose the highest available version that meets your project's requirements. The drop-down shows the versions enabled on your server and indicates the recommended one. Astro requires Node 22.23.4 or later (odd-numbered versions, such as 23, are not supported); check the current requirement in the Astro documentation.
Under Application root, enter the folder where the code will reside, for example
adhoc-app. This is the physical path in your account where you'll upload the project files.Under Application URL, choose the domain or subdomain and enter the URI where the application will be accessed. If you want to serve it from a subdirectory of that domain, add it there.
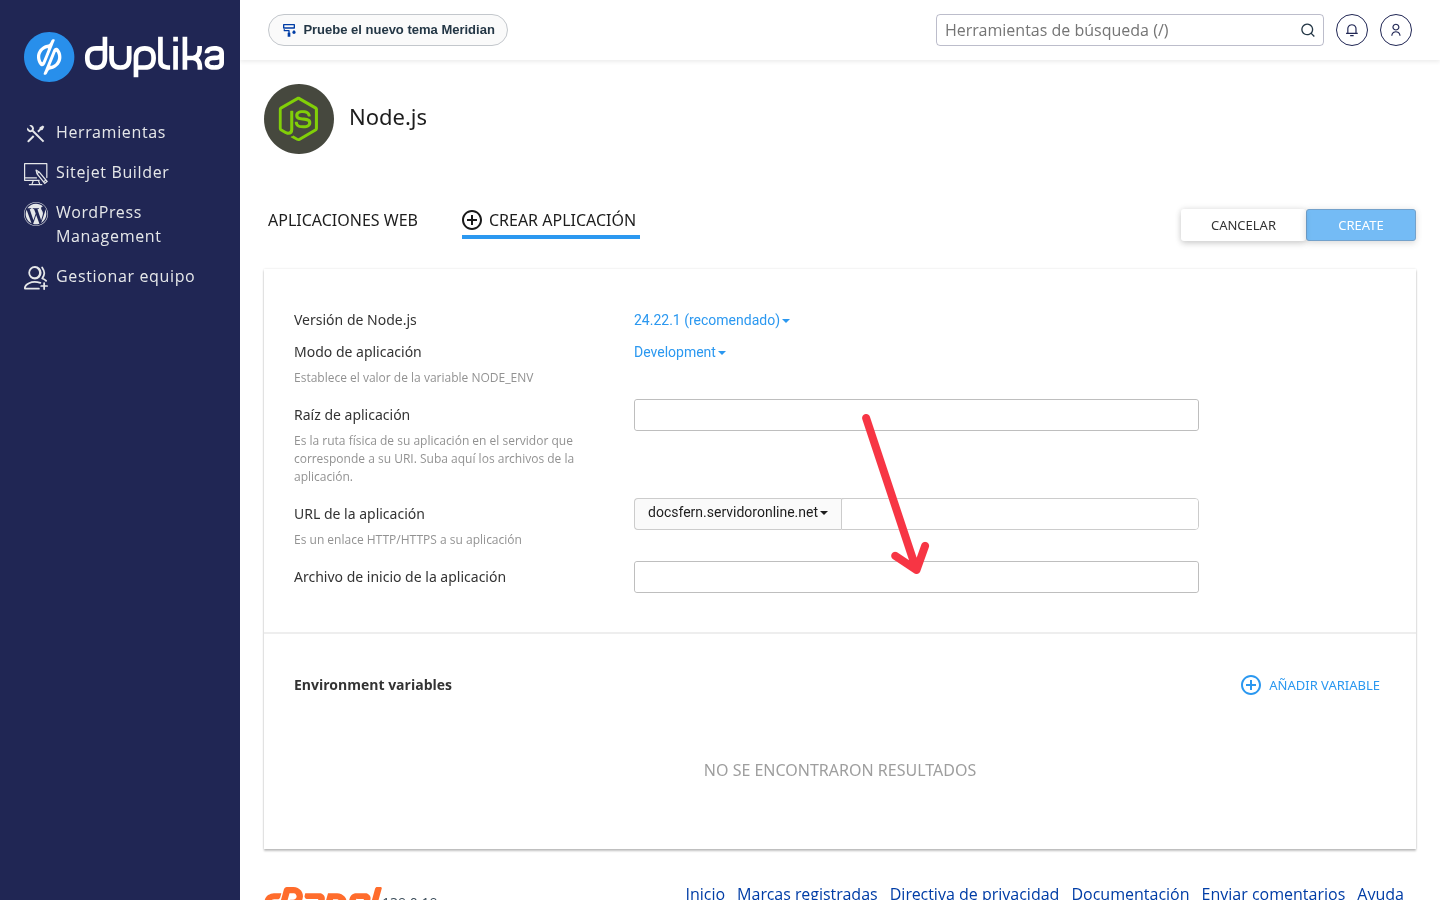
Under Application mode, choose Production for a production site: this option sets the value of the
NODE_ENVvariable, which the panel sets to Development by default.Under Application startup file, enter
dist/server/entry.mjs: this is the file generated by the Node adapter during the build that starts the server. The path is relative to the Application root.Click CREATE. The application is registered and appears in the list with its status.
Don't use public_html as the Application root: a Node application includes configuration files and credentials (such as .env) that must not be exposed on the web. Create a dedicated folder for the application.
Upload your code
The selector doesn't upload the code for you: upload your project files to the folder you specified as the Application root using File Manager, FTP, or SSH. If your repository is on GitHub, GitLab, or a similar service, you can clone it directly from cPanel:
In cPanel, open Git Version Control in the Files section, and create a new repository.
Leave Clone a repository enabled, paste your repository's clone URL, and enter the folder you specified as the Application root in the repository path.
Confirm the creation and check in File Manager that the project files are in the folder.
If the repository has more branches, you can change the active branch in the repository settings. This also lets you clone the same repository twice into different folders, for example, to set up a test environment on a subdomain.
Install dependencies and build
The application needs two commands to run: npm install for the dependencies and npm run build to generate the server. You can run them from the panel or over SSH.
From the panel
In Setup Node.js App, open your application from the list (pencil icon).
Click Run NPM Install and wait for it to finish.
Click Run JS Script and choose the
buildscript from yourpackage.json.
Over SSH
Each application has its own Node virtual environment. Connect over SSH (or use Terminal in cPanel's Advanced section) and run the command to enter the virtual environment shown on your application's page. It has the following format:
source /home/TUUSUARIO/nodevenv/aplicacion/22/bin/activate && cd /home/TUUSUARIO/aplicacionCopy it exactly as shown in the panel, since it includes your username, folder, and selected Node version. To confirm that you're in the environment, run node -v: it should return the version you selected when creating the application. Then run npm install and, when it finishes, npm run build.
When you're done, open the domain you configured under Application URL: your site should be up and running.
Environment variables
In the Environment variables section of your application, click ADD VARIABLE, enter each variable's name and value, and save it using its confirmation button: variables that aren't saved won't be applied. Neither Astro nor the Node adapter loads variables from a .env file when serving the site on the server, so if your project reads variables at runtime, define them there. You can edit them or add more at any time.
If running npm commands produces errors about running processes or resources, try adding the RAYON_NUM_THREADS environment variable with the value 1 and restarting the application.
Restart and update
After changing code, dependencies, or environment variables, restart the application to load the changes. The application list shows each application's status: started with the Node version in parentheses, and buttons to stop, restart, edit, and delete it.
The update process is the same as on any self-managed server: make and test changes in your local environment, push them to the repository, pull them to the server with git pull (or use the repository's update button in cPanel), run npm install again if you changed dependencies, build with npm run build, and restart the application.
If something goes wrong
When you open Setup Node.js App, you see
The received data is wrong. Contact support for resolution. cagefs_enter: Unable to fork: you've reached the simultaneous process limit for your plan. Check usage in Resource Usage in cPanel; find out how to resolve this in NodeJS error: The received data is wrong. Contact support for resolution. cagefs_enter: Unable to fork.The application returns 500 or 503 errors, or responds slowly: it may have reached your plan's resource limits, such as memory or the number of processes. We explain how these limits work in Manage resources and limits with CloudLinux Manager.
We manage the infrastructure, the panel, and the selector; you're responsible for your application's code, dependencies, and updates. If the error persists, contact us on WhatsApp or through the customer area and we'll look into it.