

Como clonar una aplicación con Softaculous
Actualizado hace 3 meses
Actualizar algo de nuestro sitio, modificar un código o tocar la configuración de un plugin pueden (y lo hacen) causar errores y/o incompatibilidades. De golpe nuestro sitio puede verse diferente, incluso romperse. Por eso, agradecemos que existan herramientas como Softaculous Staging. En esta guía te explicamos cómo sacarle provecho... y hacer cambios tranquilo.
Clon de pruebas
La herramienta de staging, o "puesta en escena", nos permite realizar con velocidad una copia de nuestro sitio sin comprometer el contenido online. Así, hacemos pruebas, actualizaciones, probamos funcionalidades nuevas o lo que fuere, y todo sin riesgos. Cuando terminamos, porque ya todo funciona tal cual lo deseábamos, mudamos los cambios al sitio público.
Para empezar, debemos ingresar al cPanel de nuestra web:
cpanel.nuestrositio.com
Tras haber colocado las credenciales pertinentes, buscamos el ícono de Softaculous en la sección de Software.
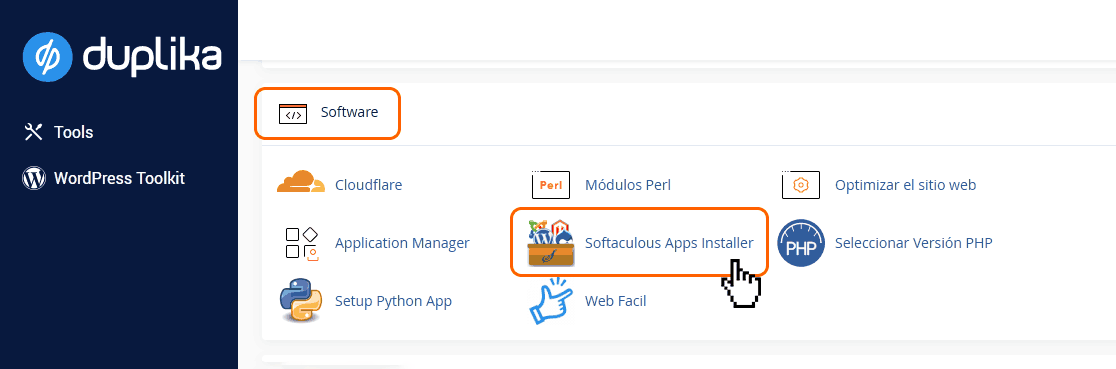
Nota: incluimos cPanel en todos nuestros planes de hosting.
A continuación, haremos clic sobre el siguiente botón:

Y luego buscaremos y haremos clic sobre el ícono azul:
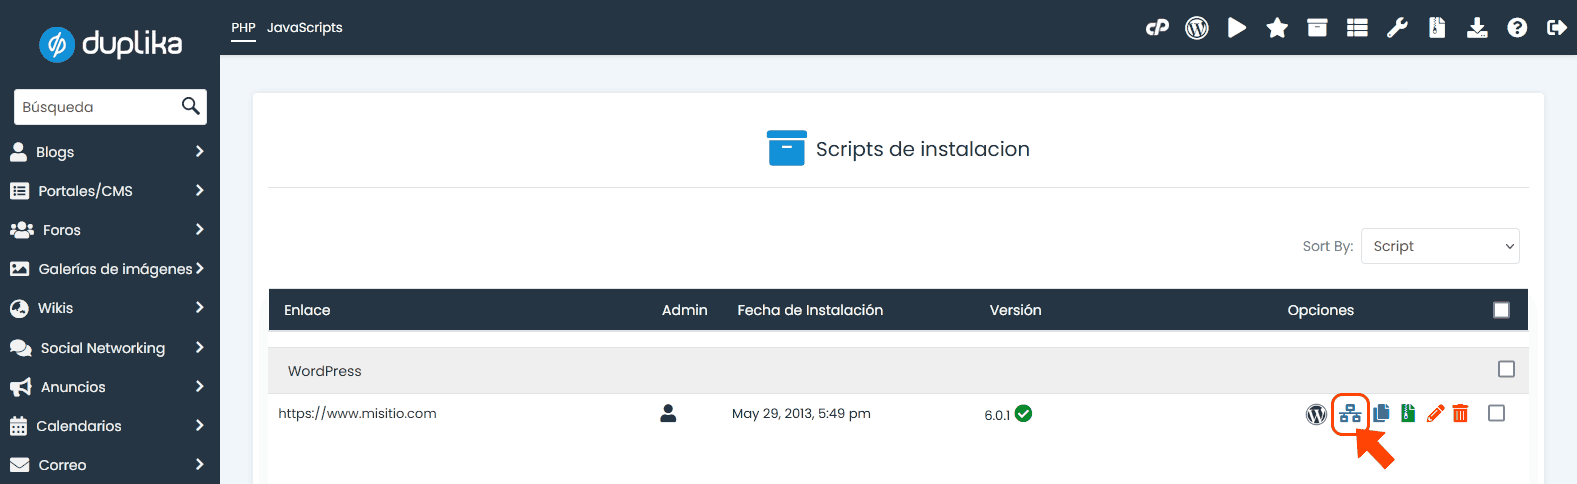
En la pantalla que aparecerá, podemos tomar algunas decisiones:
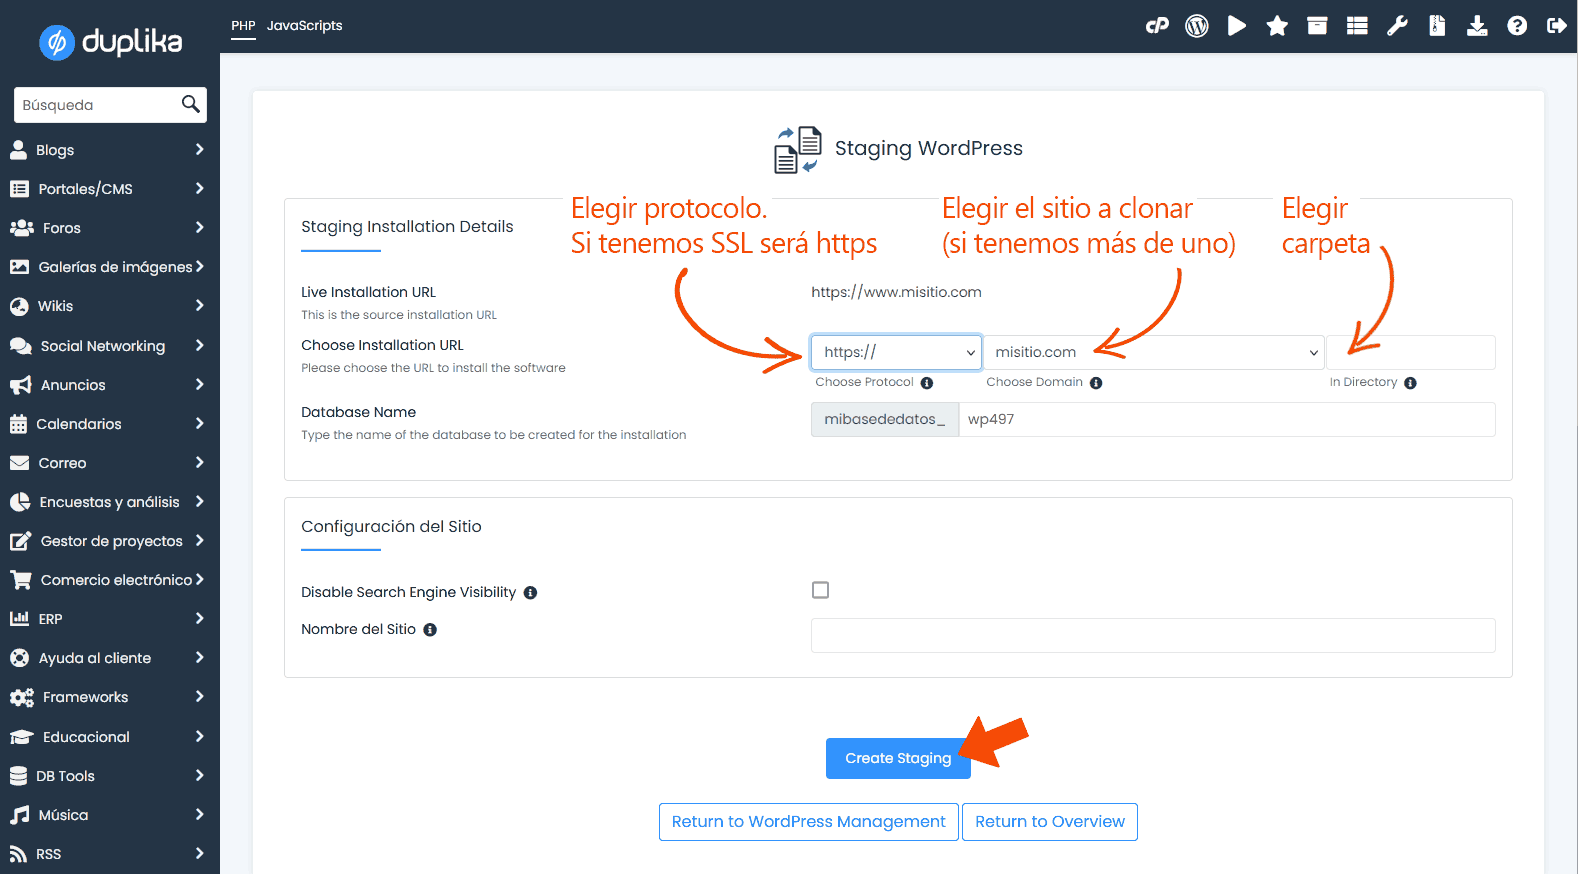
Debemos elegir el protocolo de nuestro sitio entre las opciones posibles: http://www, http://, https:// y https://www.
Luego seleccionaremos el sitio a clonar. Si tenemos uno solo, aparecerá por defecto.
A continuación, se nos permite ingresar un nombre de carpeta, por ejemplo, ejemplo.com/test. Esto es opcional, pero recordemos que entonces visitaremos nuestro sitio de pruebas en ejemplo.com/test
También podemos cambiar el nombre de la base de datos (opcional).
Luego, basta hacer clic en el botón azul de "Create Staging". Cuando el progreso termine, veremos un mensaje de éxito.
Probando nuestro sitio de pruebas
Tras haber realizado una copia de nuestro sitio público, ya podemos implementar cambios y pruebas libremente y sin miedos. Actualizar un Tema, la versión de WordPress, un plugin, modificar functions.php o lo que fuere: nadie verá los cambios hasta que nosotros lo decidamos. Al finalizar, podemos eliminar el sitio de pruebas o bien reemplazar el contenido online con los cambios hechos en el clon.
Nota: realizar modificaciones en nuestro sitio online tampoco influye a nuestro clon.
Reemplazar nuestro sitio online
Satisfechos con los cambios, experimentos, actualizaciones o cualquier otra cosa llevada a cabo en el sitio de pruebas, podemos reemplazar nuestro sitio web activo con un par de clics. Nótese que también podemos mantener nuestro sitio de ensayo intacto, en caso de que deseemos realizar más pruebas en el futuro. Esto vuelve la herramienta de staging de Softaculous una excelente manera de proteger nuestro contenido de cualquier problema que pueda ocasionar una modificación.
Veamos como reemplazar el sitio online por el sitio "staged" o clonado, paso a paso.
Como hicimos anteriormente, ingresaremos a cPanel, buscaremos Softaculous en la sección de Software, e iremos a las instalaciones activas.
Junto a nuestro sitio clonado, debemos hacer clic sobre el botón "push to live", es decir, mandar todos los cambios al sitio público.
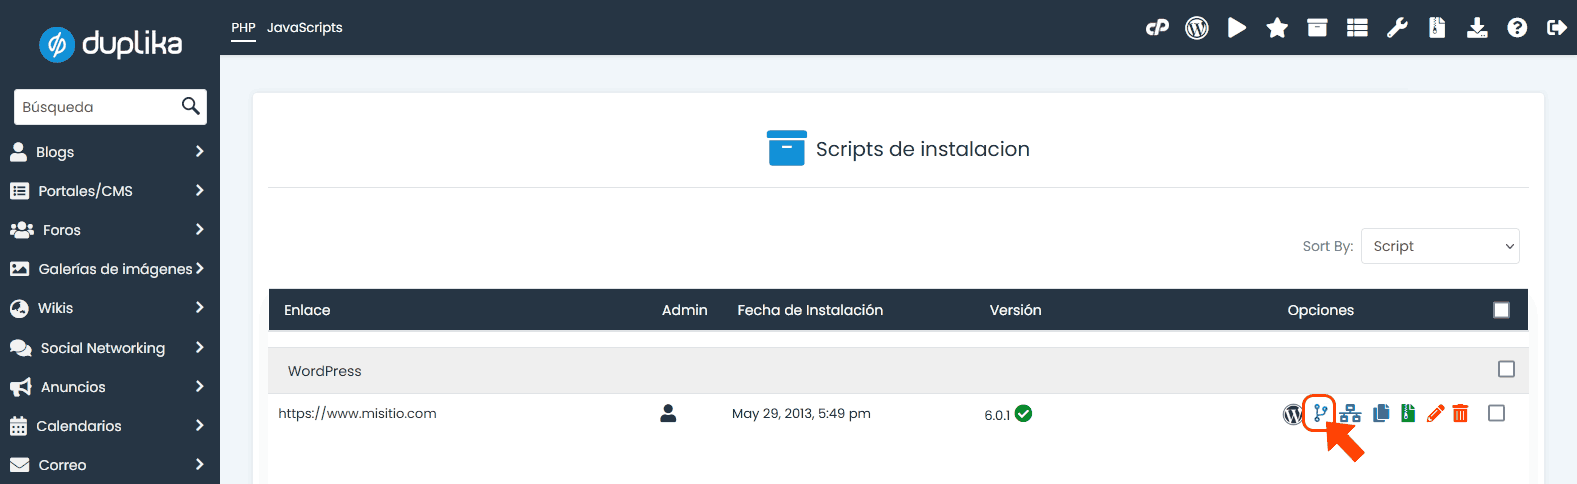
A continuación, elegiremos la solapa de personalización (Customize) para poder tomar algunas decisiones. Entre ellas, decidir si deseamos sobre escribir los archivos y carpetas, reemplazar la base de datos pública por la del clon (si, por ejemplo, recibimos mensajes en nuestro blog en el medio, los mismos se perderán), o decidir qué cosas de la base de datos cambiar.
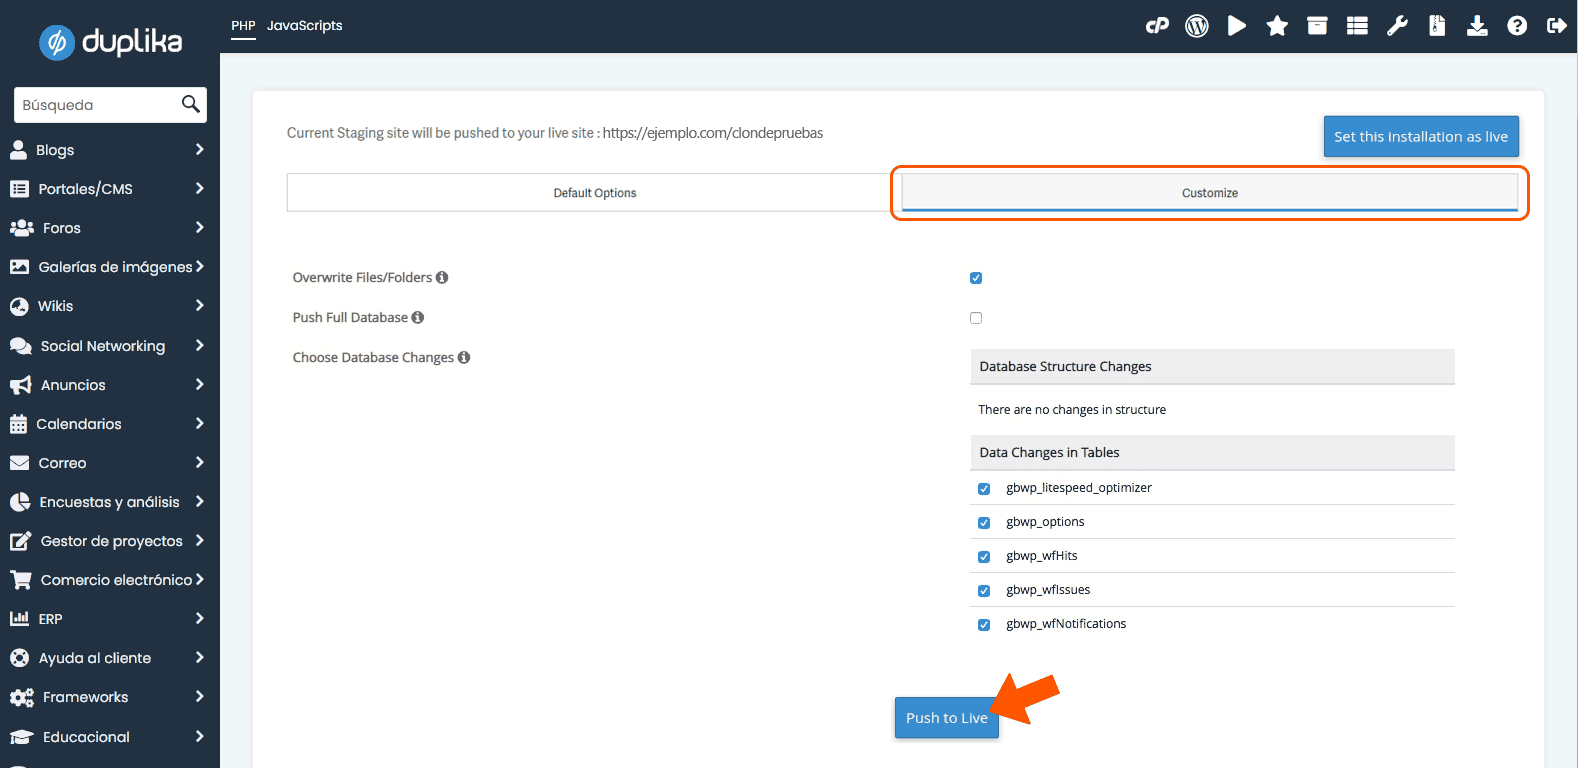
Tildamos a discreción lo que deseamos subir online. Tras finalizar, haremos clic sobre el botón azul señalado en la captura superior. Al igual que cuando creamos el clon de pruebas, veremos una barra de progreso seguida de un mensaje de éxito.