

How to Create and Restore Backups in Softaculous
Updated 3 months ago
Softaculous, a tool included in cPanel, is well known for how easily it lets us install apps on our hosting plan. However, not everyone knows about its other benefits—for example, its ability to create backups of our site. A backup includes both a website’s files and its database, and Softaculous does a wonderful job of backing up both.
In this tutorial, we’ll cover how to create (and download) a backup, and then restore our website if needed.
Creating our first backup
First, we need to log in to our site’s cPanel:
cpanel.nuestrositio.com
After entering our credentials, we’ll look for the Softaculous icon in the Software section.
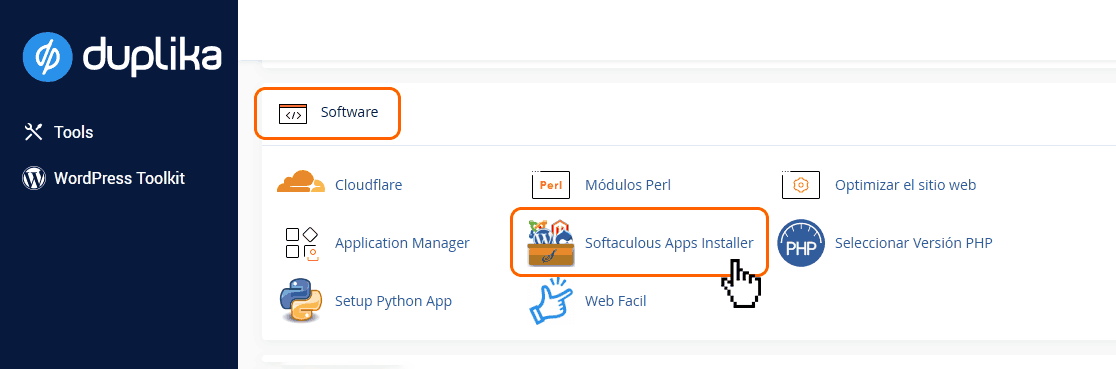
Note: cPanel is included with all our hosting plans.
Next, we’ll click the following button:

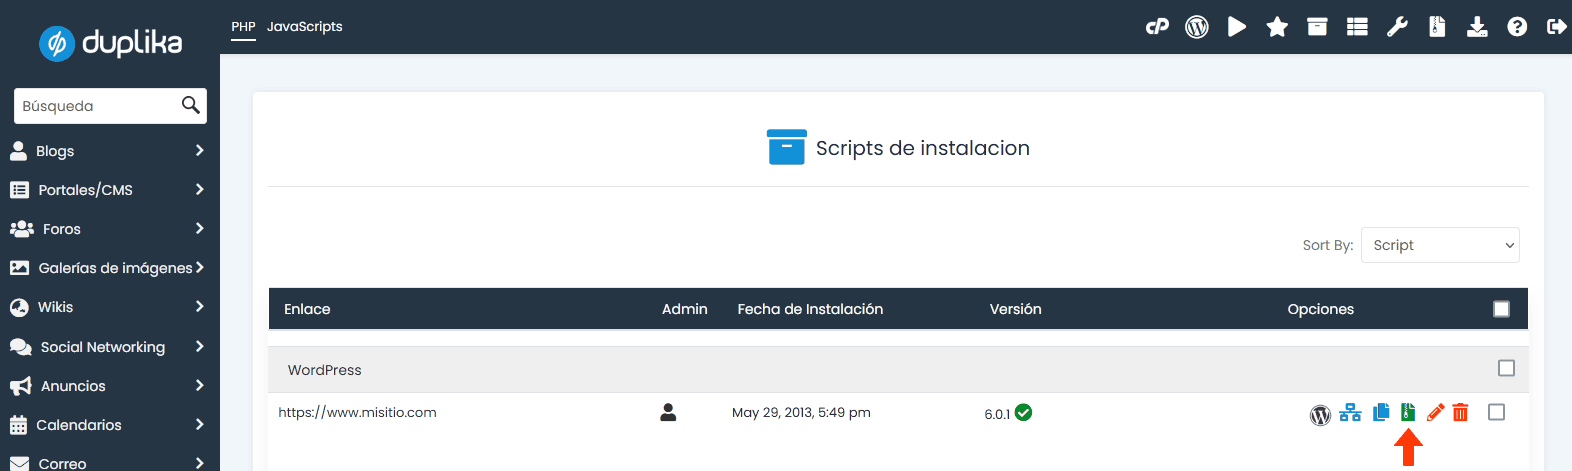
Then we’ll look for and click the icon that looks like a small green ZIP file:
On the next screen, we can make a few choices, but essentially we need to make sure the following options are checked. Optionally, we can add a note describing the reason, date, or purpose of the backup, and change the default backup directory.
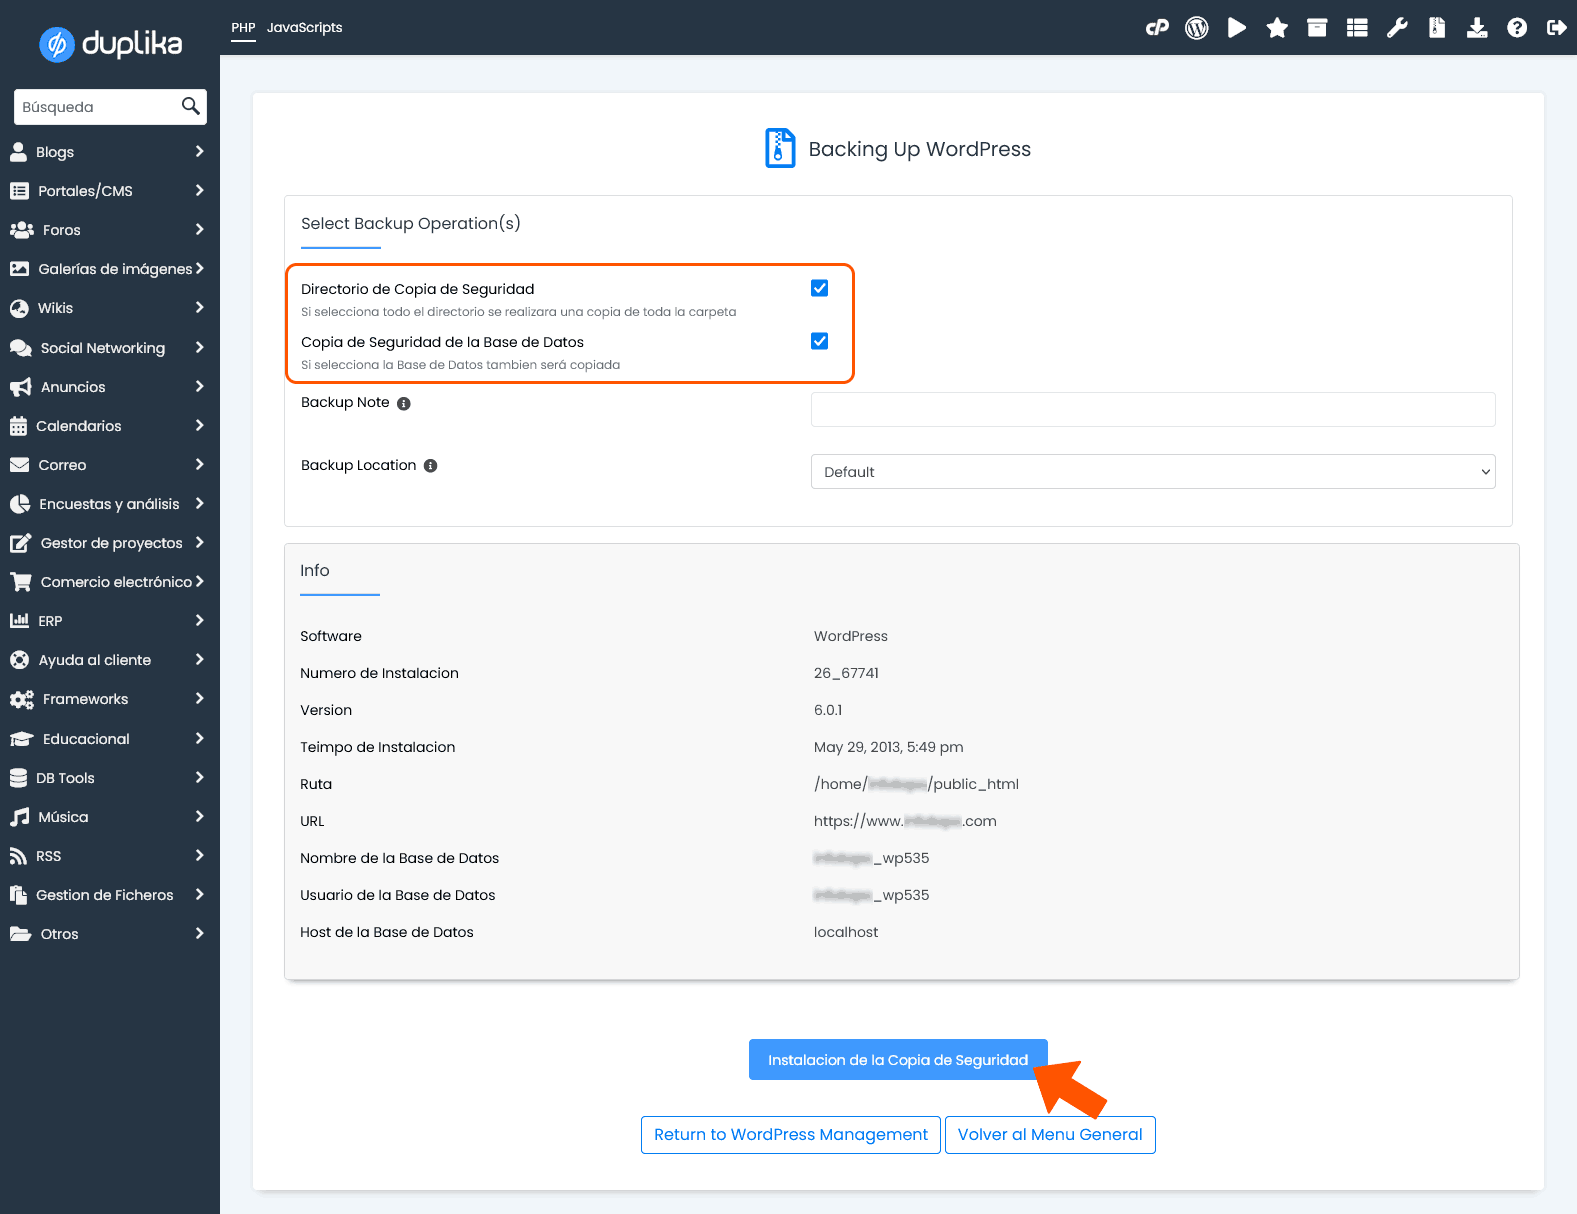
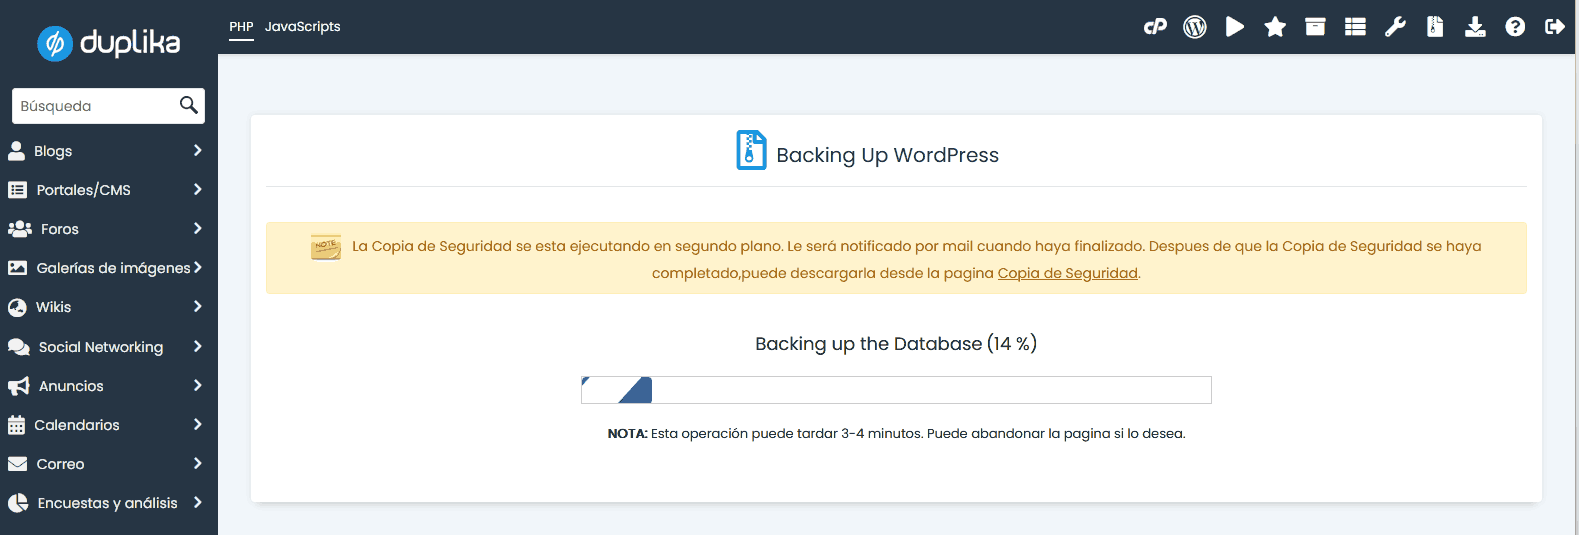
After clicking the blue button, we’ll see a progress bar that dynamically indicates how much time is left.
When it’s finished, we’ll see the message: the backup has been created successfully. You can download it from the Backups page.
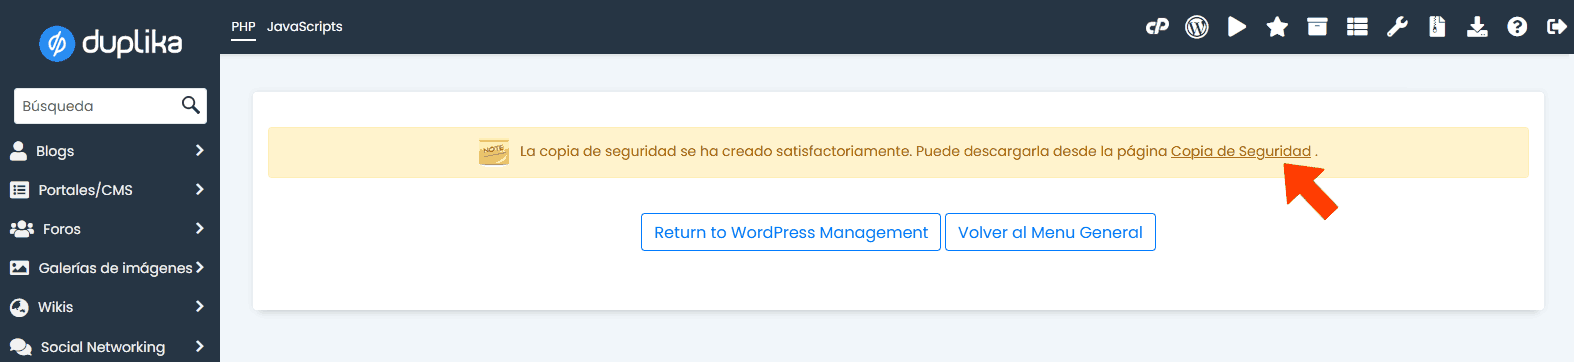
Clicking the link provided will take us to a page where we can download the backup file we created. The screen we see will look similar to the following screenshot.
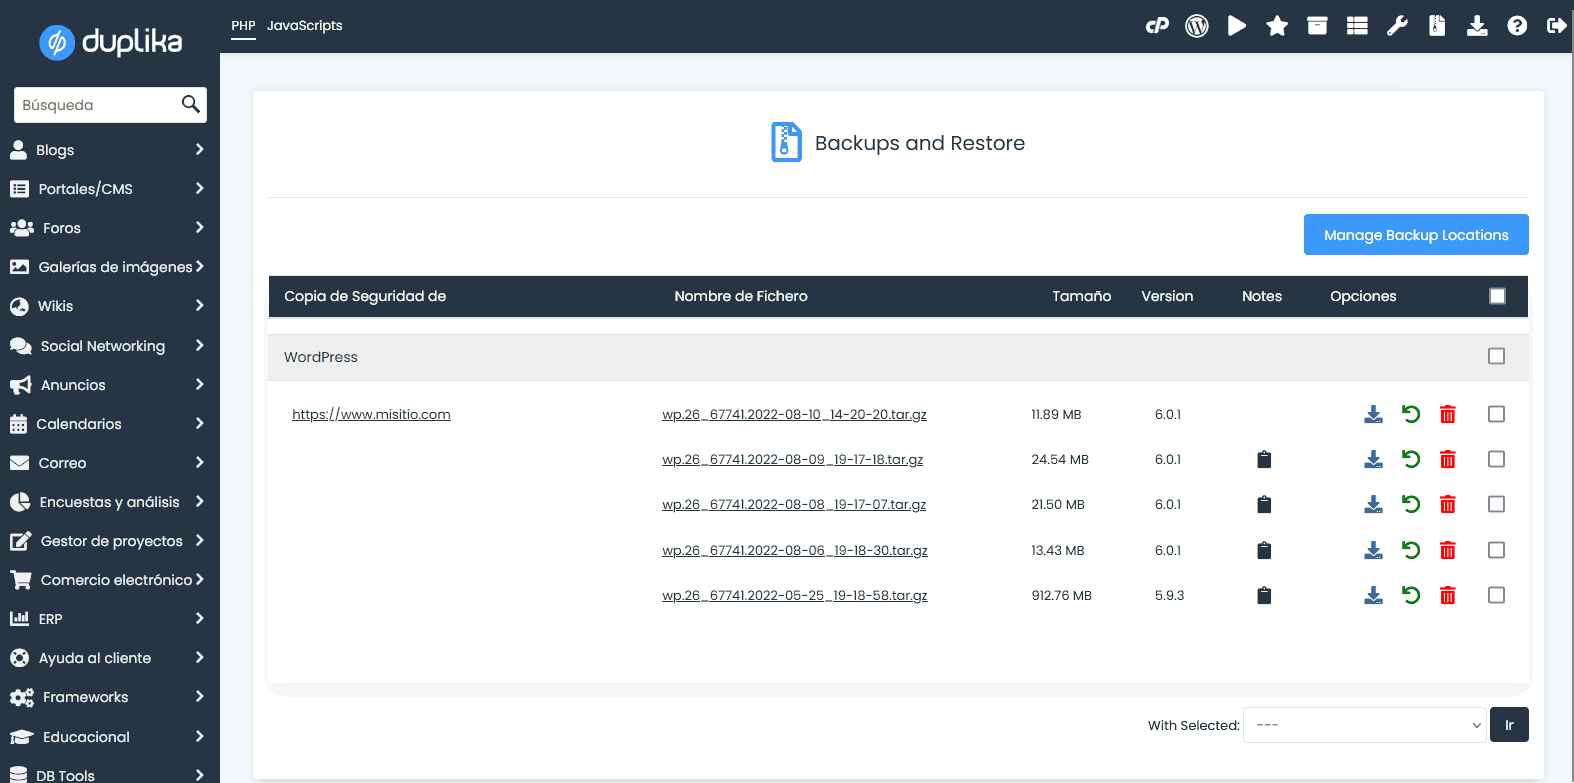
Alternatively, we can find the backups using an FTP client (e.g., filezilla) or the cPanel file manager. Note that, by default, saved backups are located in the root directory of our account, in a folder called softaculous_backups.
At any time, we can log in to cPanel, click the Softaculous icon (in the Software section, as mentioned earlier), and see the download links. In the screenshot below, the button in question is highlighted with an orange box.

Restoring our backup
We need to repeat steps we’ve already taken: log in to cPanel again and click the Softaculous icon in the Software section, as described at the beginning of this guide. Then, we’ll click the "Backups" button, indicated by an arrow in the screenshot below.

On this page, we’ll see a list of all the backups we’ve created. Next to the backup we want to restore, simply click the Restore icon. The screenshot below shows it clearly:
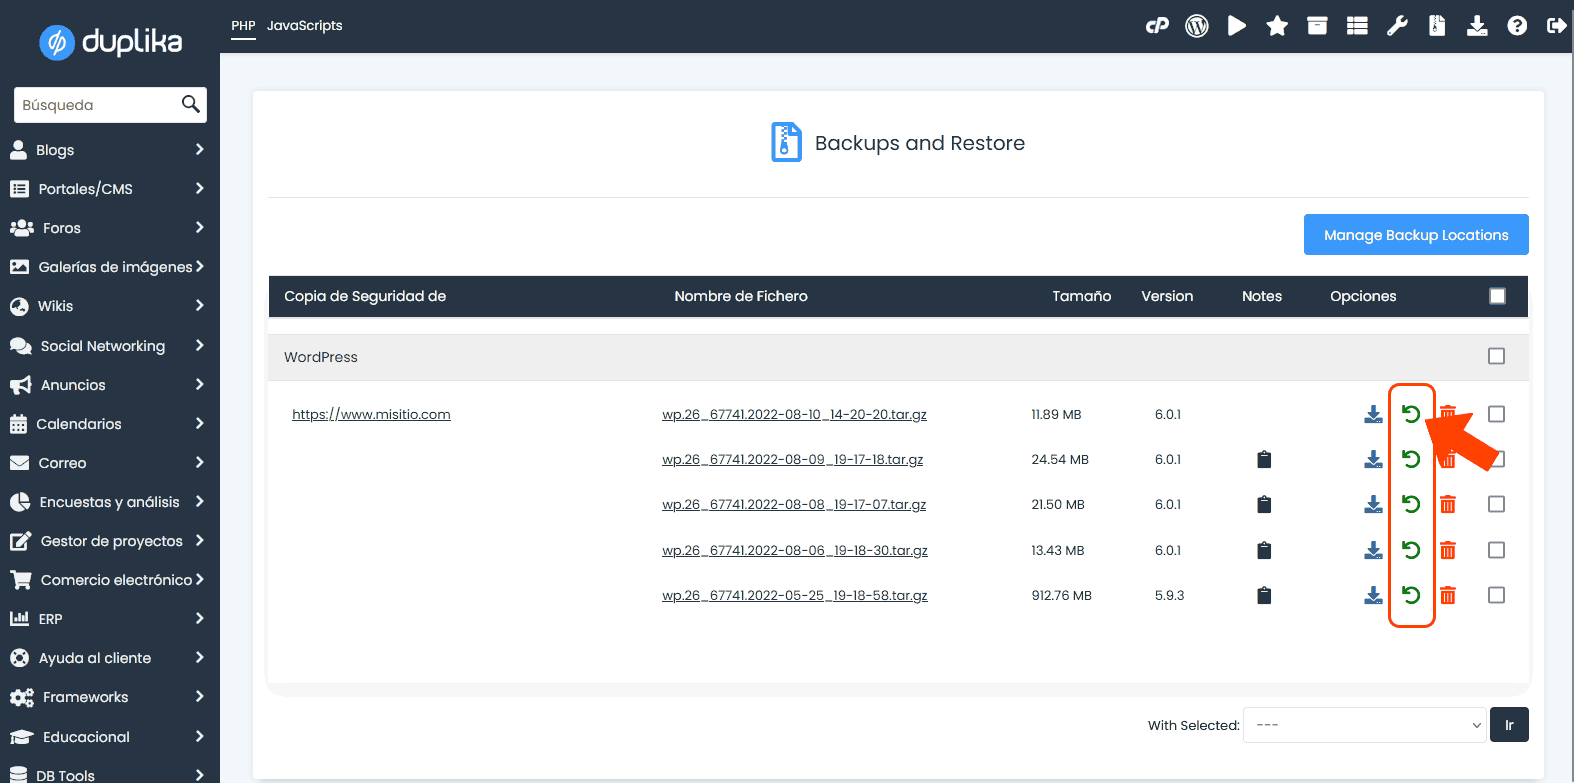
Note that we can also delete backups we no longer need, which is important for preserving free space on our hosting plan.
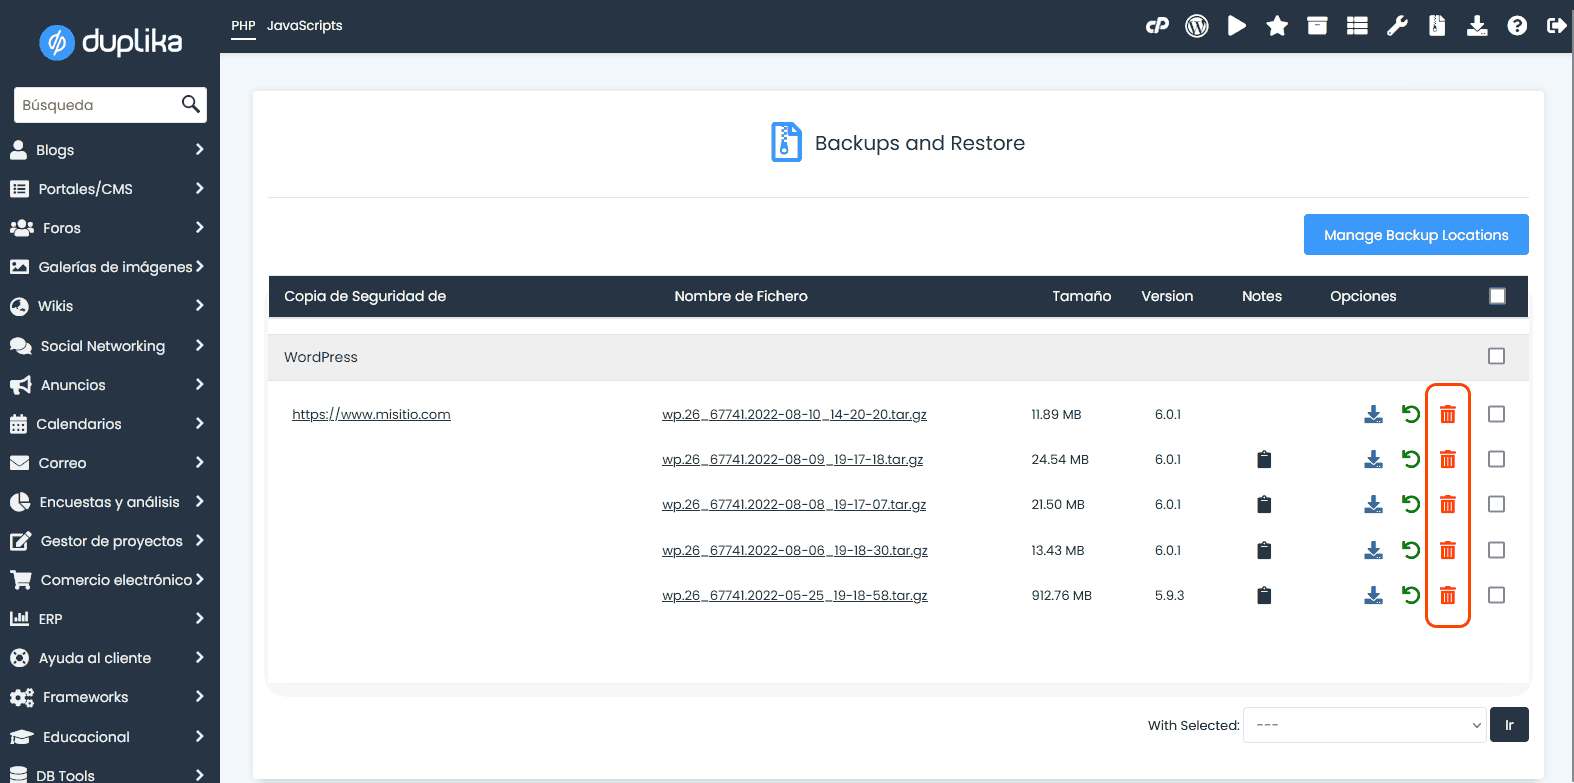
Returning to the backup restoration process, after clicking the Restore button, we’ll see the following confirmation screen. Simply click the "Restore Installation" button to replace our site with the backup.
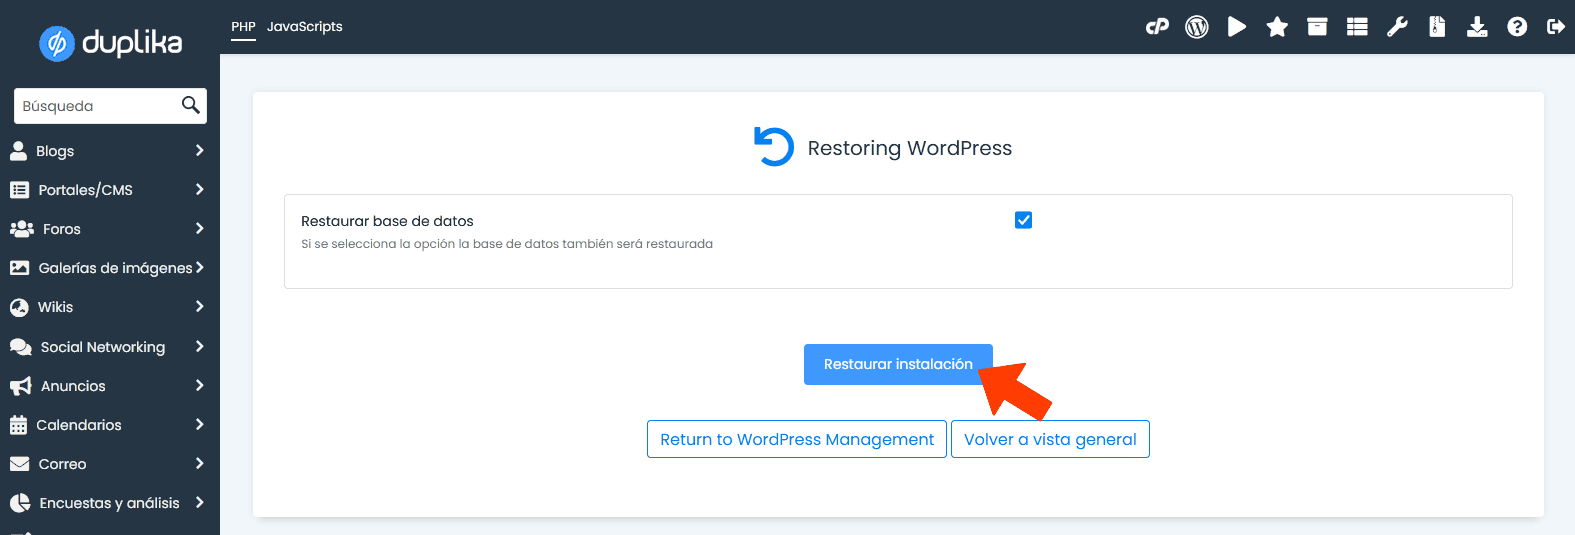
As with the backup creation process, we’ll see a progress bar, followed by the message "Your backup has been restored successfully." After that, we can visit our site and refresh the page to check the changes (or press CTRL+F5 to force our browser to load a fresh version).
That’s all! We hope you found this guide very easy to follow and, as always, wish you success and thank you for reading.