

How to Upload Files to WordPress via FTP
Updated 2 months ago
In this article, we’ll explain step by step how to bulk upload files to your WordPress site.
WordPress does have a way to upload files from its “Media” section, or to insert images directly into a post or page. However, this process is slow and tends to have occasional errors. In addition, it’s not the best option for uploading files “in bulk” (bulk), or, more simply put, “in large quantities.”
Why is it better to upload via FTP instead of using the standard Media Library?
Uploading files in bulk via FTP makes two things easier: bulk uploads and uploading large files.
Keep in mind that uploading via the WordPress Media Library has always been subject to a maximum file size limit. The maximum upload size is set not by WordPress, but by your PHP configuration and hosting provider. You can check it on the media upload screen, where the permitted limit is displayed. Many older installations also don’t accept files larger than two megabytes.
So, if you need to upload a hundred or more files, or very large files, the recommended method is to use FTP.
An FTP client: FileZilla
FTP is a file transfer method, that lets you access the hard drive on your server—the same one where your site’s files are stored.
If you’re interested, FTP stands for File Transfer Protocol. You need two things to take advantage of this protocol: first, a “client,” which is another way of saying “software for connecting to the server” (we recommend the free Filezilla), and second, your login credentials (that is, your username and password; if you don’t have or remember them, send us a ticket).
Setting up your site in FileZilla
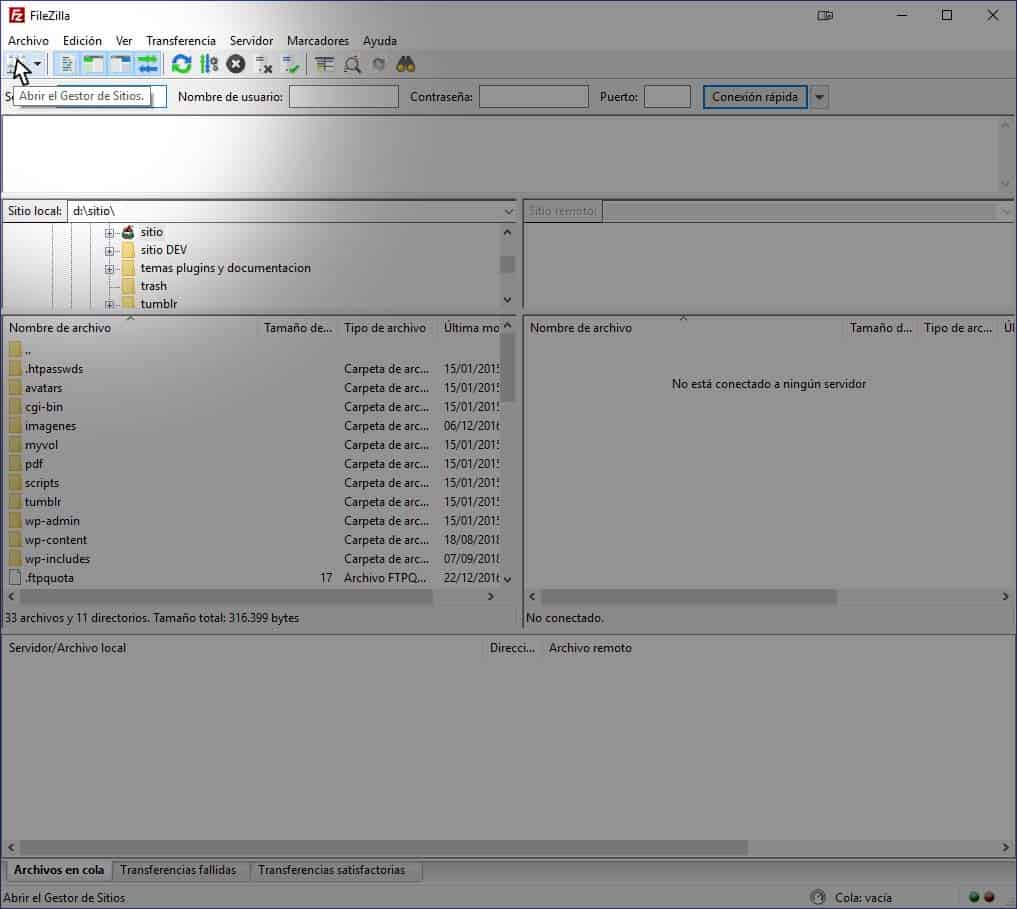
The following screenshot shows the software, or client, you use to connect to your server (for this guide, we’re using FileZilla, but of course you can use whichever program you like). First, click the first button on the toolbar, as shown in the image.
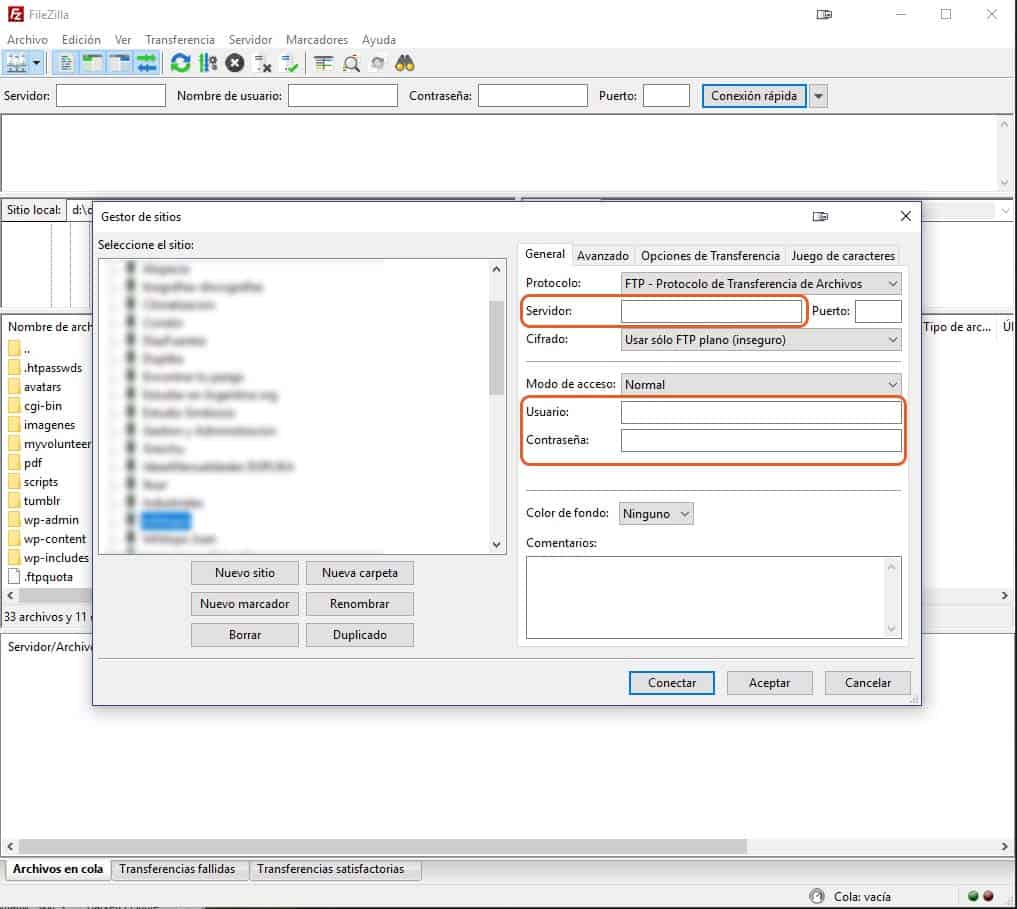
A New Site configuration window will open. The fields highlighted in the screenshot below show the information you need to enter: the server (e.g., ftp.yourSite.com) and your login credentials—that is, your username and password.
Once you’re connected to the site, you can browse remote folders as if they were on your PC. In WordPress, files are stored in yoursite.com/wp-content/uploads/year/month. Example: yoursite.com/wp-content/uploads/2019/01
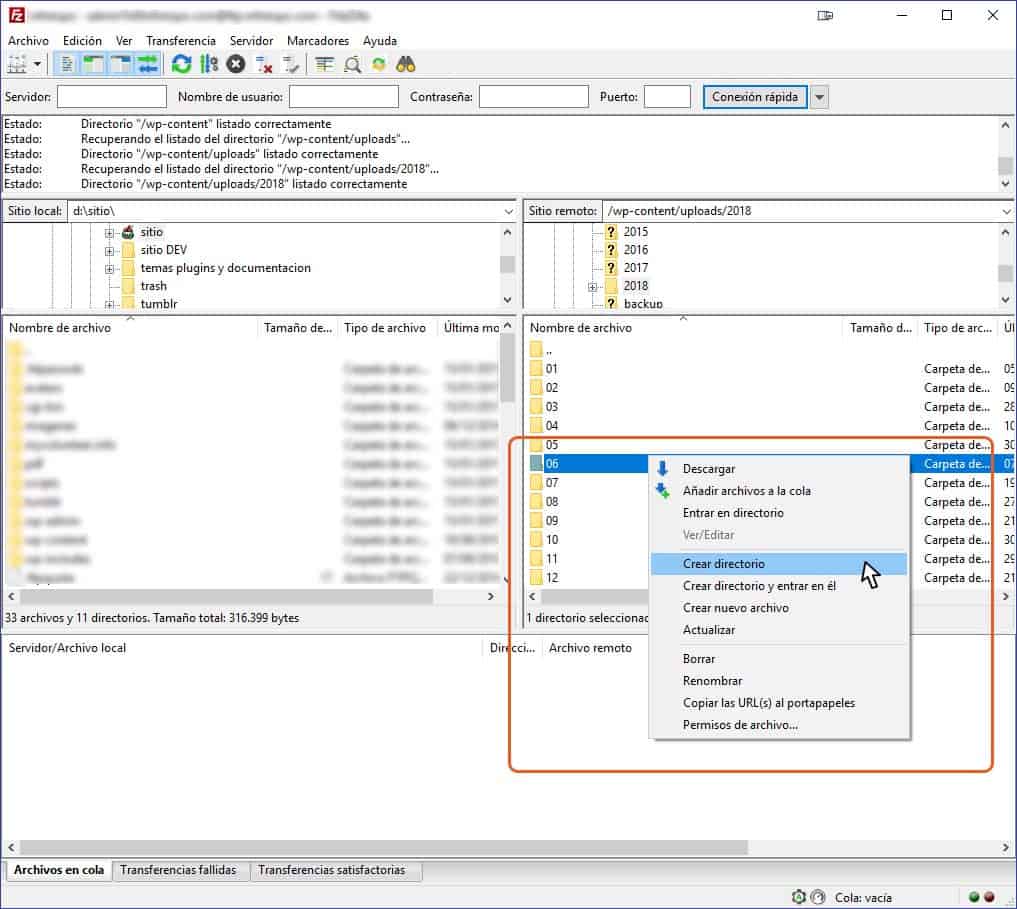
You can upload files wherever you like, though the current year and month are convenient locations. If the folder hasn’t been created, you can create it by right-clicking and selecting “Create directory,” as shown below. If you haven’t uploaded any files via WordPress this month or year, those folders may not appear.
To upload files, open the remote folder where you want to store them, then drag the files from a window on your computer into that folder. FileZilla will take care of the rest.
It’s worth noting that the left-hand window in FileZilla, which I’ve blurred so it won’t confuse you, is a local file browser (think of it as Windows File Explorer). You can also browse there to navigate to the folder containing the files you want to upload, then drag them all into the window on the right. FileZilla works the same either way: you can drag them from a Windows File Explorer window or from within FileZilla. It makes no difference.
I know how to use FTP, but the files I uploaded aren’t showing up in WordPress
This is the main issue we want to address: by default, WordPress will never recognize files uploaded via FTP as its own. They simply won’t appear in your Media Library.
You haven’t done anything wrong; that’s how WordPress works. It keeps a record of uploaded files in its database so it can display them in the Media Library. Since we used FTP, WordPress doesn’t know about those files... YET.
Let’s make the necessary introductions. To do that, we’ll use a free plugin called “Add From Server.”
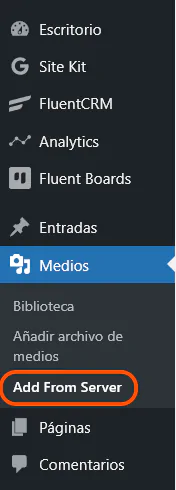
Once you’ve installed and activated the “Add From Server” plugin, go to your Media Library and look for the “Add from Server” option, as shown in the screenshot below.
A file browser for your server will open, but this time it will be inside WordPress itself. You’ll see something like this:
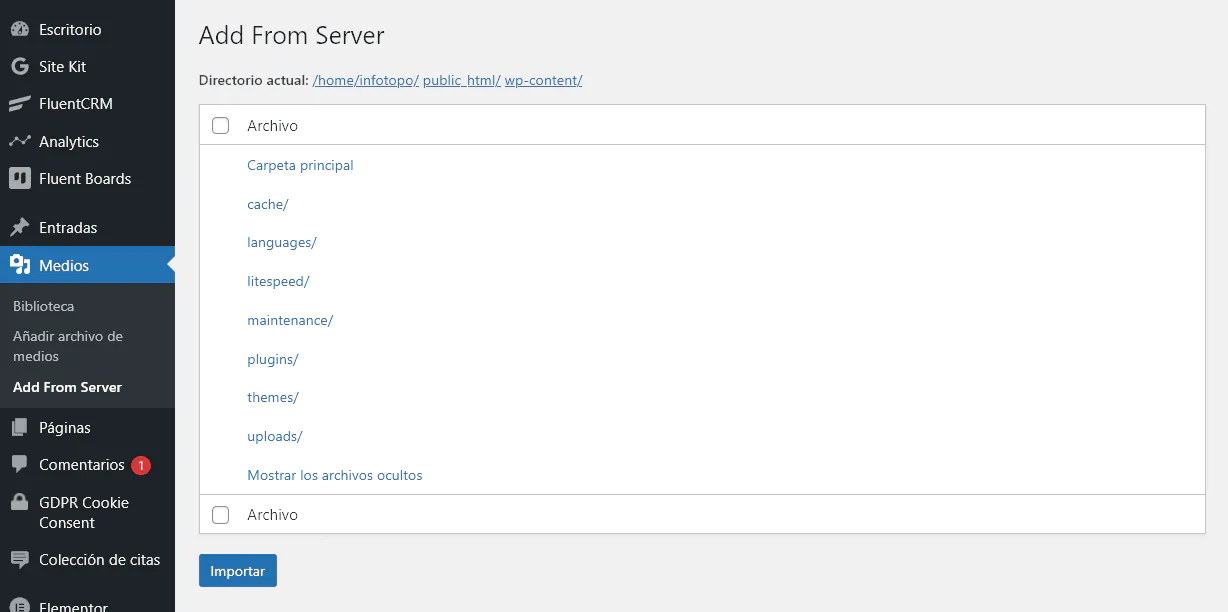
Keep in mind that Add From Server isn’t designed to import media in batches, so it’s best to use it for individual or large files. For bulk imports, we recommend WP-CLI (see the alternative methods).
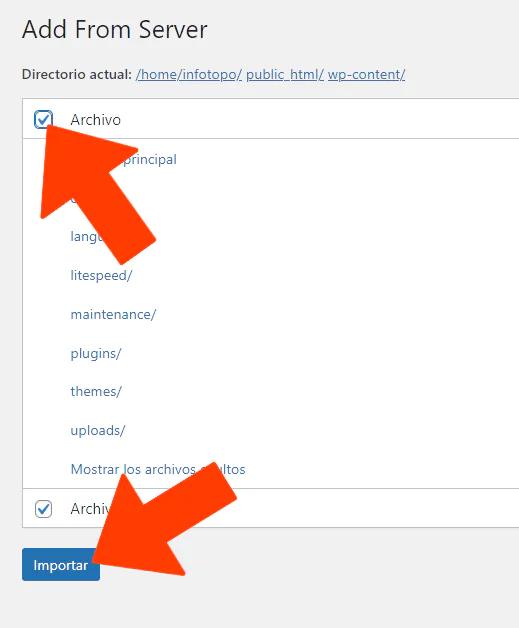
The plugin will display a list of the files being added to the library, along with a success message. If anything goes wrong, note the file in question so you can try again.
When you return to your Media Library, you’ll see all the images uploaded via FTP listed there.
Alternative methods
There are other ways to bulk upload files to your WordPress site and add them to the Media Library. Here are a few options.
Another option is to use Import Images from your Server, a paid plugin that lets you do this with a somewhat friendlier interface.
If you’re a whiz and command lines are your thing, you can import files into your library using WP-CLI. The command...wp media import...lets you create attachments from URLs to local files.