

Desactivar Cloudflare temporalmente
Actualizado el mes pasado
El modo de desarrollo (Development Mode) de Cloudflare suspende la caché durante 3 horas para que veas los cambios de tu sitio al instante, sin desactivar Cloudflare. Se activa desde el panel de Cloudflare, en la sección de caché Caching → Configuration, o desde WordPress con LiteSpeed Cache o el plugin App for Cloudflare. Si todavía no activaste Cloudflare en tu dominio, seguí primero la guía Activar Cloudflare.
El modo de desarrollo no desactiva Cloudflare: las reglas, el WAF y el SSL/TLS siguen funcionando. Si tu problema es una página de bloqueo o un error de certificado, el modo de desarrollo no lo resuelve; en ese caso mirá Identificar y desactivar reglas WAF de Cloudflare que bloquean tu conexión.
Activar el modo de desarrollo desde Cloudflare
Ingresá a dash.cloudflare.com y seleccioná tu dominio.
En el menú lateral, entrá a la sección de caché, Caching, y después a Configuration.
Activá Development Mode (Modo de desarrollo).
Qué hace el modo de desarrollo
Suspende la caché de borde y Polish, de modo que ves de inmediato los cambios en contenido como imágenes, CSS y JavaScript.
Dura 3 horas: al cumplirse, se desactiva automáticamente y la caché vuelve a funcionar normalmente.
No borra los archivos que ya estaban cacheados. Para eliminarlos al instante, usá Purge Cache además del modo de desarrollo.
No apaga Cloudflare: las reglas (Rules), el WAF y el SSL/TLS siguen activos durante las 3 horas.
Si necesitás prescindir de la caché por más de 3 horas, Cloudflare recomienda crear una regla de caché (Cache Rule) con acción de bypass en lugar de dejar el modo de desarrollo encendido de forma indefinida.
Pausar Cloudflare por completo
Si necesitás que el tráfico pase directamente por tu servidor, sin Cloudflare, usá la opción Pause Cloudflare on Site, que pausa Cloudflare en todo el sitio y es distinta del modo de desarrollo.
En la página de inicio del panel de Cloudflare, seleccioná tu cuenta y tu dominio.
En Overview, dentro de Advanced Actions, hacé clic en Pause Cloudflare on Site.
Mientras el sitio está pausado, las visitas van directo a tu servidor y se desactivan funciones de Cloudflare como las reglas, el WAF y los certificados SSL/TLS de Cloudflare. La pausa tarda cinco minutos o menos en hacerse efectiva, y evita tener que cambiar los nameservers del dominio.
Activar el modo de desarrollo desde WordPress
Con LiteSpeed Cache
Si usás LiteSpeed Cache y ya lo conectaste a tu cuenta de Cloudflare, podés activar el modo de desarrollo sin salir de WordPress:
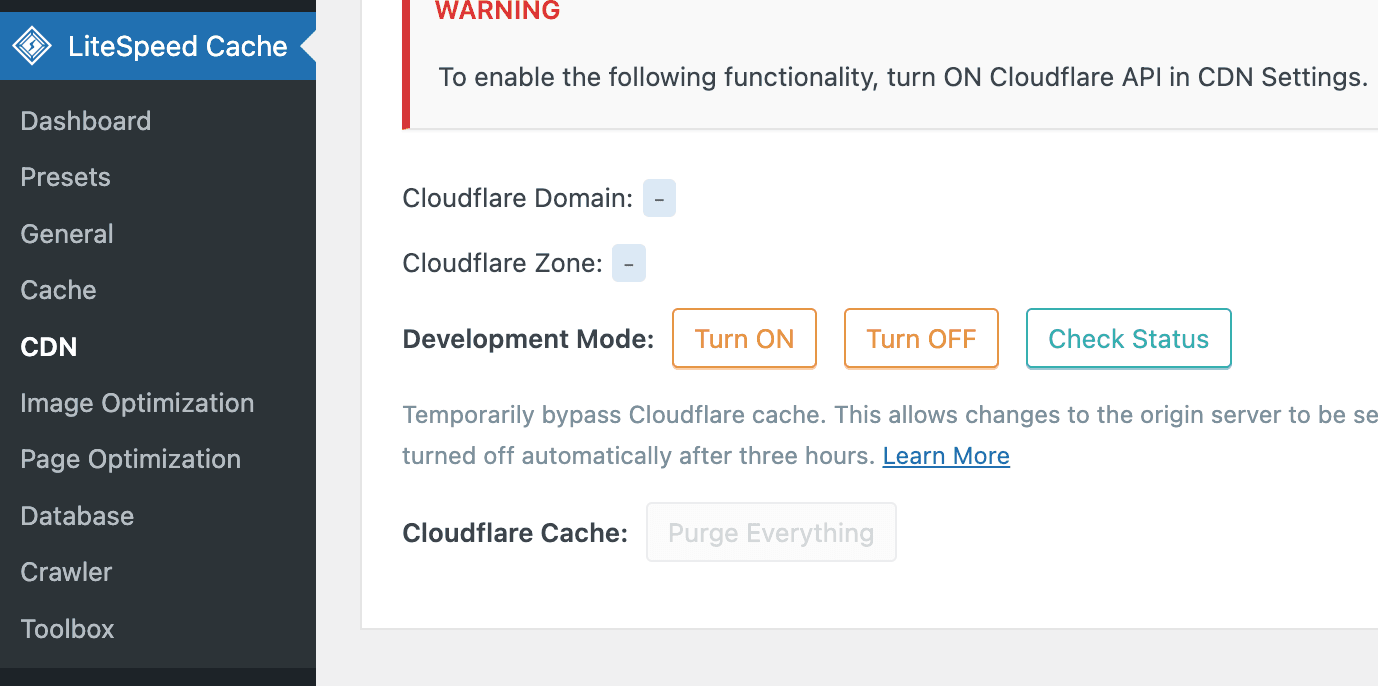
En WordPress, entrá a LiteSpeed Cache → CDN y abrí la pestaña Cloudflare.
Activá Cloudflare API y completá tu Global API Key o API Token, tu Email Address y tu Domain. Guardá los cambios.
En la sección Cloudflare que aparece después, usá el control de Development Mode para activarlo, consultar su estado o desactivarlo.
Como en el panel, el modo se apaga automáticamente después de 3 horas.
Con App for Cloudflare
El plugin App for Cloudflare también permite alternar el modo de desarrollo y purgar la caché desde el administrador de WordPress.
El plugin oficial de Cloudflare para WordPress ya no incluye la opción de modo desarrollo: para activarlo, usá el panel de Cloudflare, LiteSpeed Cache o App for Cloudflare.