

Automatic Backups and Restores
Updated 4 weeks ago
All cPanel hosting plans include daily automatic backups of your files, emails, and databases, encrypted and stored off-server. You can restore them yourself from cPanel using JetBackup 5 or Acronis Backup. Backups are optional and disabled by default on Cloud and VPS servers.
Before restoring, decide what you want to recover: the entire account, files only, a database, or email accounts. Then choose the backup date and, if your site was hacked, follow the subsequent cleanup steps to prevent the problem from happening again.
How long backups are kept
We keep backups for up to 21 days for restoration on cPanel hosting plans. Reseller plans also include daily automatic backups. On Cloud and VPS plans, once backups are enabled, they run daily and are kept for up to 21 days, according to the agreed configuration.
If you’d rather manage backups of your content yourself, contact us and we’ll disable backups for your account.
Choose what to restore
Each type of restoration affects a different part of the account. Choose based on what you want to recover:
What to restore | When to use it |
|---|---|
Full backups | Only when you want to restore the entire account: files, databases, logs, emails, and any other content. This can take a considerable amount of time, depending on the size and number of files. |
Home Directory | When you need to restore specific files or directories. You can select the backup date and the content you want to restore. |
Databases | When the problem is with a database, for example, a WordPress site that won’t open. The database is restored to its state on the selected date. |
Email accounts | When you need to recover messages or deleted email accounts. |
The date you choose determines the state the site will be restored to: anything that happened after that backup will not be included in the restoration.
Restoring a store’s database to an earlier date may remove orders, users, or changes recorded after that backup. If your site is still receiving transactions, coordinate the recovery with us before restoring the entire site.
If you want to keep your current content and only add what’s missing, enable Merge backup data with live account data after choosing the backup type and date. This keeps the current content and adds any deleted content.
JetBackup
To restore using JetBackup 5:
Log in to cPanel. Replace «misitio.com» with your website’s actual URL.

Find the JetBackup 5 tool in your control panel.
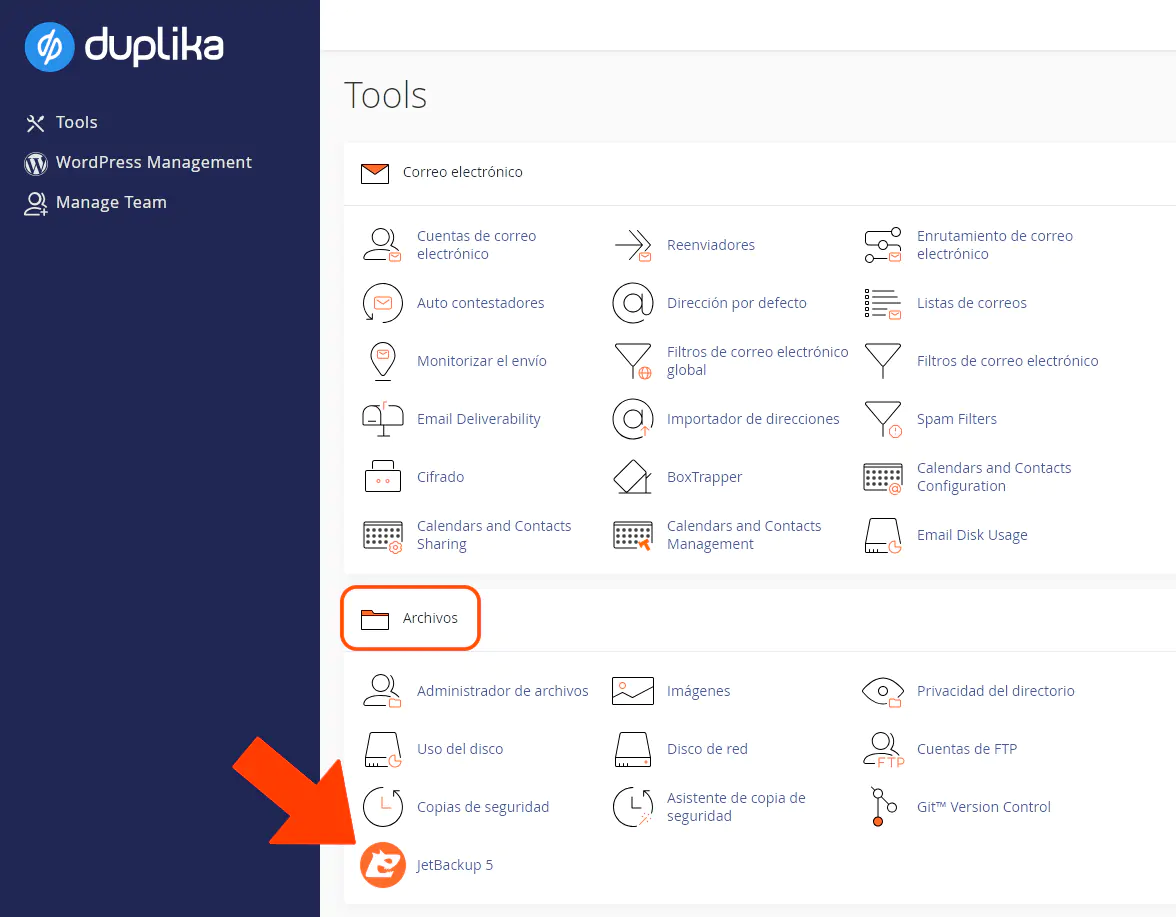
Choose the backup type as described in the previous section: full backups, Home Directory, databases, or email accounts.
Select the date of the backup you want to recover.
If you want to keep your current content, enable Merge backup data with live account data.
Start the restoration. A full restoration can take a considerable amount of time, depending on the size and number of files.
Acronis Backup
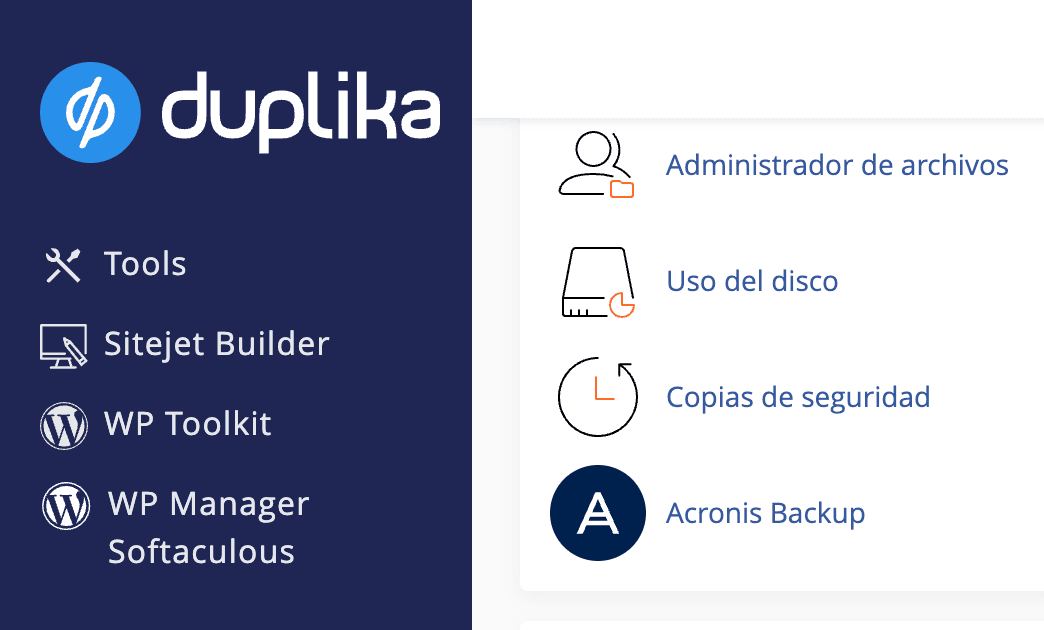
When Acronis Backup is installed on your server, you can find it in the Files section of the control panel. There you’ll see a list of the available backup dates for restoration: choose the date you need and start the restoration from that screen.
Download a Backup
In addition to restoring backups, you can save copies to your computer:
Full account backup: In cPanel, go to Backup and select Download a Full Account Backup. It includes all content, databases, email accounts, and settings, and can be used to restore the account at Duplika or any other cPanel provider. For full details, see how to download a full account backup.
Databases: In cPanel, you can also download the account’s databases from Backup, for example, to export products, customers, and orders.
Files and databases from automatic backups: In JetBackup, you can download files or databases from available backups to import or restore wherever you need them.
For a manual backup of a WordPress installation, see how to create and download a WordPress backup to your PC.
Recover a Hacked or Damaged WordPress Site
A restoration returns the files and database to their state on the selected date, but it does not remove the cause of the hack. After restoring:
Change your cPanel and customer portal passwords, and enable two-step verification.
In WordPress Management, use Check WordPress integrity and, if necessary, Reinstall WordPress core.
Update WordPress, plugins, and themes, and remove any unlicensed plugins or templates.
Review the list of administrator users and reset their login credentials.
Install and configure Wordfence, run a full site scan, and remove all files that are not part of WordPress.
The complete cleanup guide is in recommendations in case of a hack, including a review in Google Search Console if Google indexed a different version of your site.
If the problem appeared after updating WordPress or a plugin, restoring may bring back the same problem. Contact us before restoring so we can coordinate the recovery.
If the site is still damaged or infected after restoration, contact us through the support area: we can restore databases or email accounts on our end and help you coordinate the cleanup. Tell us the domain, the backup date you need, and which data must be preserved.