Transactional emails are those sent by our store to keep our customers updated on their orders. While most marketing emails from a newsletter have an average open rate of 20%, transactional emails have an 85% open rate. Therefore, personalizing them presents a great opportunity to increase customer loyalty and convey any important messages we would like to share.
We have brought WooCommerce emails to life with colors, fonts, and messages that not only reinforce our brand but also add weight, consistency, and help our store be remembered. Hopefully, visitors will return after their first order. Including other products or related services and discount coupons is a great way to pave the way for future sales. In this post, we will help and explain how to accomplish this with simple steps. Let’s begin.
How to edit transactional mails
In our WooCommerce desktop, we’ll search for Settings and later clic the tab Emails:

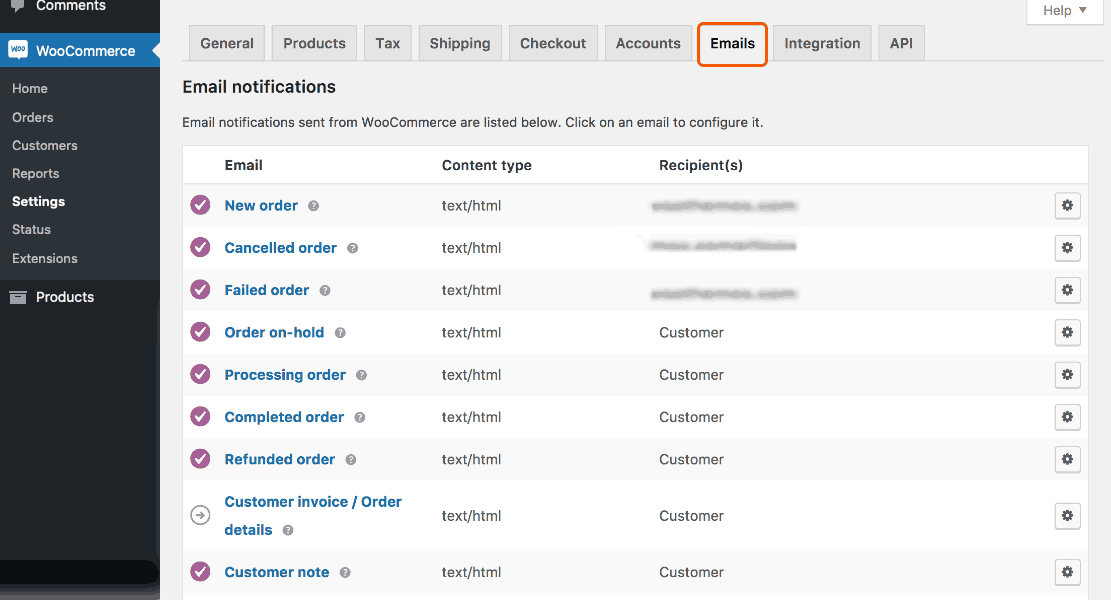
We’ll find a set of templates for each different purpose:
- New Order: Notifies us about a new order in our store.
- Canceled Order: Notifies us of the cancellation of an order.
- Failed Order: Notifies us of an order that failed for some reason.
- Order On-Hold: Sent to customers with details when an order has been placed on backorder.
- Processing Your Order: Sent to customers after a completed payment; contains all the details of the order.
- Completed Order: Sent to customers when their orders are marked as completed; indicates that the order has been shipped.
- Refunded Order: Sent to customers when an order is refunded.
- Customer Invoice/Order Details: Sent to customers with order information and links to make payment.
- Customer Note: Sent when a customer note is added to the dashboard.
- Reset Password: Sent to a customer after they requested to reset their password.
- New Account: Sent to the customer when they create their account.
To edit a particular template, simply click on the “Manage” button next to the email you wish to modify.
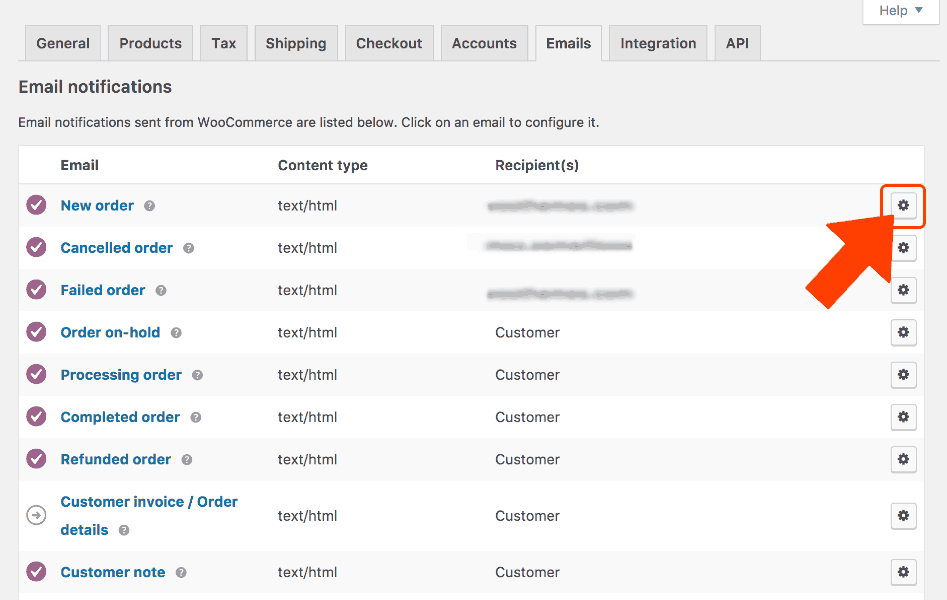
For example, here we can customize the subject, header, content, and type of the email for the “New Order” template (see screenshot below).
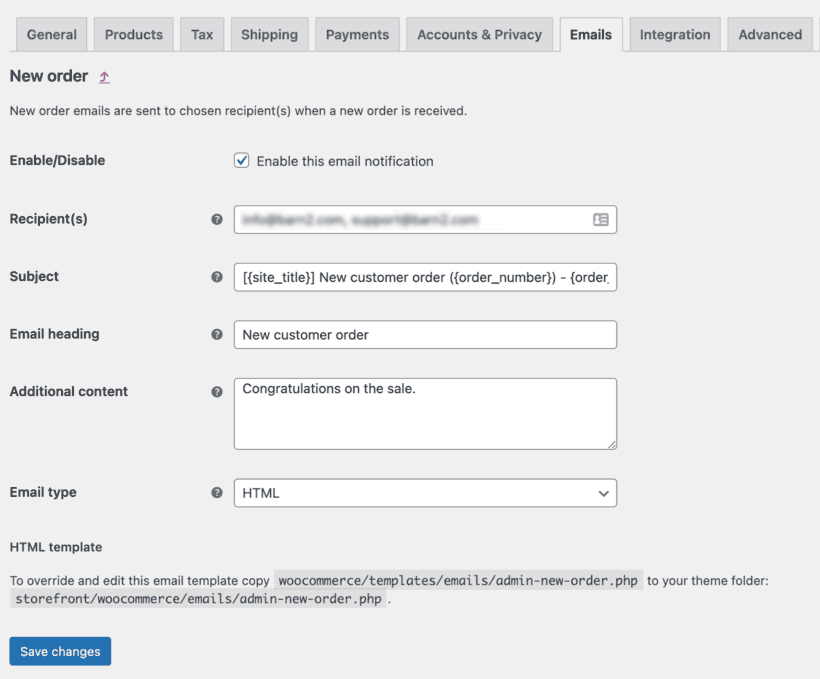
Note that it is also possible to use template variables to quickly and automatically complete information; for example: {site_title}, {customer_name}, {order_shipping_address}, or {item_names}. These variables enable us to personalize emails for each individual customer. WooCommerce dynamically replaces these variables with the corresponding information.
The Additional Content field is invaluable for conveying messages to our clients. For instance, we can include a personalized thank you note, and being original can be quite advantageous. This approach fosters empathy with our buyers while infusing our brand with personality.
Considerations should also encompass the inclusion of additional data, such as warranty details, return policies, certificates, awards our product has received, unpacking/assembly instructions, and any other relevant documentation. The goal is to ensure that our customers have easy access to all pertinent details following their purchase.
Global settings
Let’s explore the final section found at the bottom of the email templates window after scrolling down.
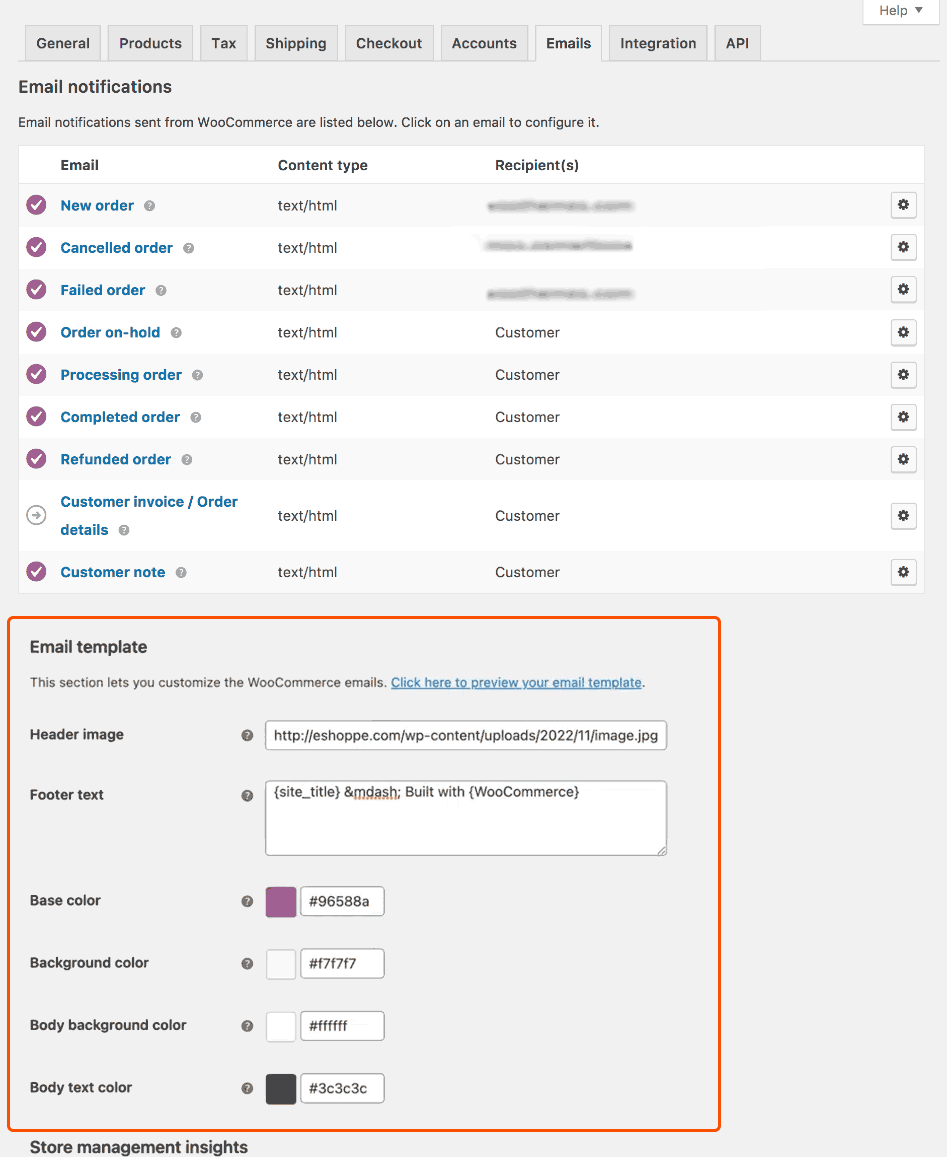
Any fields modified here will be reflected in all existing email templates.
In this section, we can modify:
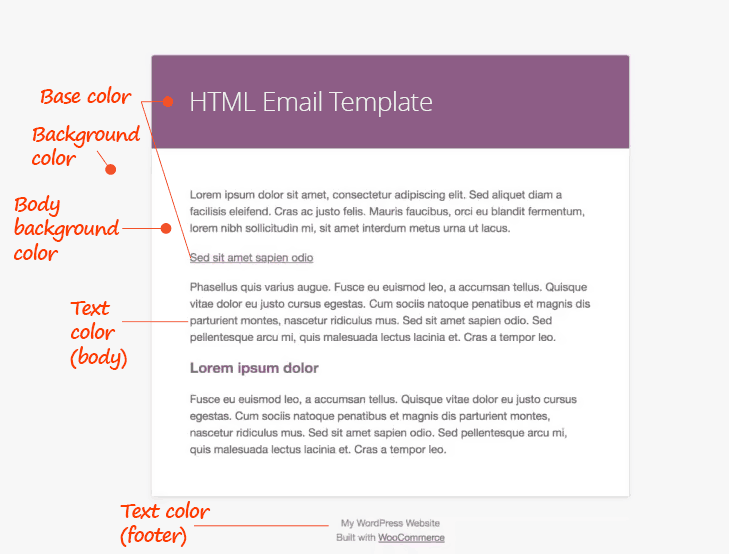
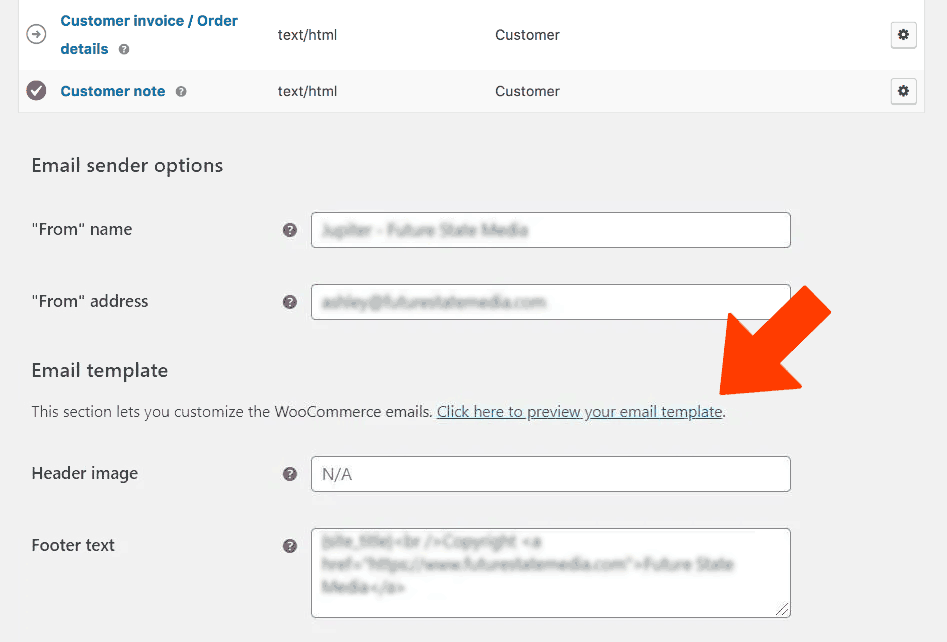
Header Image: Allows us to select an image to display at the top of all emails. Typically, this would be our brand logo.
Footer Text: Here, we can enter information to be displayed at the bottom of each email. We recommend including a link to our website, as well as typical contact information such as WhatsApp, telephone numbers, and emails. This makes it easier for our customers to contact us with any questions, as they will often look for contact information at the end of the email.
Base Color: This is the color used for email headers, links, and title backgrounds. By default, it will be the purple of the WooCommerce brand, so we should enter a color that aligns with our brand.
Background Color: This is the color used for the background of the email. By default, it is almost pure white, but we encourage you to use a tone related to your own brand.
Body Background Color: This is the background color of the email content. The same recommendation applies as in the previous item. If we use a very dark or saturated color, it is best to change the text color to white.
Body Text Color: This is the color of all written content in the email. As mentioned earlier, it will be dark for light-toned backgrounds but white or a very light color if our background color is dark or saturated.
To preview our emails, we can click on the following link:
Personalizing our emails goes beyond aesthetics. If our site utilizes a color scheme with greens and oranges, receiving an email with violets may lead our customers to not immediately recognize our store. Conversely, when our communication and marketing align consistently, it fosters confidence in our business and increases customer loyalty.
Adding specific information about our products
If we wish to include specific information in each of the emails to our clients, we should navigate to the Products section and then click on “Edit” under the product we want to modify.
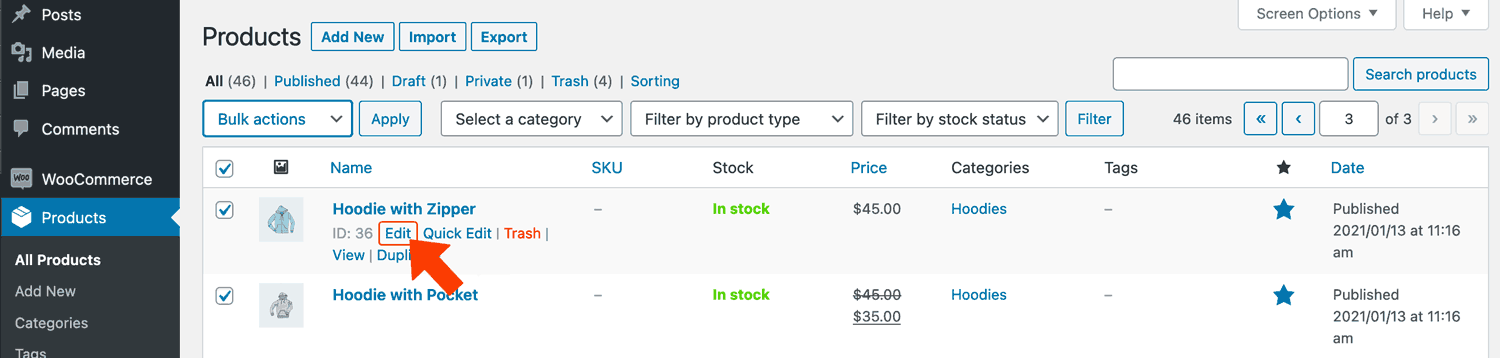
Once this is done, we will scroll down to locate the “Product Data” section and click on the blue “Advanced” link. Here, we will find a free field that allows us to add a Purchase Note.
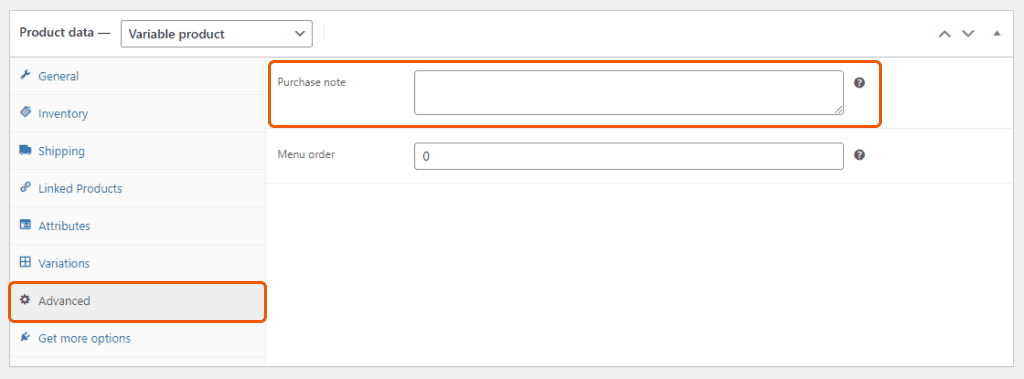
These Purchase Notes allow us to expand the product information in various ways. For instance, we can provide a link to a PDF with instructions, warranty details, user manuals, etc. This field is also useful for entering a discount code for a future purchase. As sellers, our goal is to provide as much valuable information as possible so that our customers feel valued, important, and become loyal to our store.
Taking advantage of MailPoet
MailPoet is a WooCommerce extension that enhances marketing strategies by enabling easy customization of transactional emails. It’s included in our Managed WordPress plan, but you can also use the free version by installing it like any other WordPress plugin.

Once this step is completed, and after activating the component, we will navigate to MailPoet → Settings and proceed with a few steps to configure it.
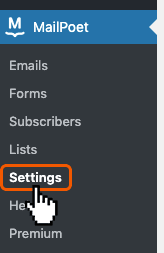
Once this is completed, the section that interests us is as follows:
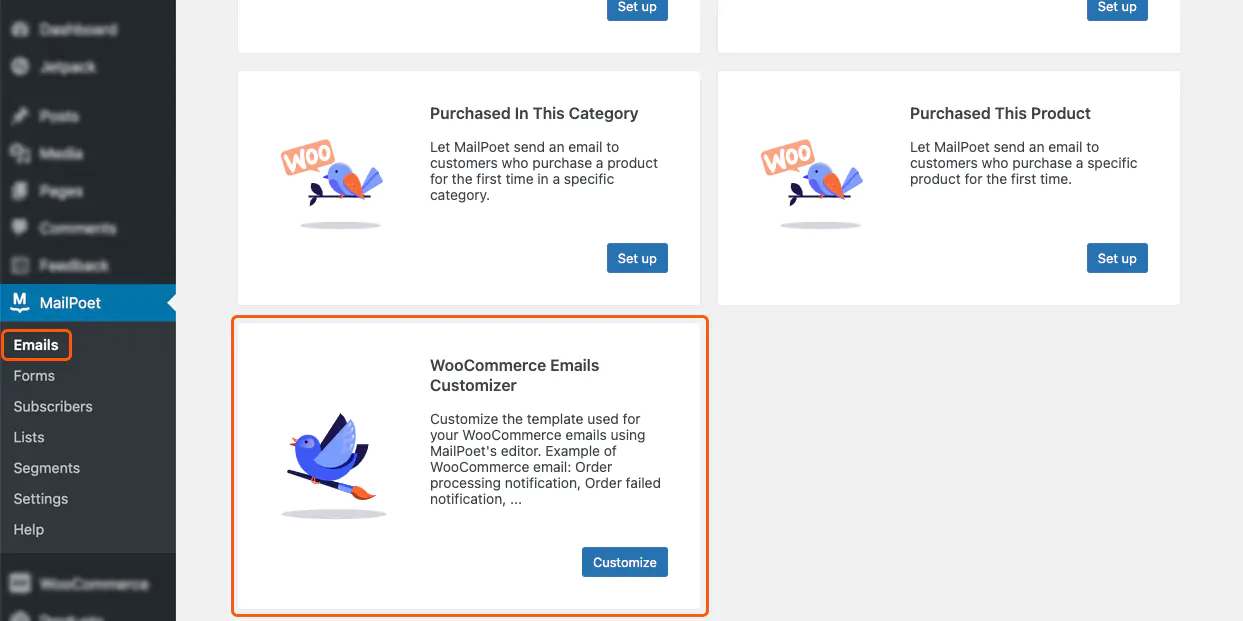
After clicking, a brief introductory video demonstrates the Drag and Drop method.
We will close the video with a click on the upper right X.
As depicted in the screenshot below, selecting the template and editing it is incredibly easy thanks to the MailPoet extension.
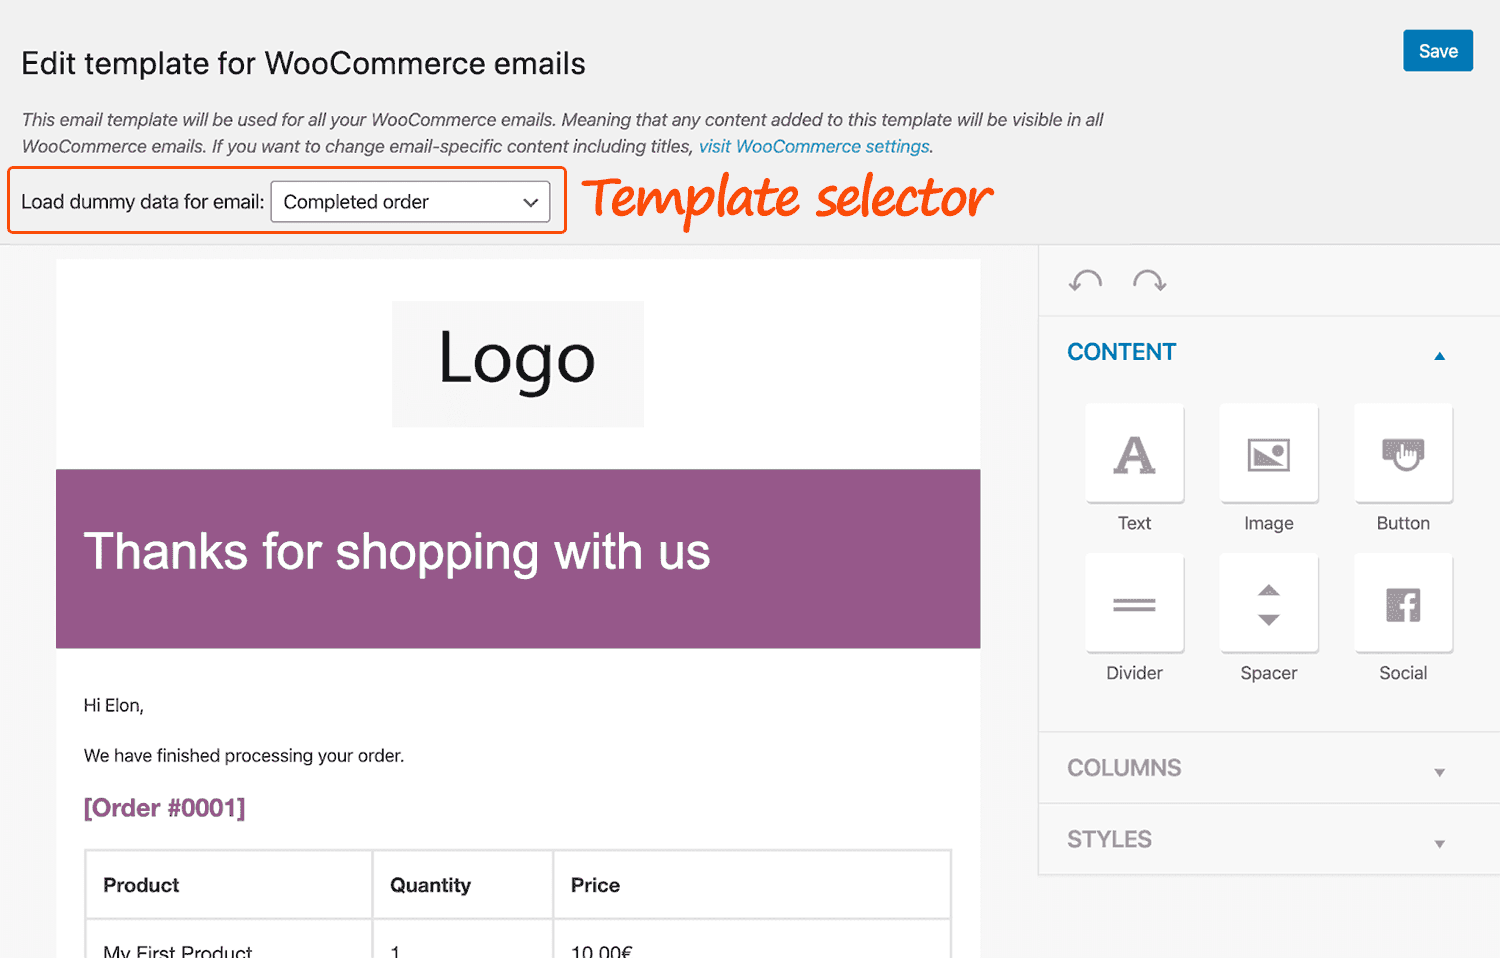
As soon as we hover the mouse cursor over the sections, the available actions for each become visible. Additionally, the drag and drop function enables fluid editing.
For comprehensive, detailed instructions on using MailPoet, it’s advisable to follow this official link.
More control with YayMail
Similarly, utilizing Drag and Drop editing, YayMail serves as a free alternative to MailChimp, which we couldn’t overlook in the context of this guide. This plugin enables the sending of custom emails using shortcodes, placeholders, and WooCommerce native conditional logic. If more control over the emails sent by WooCommerce is needed, we recommend considering YayMail.
- Custom email templates for your WooCommerce eshop
- We can edit without limits: email header layout and design, body, visual footer, signature, social tracking module.
- Destop and mobile preview + sending a test email to our inbox.
- The integrated previewer allows us to see a mockup of the order email and also select an existing order placed in our store to check the actual email.
Third in contention
There is another plugin for customizing WooCommerce emails that enables editing of the default WooCommerce transactional email templates. With this plugin, it’s possible to work on the design using the native WordPress customizer for instant visual edits. For more information, follow this link.
If we have some coding knowledge…
For those who have some understanding of HTML/PHP language, it becomes a bit easier to achieve what we want. In WooCommerce → Settings, Emails tab, click on “Manage” next to the email template to modify. At the end of everything, above the “Save changes” button, we will see the precise link of the template associated with that email.
Each transactional email comprises a combination of templates, offering greater control over customization compared to other methods mentioned above. For example, to edit the header of an email, we simply modify the email-header.php file. For changes to the footer, we work on email-footer.php. If we want to edit a specific email template, such as the customer invoice, we modify customer-invoice.php accordingly.
Conclusions
Personalizing the design and content of our emails goes beyond aesthetics or merely a friendly gesture. It reinforces our brand, builds trust, solidifies identity, and enhances communication to grow our business.
Well-designed transactional emails enhance communication with clients/buyers, making it more effective. Regardless of our level of programming or marketing expertise, it’s essential to improve these emails using any of the alternatives provided in this article.
We invite you to share your experiences, and as always, feel free to ask any questions in the comments section. We read and respond to all messages.
Thank you for reading, and best of luck!
Why not assess the quality of our hosting service?
We offer assisted and free migration services along with a 30-day satisfaction guarantee

Leave a Reply